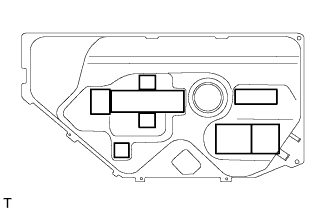
REMOVAL
Removal / installation
| 1. DISCHARGE FUEL SYSTEM PRESSURE |

| 2. DISCONNECT CABLE FROM NEGATIVE BATTERY TERMINAL |
| 3. REMOVE EXHAUST PIPE ASSEMBLY CENTER |
| 4. REMOVE FRONT FLOOR HEAT INSULATOR NO.3 |
Remove the 5 nuts and front floor heat insulator No.3.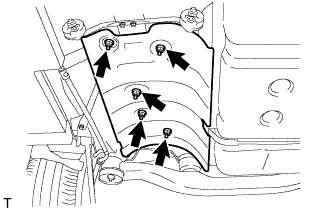

| 5. REMOVE FUEL TANK PROTECTOR SUB-ASSEMBLY NO.1 |
Disengage the 4 grommets.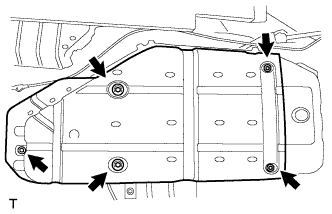
Remove the screw and fuel tank protector sub-assembly No.1.
| 6. SEPARATE PARKING BRAKE CABLE ASSEMBLY NO.3 |
Remove the nut and disconnect the parking brake cable assembly No.3.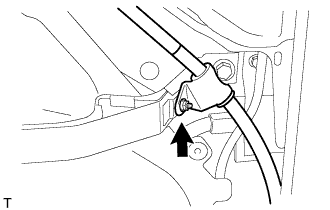
| 7. DISCONNECT FUEL TANK WIRE |
Separate the fuel tank wire connector from the bracket.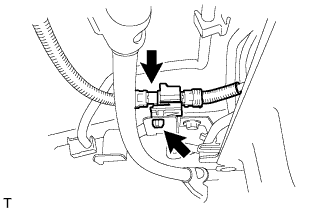
Disconnect the connector.
| 8. REMOVE CHARCOAL CANISTER PROTECTOR |
Remove the 3 bolts and charcoal canister protector.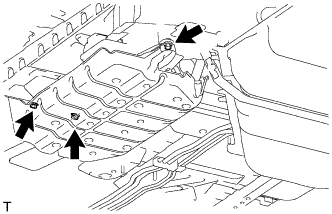
| 9. DISCONNECT FUEL TANK TO CANISTER TUBE SUB-ASSEMBLY |
Disconnect the fuel tank to canister tube sub-assembly from the charcoal canister assembly.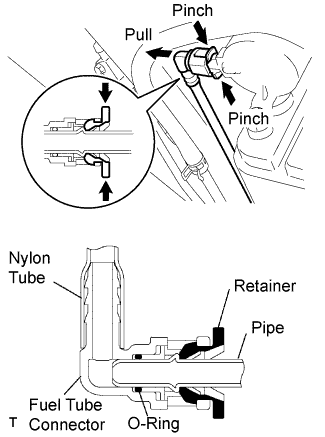
Pinch the tube connector and then pull out the fuel tank to canister tube sub-assembly.
- NOTICE:
- Check for dirt or other foreign objects around the connector before this operation. Clean the connector as necessary.
- Be careful not to allow mud or foreign matter to scratch or come into contact with the pipe and connector that are sealed by an O-ring.
- Do not use any tools for this operation.
- Do not damage the disconnected pipe and connector. Prevent intrusion of foreign objects by covering the pipe and connector with a plastic bag.
- When the pipe and connector are stuck, push and pull the connector to release. Pull out the connector carefully.
- Check for dirt or other foreign objects around the connector before this operation. Clean the connector as necessary.
Separate the fuel tank to canister tube from the clamp.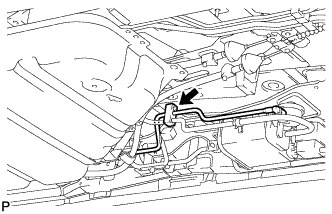
| 10. DISCONNECT FUEL TANK MAIN TUBE SUB-ASSEMBLY |
Pinch the tabs of the retainer to disengage the lock claws and pull the retainer down as shown in the illustration.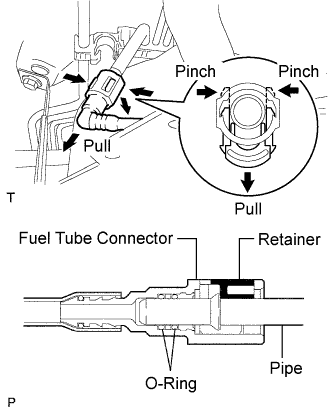
Pull out the fuel tank main tube.
- NOTICE:
- Check for dirt or other foreign objects around the connector before this operation. Clean the connector as necessary.
- Be careful not to allow mud or foreign matter to scratch or come into contact with the pipe and connector that are sealed by O-rings.
- Do not use any tools for this operation.
- Do not damage the disconnected pipe and connector. Prevent intrusion of foreign objects by covering the pipe and connector with a plastic bag.
- When the pipe and connector are stuck, push and pull the connector to release. Pull out the connector carefully.
- Check for dirt or other foreign objects around the connector before this operation. Clean the connector as necessary.
| 11. DISCONNECT FUEL TANK TO FILLER PIPE HOSE |
Loosen the hose clamp bolt and disconnect the fuel tank to filler pipe hose.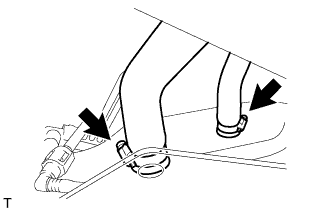
Loosen the hose clamp bolt and disconnect the fuel tank breather hose.
| 12. REMOVE FUEL TANK ASSEMBLY |
Set a transmission jack to the fuel tank.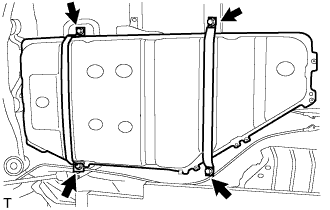
Remove the 4 bolts and the fuel tank bands.
Operate the transmission jack, and remove the fuel tank.
| 13. REMOVE FUEL PUMP AND GAUGE WITH SUCTION TUBE |
Disconnect the fuel pump connector.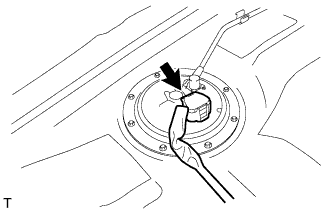
Disconnect the clamp and vapor pressure sensor connector.
Remove the tube joint clip and clamp, and pull out the fuel pump tube.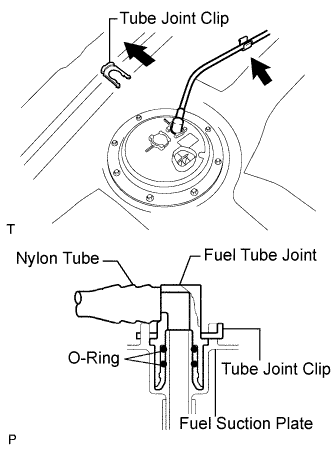
- NOTICE:
- Check for dirt around the fuel tube joint before this work. Clean the dirt away as necessary.
- Check for dirt around the fuel tube joint before this work. Clean the dirt away as necessary.
- Be careful not to allow dirt or foreign matter to scratch or come into contact with the fuel tube connector and fuel suction plate that are sealed by O-rings.
- Be careful not to allow dirt or foreign matter to scratch or come into contact with the fuel tube connector and fuel suction plate that are sealed by O-rings.
- Do not use any tools in this work.
- Do not use any tools in this work.
- Do not bend or twist the nylon tube by force.
- Do not bend or twist the nylon tube by force.
- Cover the disconnected fuel tube joint with a plastic bag.
- Cover the disconnected fuel tube joint with a plastic bag.
- When the fuel tube joint and fuel suction plate are stuck, pinch the fuel tank tube with the fingers, and turn it carefully to release. Disconnect the fuel tank tube.
- When the fuel tube joint and fuel suction plate are stuck, pinch the fuel tank tube with the fingers, and turn it carefully to release. Disconnect the fuel tank tube.
Remove the 8 bolts and fuel tank vent tube set plate.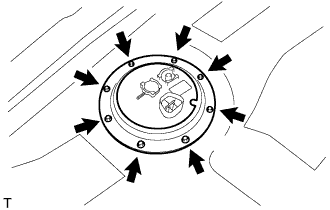
Pull out the fuel pump assembly from the fuel tank.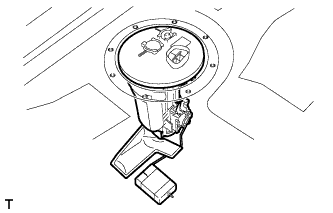
- NOTICE:
- Do not damage the fuel pump filter.
- Do not damage the fuel pump filter.
- Be careful not to bend the arm of the sender gauge.
- Be careful not to bend the arm of the sender gauge.
Remove the gasket from the fuel suction tube.
| 14. DRAIN FUEL |
| 15. REMOVE FUEL TANK WIRE |
Disconnect the 4 clamps, and remove the fuel tank wire.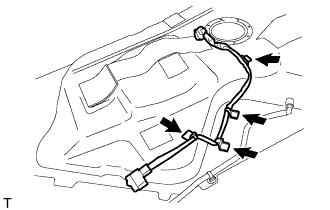
| 16. REMOVE FUEL TANK TO CANISTER TUBE SUB-ASSEMBLY |
Disconnect the fuel tank to canister tube sub-assembly.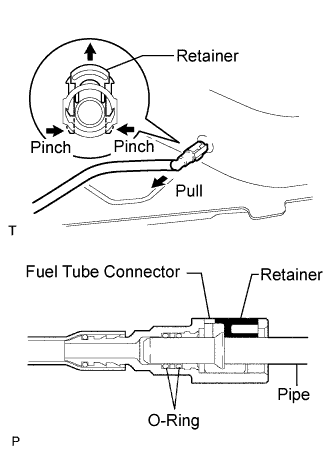
Pinch the tabs of the retainer to remove the lock claws and pull it up as shown in the illustration.
Pull out the fuel tank to canister tube sub-assembly.
- NOTICE:
- Check for dirt or other foreign objects around the connector before this operation. Clean the connector as necessary.
- Be careful not to allow mud or foreign matter to scratch or come into contact with the pipe and connector that are sealed by O-rings.
- Do not use any tools for this operation.
- Do not damage the disconnected pipe and connector. Prevent intrusion of foreign objects by covering the pipe and connector with a plastic bag.
- When the pipe and connector are stuck, push and pull the connector to release. Pull out the connector carefully.
- Check for dirt or other foreign objects around the connector before this operation. Clean the connector as necessary.
Disconnect the clamp and remove the fuel tank to canister tube sub-assembly.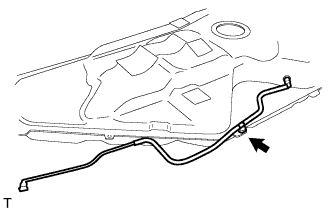
| 17. REMOVE FUEL TANK MAIN TUBE SUB-ASSEMBLY |
Remove the fuel tank main tube from the clamp.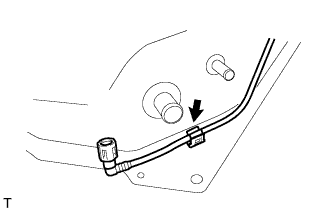
| 18. REMOVE CLAMP |
Remove the 2 clamps of the fuel tank main tube from the fuel tank.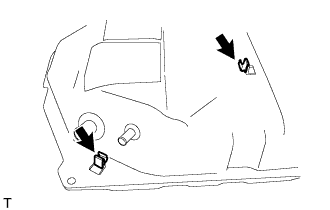
Remove the clamp from the fuel tank.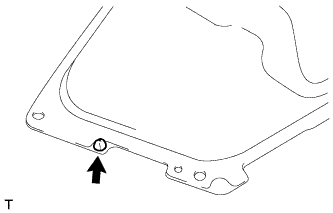
| 19. REMOVE FUEL TANK CUSHION |
Remove the 8 fuel tank cushions from the fuel tank.