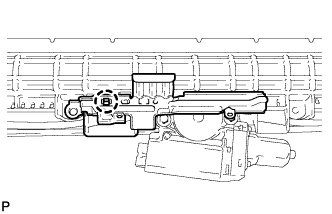
REASSEMBLY
Removal / installation
| 1. INSTALL SLIDING ROOF DRIVE CABLE SUB-ASSEMBLY |

Using a screwdriver, slide the sliding roof drive cable sub-assembly in the direction indicated by the arrow in the illustration to install it.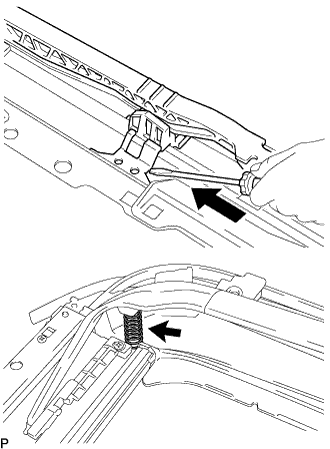

- NOTICE:
- Check and be sure that the spring indicated by the arrow in the illustration is securely installed.
- HINT:
- Tape the screwdriver tip before use.
Engage the 2 claws and install the sliding roof drip channel.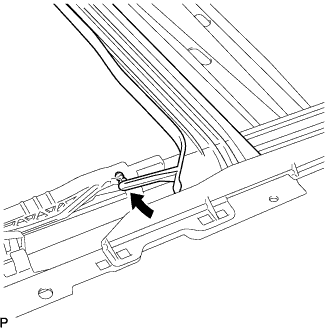
Install the 2 sliding roof guide stoppers with the 2 screws.
- Torque:
- 2.0 N*m{ 20 kgf*cm , 18 in.*lbf }
| 2. ADJUST FULLY CLOSED POSITION |
Using a screwdriver, slide the sliding roof drive cable sub-assembly in either direction as indicated by the arrows in the illustration and align the matchmarks.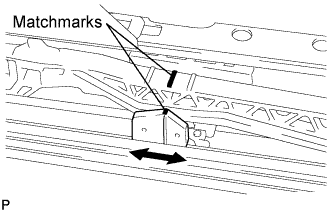
- HINT:
- Tape the screwdriver tip before use.
| 3. INSTALL SUNSHADE TRIM SUB-ASSEMBLY |
Insert the sunshade trim into the sliding roof housing sub-assembly.
Install the sliding roof LH and RH piece sub-assemblies with the 2 screws.
- Torque:
- 2.0 N*m{ 20 kgf*cm , 18 in.*lbf }
| 4. INSTALL SLIDING ROOF DRIVE GEAR SUB-ASSEMBLY |
Install the sliding roof drive gear sub-assembly with the 2 bolts.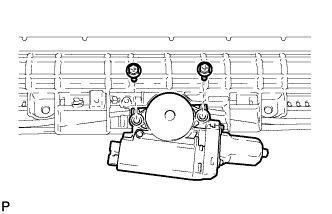
- Torque:
- 5.4 N*m{ 55 kgf*cm , 48 in.*lbf }
Engage the claw and install the sliding roof drive gear bracket.