- Remove the shift cable or selector rod from the manual
lever shaft on the transmission.
- Remove the electrical connector from the switch.
-
Remove the mounting bolts and remove the switch.
To Install And Adjust:
- Install the park/neutral switch to the transmission
manual shift lever with the mounting bolts, but do not tighten the bolts
until the adjustment is made.
- Make sure that the transmission manual shaft lever
is in the N position.
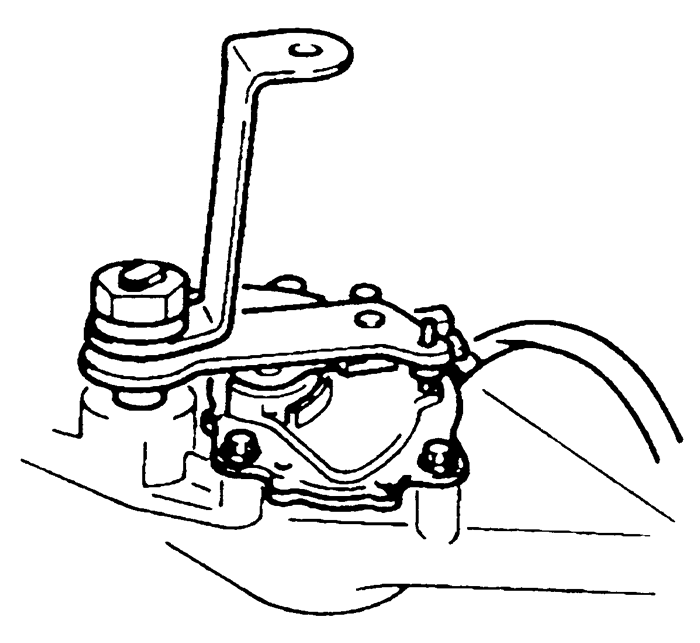
- Align the holes of the park/neutral switch and the
manual shaft by inserting a 0.16 in. (4.0mm) outer diameter pin.
- Tighten the park/neutral switch mounting bolts to
22-34 in. lbs. (2.5-3.9 Nm). Remove the aligning pin.
- Reconnect the electrical connector and reinstall
the shift cable or selector rod to the manual lever shaft on the transmission.
- Check for proper operation.
- Disconnect the negative battery cable.
- Remove the resonance chamber, fresh air duct and
air cleaner assembly.
- Remove the spring pin and clip and disconnect the
shift cable at the transmission.
- Disconnect the neutral safety switch connector.
- Remove the manual shaft nut, lockwasher and lever.
-
Remove the switch mounting bolts and the switch.
To install:
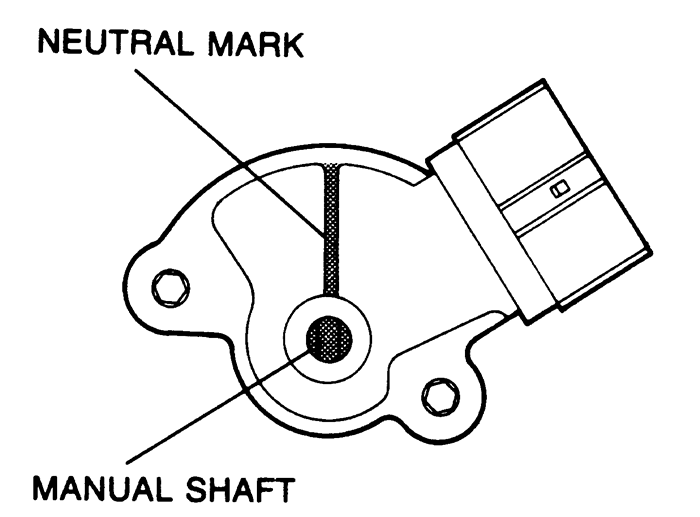
| Fig. 1: Park/Neutral switch
|
- Rotate the manual shaft to N.
- Turn the neutral safety switch so the neutral mark
is in line with the flat, straight surfaces on either side of the manual
shaft.
- Loosely tighten the switch bolts and adjust the switch.
Tighten the bolts to 70-95 inch lbs. (8-11 Nm).
- Install the manual shaft nut, lockwasher and lever.
Torque to 24-33 ft. lbs. (32-46 Nm).
- Connect the neutral safety switch electrical connector.
- Connect the shift cable at the transmission. Install
the spring pin and clip.
- Install the resonance chamber, fresh air duct and
air cleaner assembly.
- Connect the negative battery cable.
NOTE: The switch is called a P position switch, and the
vehicle can only be started with the transmission in park.
- Disconnect the negative battery cable.
- Remove the power window switch.
- Remove the rear console.
- Remove the boot panel.
- Remove the ashtray.
- Remove the radio.
- Remove the front console.
- Shift the selector lever to the N position.
Remove the spring pin and washers, and disconnect the selector rod. Lift
the selector lever.
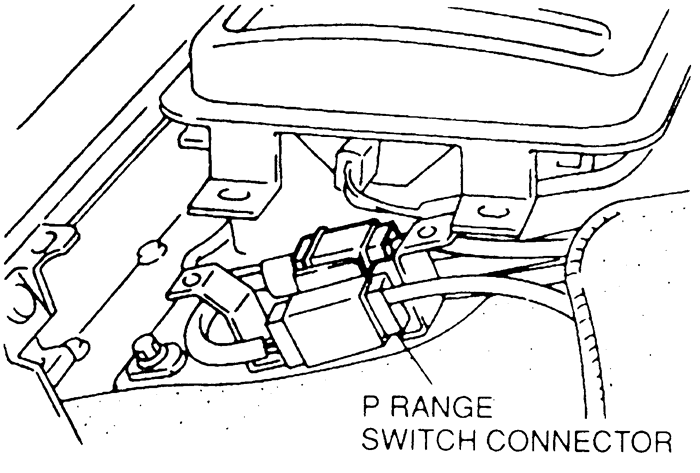
- Disconnect the P position switch connector.
-
Remove the switch.
To install:
- Install the P position switch.
- Connect the P position switch connector.
- Lower the selector lever, position the selector rod,
and install a new spring pin and washers.
- Install the front console, radio, ashtray and boot
panel.
- Install the rear console and power window switch.
- Connect the negative battery cable.
- Disconnect the negative battery cable. Wait at least
90 seconds before performing any work.
- Remove the air cleaner assembly.
- Disconnect the transaxle range switch connector.
- Remove the nut and the clip, and disconnect the selector
cable.
- Remove the transaxle manual shaft nut, lock washer
and nut.
-
Remove the mounting screws and the range switch.
To install:
- Install the transaxle range switch over the manual
shaft lever.
- Rotate the manual shaft to the neutral position.
- Turn the transaxle range switch so that the neutral
mark is in line with the flat, straight surfaces on either side of the
manual shaft.
- Hand tighten the range switch mounting screws.
- Verify that there is continuity between terminals
A and H of the range switch connector.
- Torque the transaxle range switch mounting screws
to 70-95 inch lbs. (8-11 Nm).
- Install the manual shaft lever, lock washer and nut.
Torque the nut to 24-33 ft. lbs. (32-46 Nm).
- Verify that the selector lever range position and
transaxle range switch are aligned, then connect with the nut and clip.
- Reconnect the range switch connector and install
the air cleaner assembly.
-
Reconnect the negative battery cable and check for proper operation.
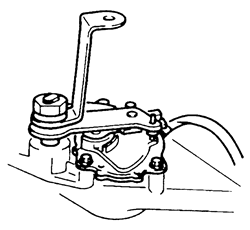
| Fig. 2: Aligning the range switch with a pin --
1995-97 Millenia 2.3L (KJS) and 2.5L (KLD) engines
|
| Fig. 3: Park switch -- 1995-97 Miata 1.8L (BPD)
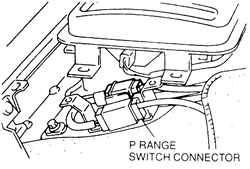
|
- Disconnect the negative battery cable. Wait at least
90 seconds before performing any work.
- Remove the selector rod from the manual shaft lever.
- Move the manual shaft to the N position.
-
Disconnect the transaxle range switch connector, remove the mounting
bolts and remove the switch.
To install:
- Install the transaxle range switch and hand tighten
the mounting bolts.
- Align the holes of the range switch and the manual
shaft lever by inserting a pin with an outside diameter of 0.157 in. (4
mm).
- Tighten the range switch mounting bolts to 22-34
inch lbs. (3-4 Nm).
- Reconnect the range switch connector and install
the selector rod to the manual shaft lever.
- Reconnect the negative battery cable and check for
proper operation.
NOTE: The switch is called a P position switch, and the
vehicle can only be started with the transmission in park.
- Disconnect the negative battery cable.
- Remove the rear console.
- Remove the screws and lift the indicator panel.
- Disconnect the P position switch connector.
-
Remove the switch.
To install:
- Install the P position switch.
- Connect the P position switch connector.
- Lower the indicator panel, and install the mounting
screws.
- Install the rear console.
- Connect the negative battery cable.