- Properly relieve the fuel system pressure as outlined earlier in this section.
- Raise and safely support the vehicle.
- Drain the fuel from the fuel tank into an approved gasoline container.
- Remove the electrical connectors at the fuel pump. Make sure there is enough
slack in the electrical harness of the fuel gauge unit to allow for the fuel
tank to be lowered slightly. If not, label and disconnect the electrical harness
at the fuel gauge unit.
CAUTION
Cover the high pressure fuel hose with rags to prevent splash of fuel caused
by residual pressure in the fuel pipe line.
- Disconnect the high pressure fuel line connector at the pump.
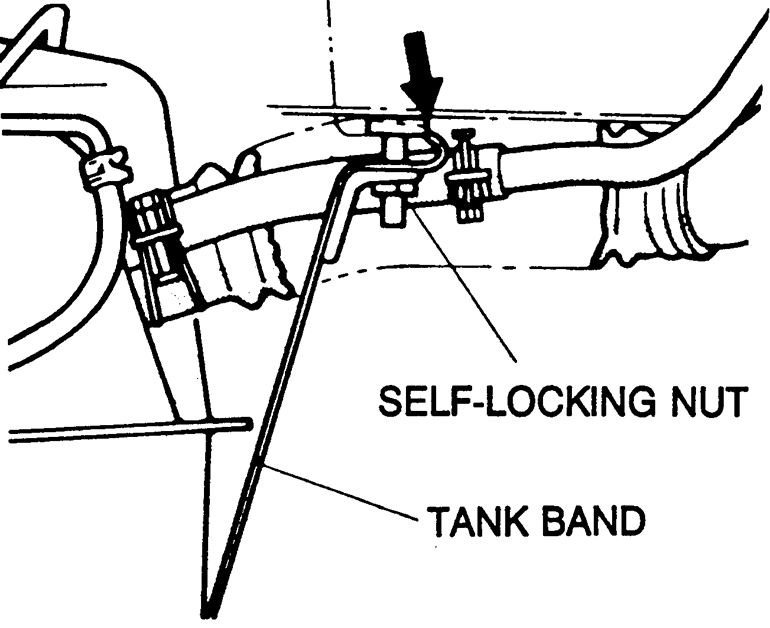
- Loosen self-locking nuts on tank support straps to the end of the stud bolts.
- Remove the right side lateral rod attaching bolt and disconnect the arm
from the right body coupling. Lower the lateral rod and suspend from the axle
beam using wire.
- Remove the holding bolt and gasket from the base of the tank.
- Remove the fuel pump assembly.
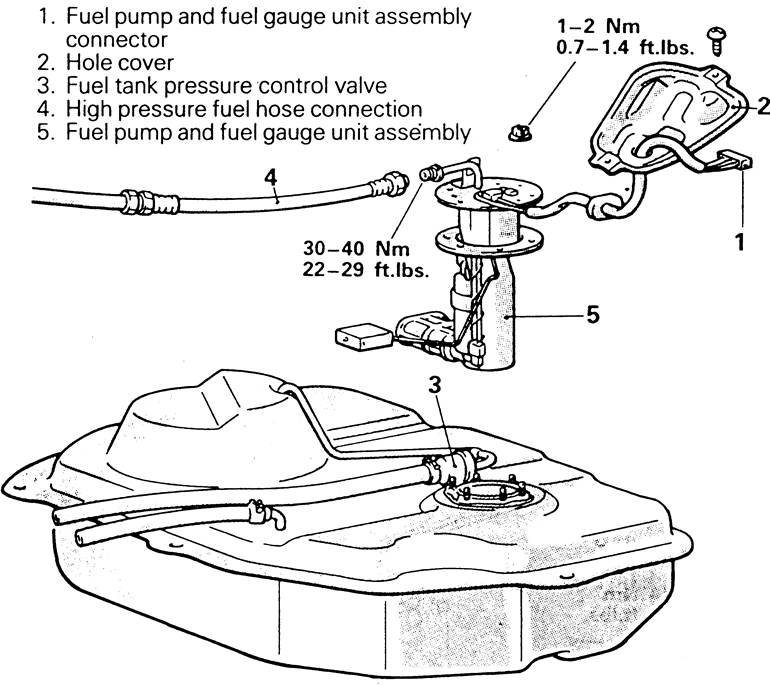
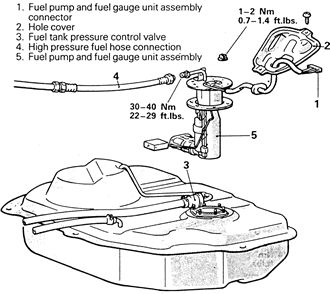
| Fig. 1: Exploded view of the fuel pump, fuel gauge
sending unit and related components
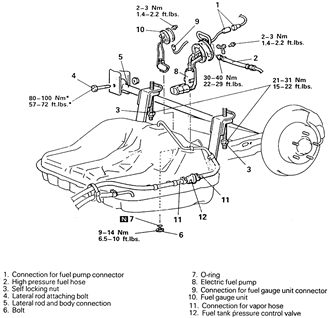
|
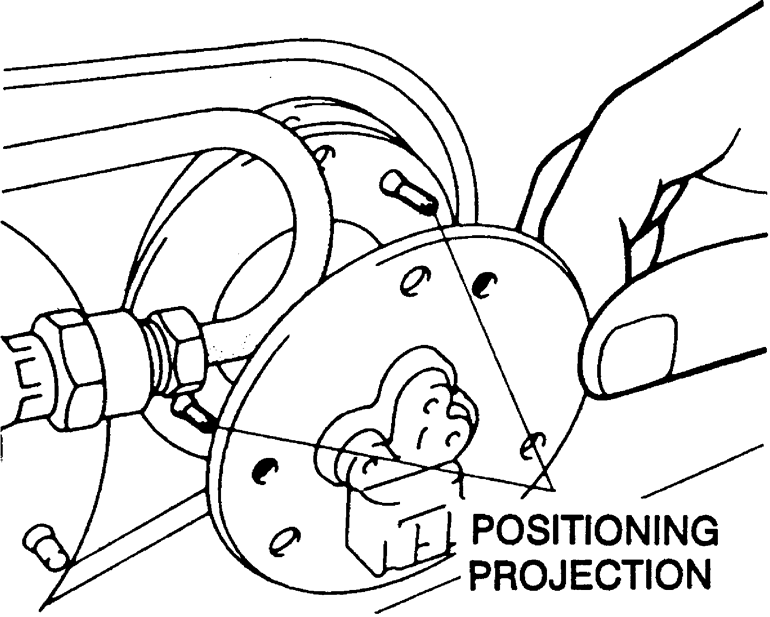
To install:
- Align the 3 projections on packing with the holes on the fuel pump and the
nipples on the pump facing the same direction as before removal.
| Fig. 2: When installing the electric fuel pump, align
the 3 position projections with the holes in the pump
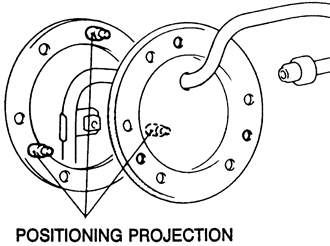
|
- Install the holding bolt through the bottom of the tank. Make sure the gasket
on the bolt is replaced and is not pinched during installation. Tighten to
10 ft. lbs. (14 Nm).
- Install the right side lateral rod and attaching bolt into the right body
coupling. Tighten loosely only, at this time.
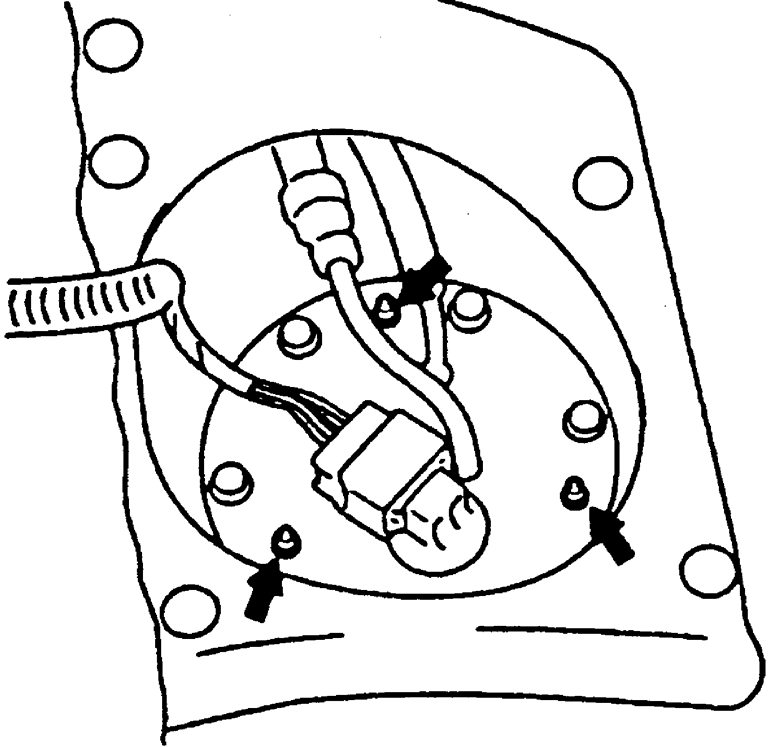
| Fig. 3: During installation of the fuel gauge unit,
align the 2 position projections with the holes in the fuel gauge
unit.
|
| Fig. 4: Tighten the self-locking nuts until the rear
end of the tank band contacts the body of the vehicle
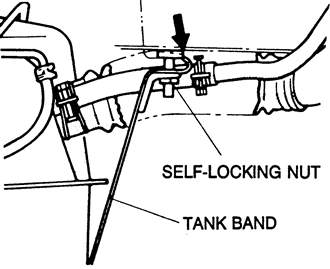
|
- Tighten self-locking nuts on tank support straps until tank is seated fully.
Tighten nuts to 22 ft. lbs. (31 Nm).
- Install the high pressure fuel hose connector and tighten to 29 ft. lbs.
(40 Nm).
- Install the electrical connectors onto the fuel pump and gauge unit assemblies.
- Lower the vehicle so the suspension supports the weight of the vehicle.
Tighten the lateral rod attaching bolt to 58–72 ft. lbs. (80-100 Nm).
- Refill the fuel tank with fuel drained during this procedure.
- Connect the negative battery cable and check the entire system for proper
operation and leaks.
- Properly relieve the fuel system pressure as outlined earlier in this section.
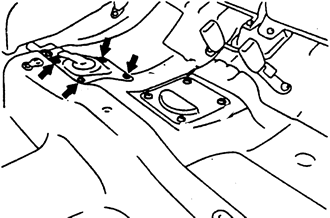
- The fuel pump is located in the fuel tank. Remove the hole cover located
in the rear floor pan.
- Partially drain the fuel tank into an approved gasoline container.
- Remove the electrical connector from the fuel pump.
- Remove the overfill limiter (two-way valve), as required.
| Fig. 5: Exploded view of the fuel pump, gauge sending
unit and related components
|
- Cover the hose connection with a shop towel to prevent any splash of fuel
due to residual pressure in the fuel pipe. Remove the high pressure fuel hose
connector.
- Remove the fuel pump and gauge assembly from the tank. Note positioning
of pump prior to removal from tank.
To install:
- Align the 3 projections on the packing with the holes on the fuel pump and
the nipples on the pump facing the same direction as before removal. Install
the retainers and tighten to 2 ft. lbs. (3 Nm).
- Install the high pressure hose connection and tighten to 29 ft. lbs. (40
Nm).
- Install the overfill limiter (two-way valve) and the electrical connector
to the fuel pump.
- Fill the fuel tank with the gasoline removed during this procedure.
- Reconnect the negative battery cable and check the entire system for leaks.
| Fig. 6: Before installing the hole cover, apply a
suitable sealant to the rear floor pan

|
- Install MOPAR Rope Caulk Sealer part 4026044 or equivalent, to the rear
floor pan and install the cover into place.
NOTE: On these vehicles, is possible to remove the fuel pump
and/or gauge assembly by working through the access panel under the rear seat
cushion instead of having to lower or remove the fuel tank.
- Properly relieve the fuel system pressure, as outlined earlier in this section,
but keep the rear seat cushion off and the connector(s) detached.
- If not already done, remove the protector.
- Disconnect the fuel pump hoses and connectors, then remove the fuel pump
from the vehicle.
| Fig. 7: The fuel pump is located under the rear seat
cushion
|
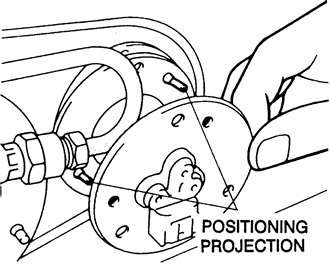
To install:
- For FWD vehicles, place the fuel pump in the vehicle, aligning the packing
positioning projections with the holes in the fuel pump.
| Fig. 8: When installing the fuel pump, make sure
the projections are properly aligned with the holes in the pump assembly

|
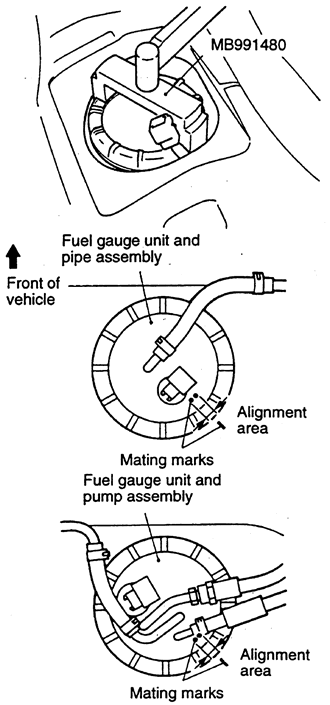
- For AWD vehicles, perform the following:
- Check to be sure the fuel tank packing is not damaged. If it is, it
must be replaced.
- Place soapy water on the inside of the packing, then install the fuel
pump assembly. Do NOT tilt the assembly during installation.
- Apply soapy water to the outside thread of the fuel tank. Use special
tool MB994180 or an equivalent spanner wrench to tighten the cap to the
specified torque. Make sure that the marks on the fuel tank and pump assembly
are aligned.
| Fig. 9: On AWD vehicles, you need a spanner wrench
to tighten the fuel pump assembly cap
|
WARNING
Make sure the pump assembly does not turn together with the cap when
tightening the cap. If the mating marks are not aligned, the position
of the flat will not be correct and the fuel gauge indicator light and
gauge will not work properly.
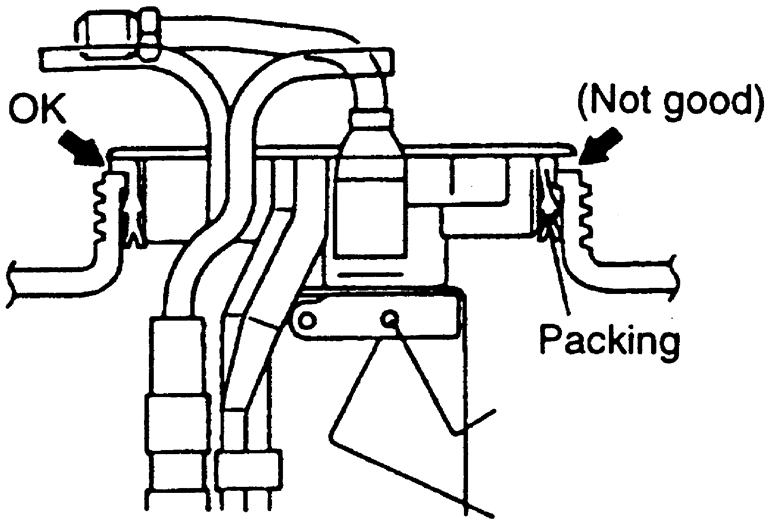
- For AWD vehicles, make sure the packing is installed properly, as shown
in the accompanying figure.
| Fig. 10: The fuel pump packing must be properly installed
for sealing purposes

|
- For AWD vehicles, check for leaks as follows:
- Apply soapy water to the circumference of the cap.
- Choke the vapor hose and main hose, apply and internal pressure of 1.5
psi (10 kPa) or less from the return hose and make sure no bubbles form
in the soapy water.
- Install the protector and attach the fuel pump electrical connector.
- Install the rear seat cushion.
- Connect the negative battery cable.