Previous Next

Speakers

REMOVAL & INSTALLATION

Front Speaker
  1. Disconnect the negative battery cable.
  2. Remove the front speaker garnish.
  3. Remove the retainers, detach the harness connector and remove the front speaker.

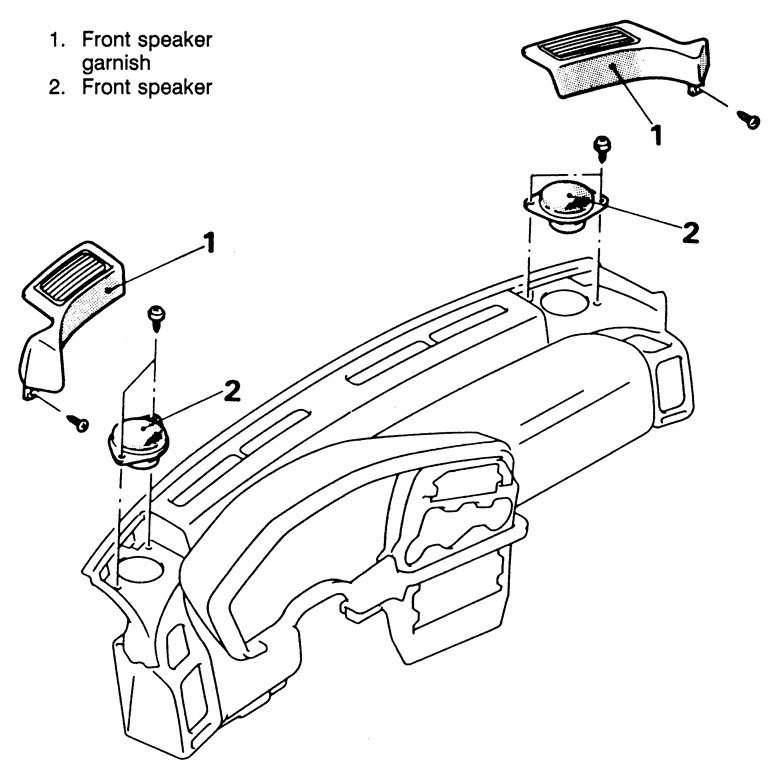
    Fig. 1: Front speaker mounting — early model shown, later models similar

    WARNING
    Handle the speaker carefully to avoid damaging the cone during removal and installation.

  4. Installation is the reverse of the removal procedure
Door Speaker
  1. Disconnect the negative battery cable.
  2. Remove the door trim panel. Refer to the procedure in Section 10.
  3. Remove the mounting screws, detach the harness connector and remove the front speaker.

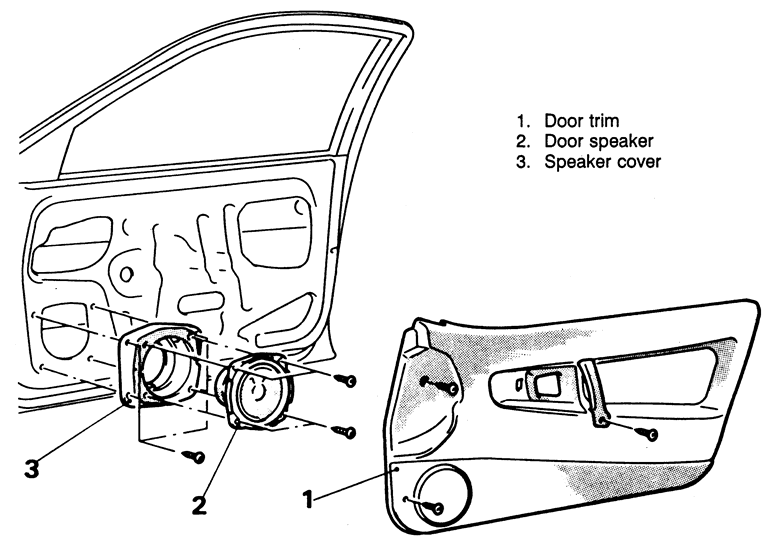
    Fig. 2: You must remove the door trim panel for access to the door speakers

    WARNING
    Handle the speaker carefully to avoid damaging the cone during removal and installation.

  4. Installation is the reverse of the removal procedure
Rear Speaker
EXCEPT ECLIPSE SPYDER
  1. Disconnect the negative battery cable.
  2. Remove the luggage compartment side tray.
  3. Remove the speaker retainers and lift the speaker from the speaker cover. Detach the harness connector.

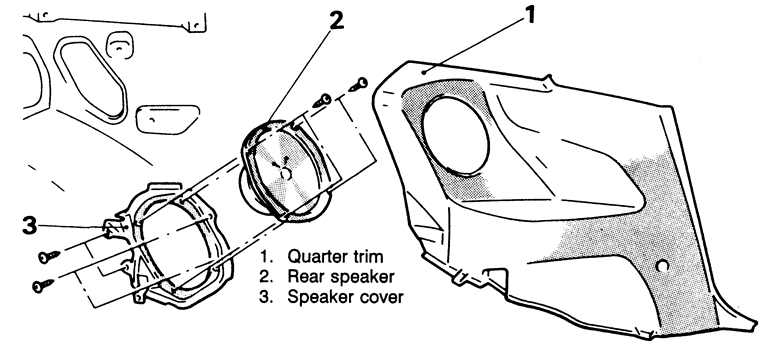
    Fig. 3: Exploded view of the rear speaker — 1990–94 vehicles

    Fig. 4: Rear speaker mounting — 1995–98 vehicles

    WARNING
    Handle the speaker carefully to avoid damaging the cone during removal and installation.

  4. Installation is the reverse of the removal procedure.
  5. Connect the negative battery cable.
ECLIPSE SPYDER
  1. Disconnect the negative battery cable.
  2. Remove the speaker garnish cover.
  3. Unfasten the retaining screws.

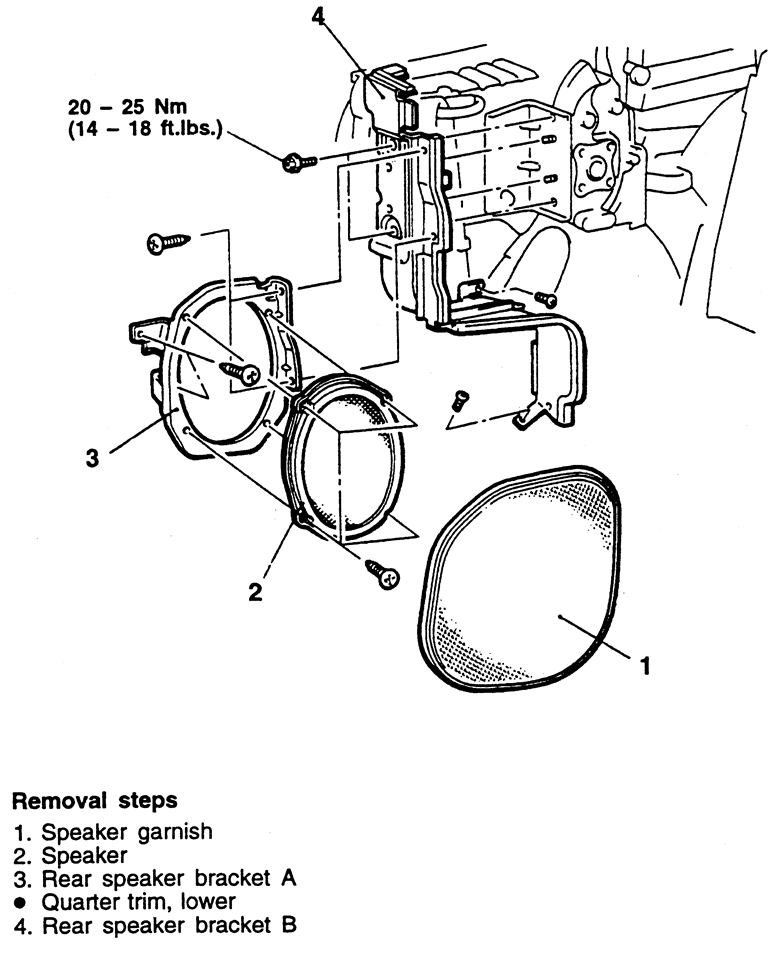
    Fig. 5: Exploded view of the rear speaker mounting on an Eclipse Spyder

  4. Partially lift the speaker up, detach the connectors, then remove the speaker from the vehicle.
  5. If necessary, remove the speaker brackets.
  6. Installation is the reverse of the removal procedure.

Previous Next