Previous Next

Console

REMOVAL & INSTALLATION

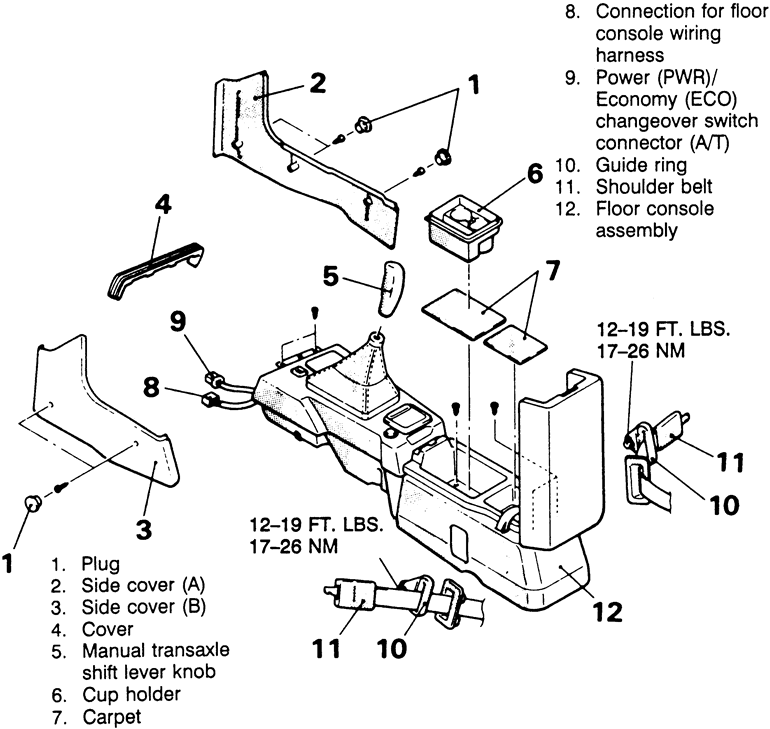
Fig. 1: Exploded view of the floor console and related components — 1990–94 vehicles

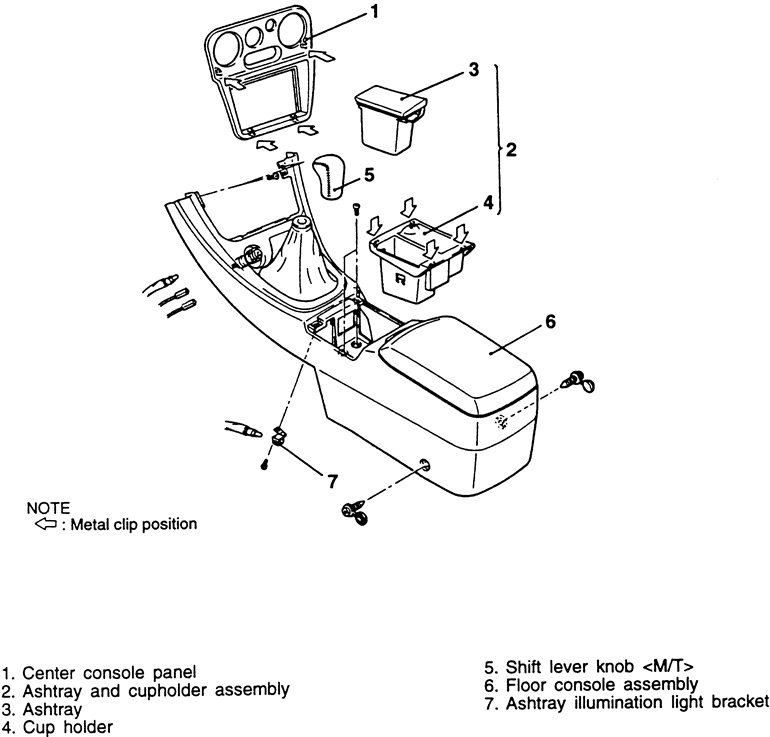
Fig. 2: Floor console and related components — 1995–98 vehicles

  1. Disconnect the negative battery cable. If equipped with SRS, wrap the cable in insulated tape, then wait at least 60 seconds before continuing to allow the SRS system time to disable.

    CAUTION
    If equipped with SRS, be careful not to let the console bump against the SRS-ECU during removal and installation.

  2. If necessary, remove the center console trim panel.
  3. Remove the screw plugs in the side covers. Remove the retainer screws and the side covers from the vehicle.

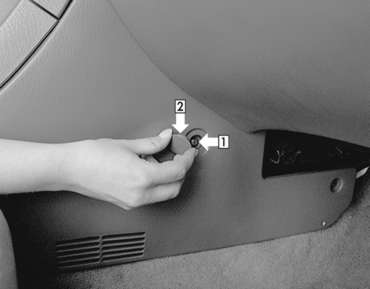
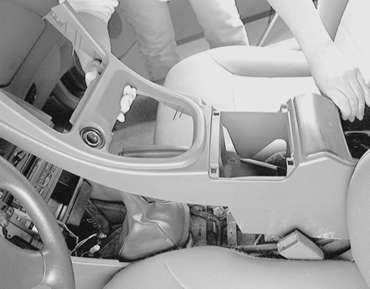
    Fig. 3: The console side cover retaining screws (1) are hidden by plugs (2)

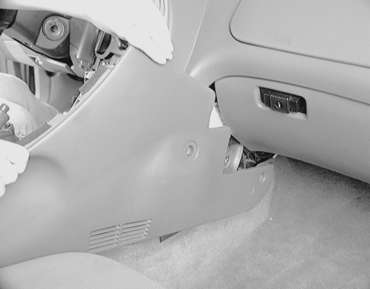
    Fig. 4: After unfastening the screws, remove the console side panels

  4. Remove the front mounting screw cover from the floor console.
  5. Remove the ashtray and cup holder assemblies. If equipped, remove the carpet inserts from the floor console assembly.

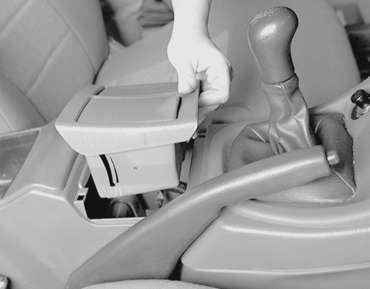
    Fig. 5: Lift the ashtray and cup holder assembly up and out of the console

    Fig. 6: There are two retaining screws (see arrows) under the cup holder and ashtray assembly

  6. If equipped, remove the manual transaxle shift lever knob.

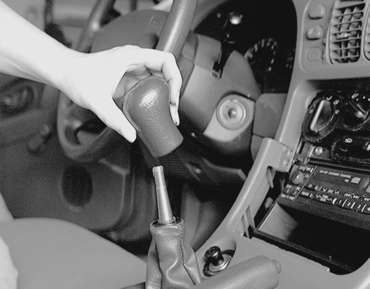
    Fig. 7: For vehicles equipped with a manual transaxle, remove the shift lever knob

  7. Label and detach the electrical wire harness connections for the floor console.
  8. Remove the mounting bolts/screws and the floor console from the vehicle. Disassemble components as required.

    Fig. 8: Unfasten the remaining console mounting screws . . .

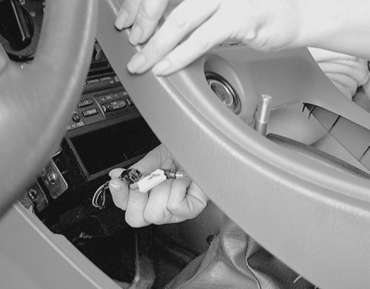
    Fig. 9: . . . pull the console partially up and detach the connectors . . .

    Fig. 10: . . . then remove the console from the vehicle. Be careful not to bump it against the SRS-ECU, if equipped

    To install:

  9. Install the floor console in position in the vehicle and secure with the retaining bolts/screws.
  10. Attach the electrical harness connectors to the vehicle body harness, as tagged during removal.
  11. Install the carpet and the cup holder/ashtray assembly to the console assembly.
  12. Install the side covers and retainers. Cover retainer screws with plugs.
  13. Connect the negative battery cable and check console electrical components for proper operation.

Previous Next