To Remove:
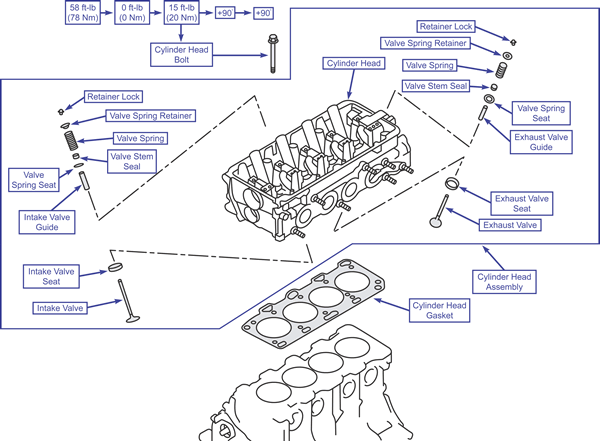
| Cylinder head (2.4L)
|
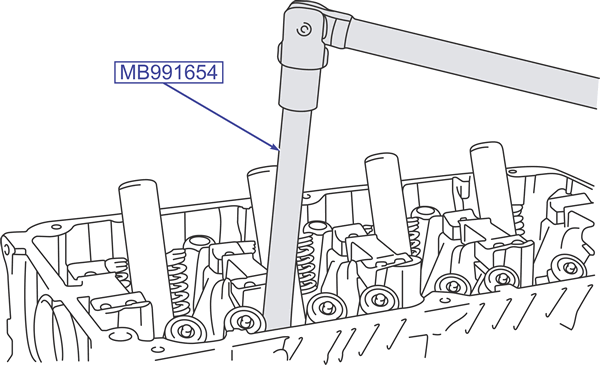
| Cylinder head bolt wrench (#MB991654)
|
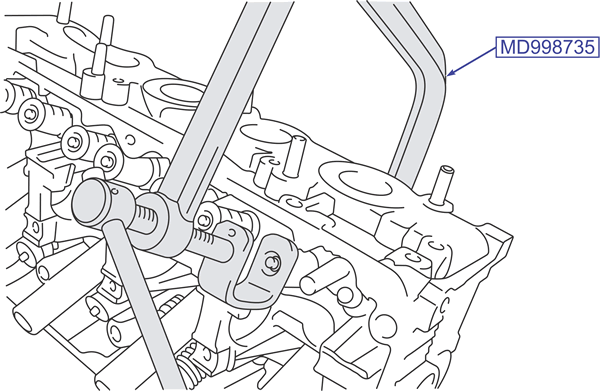
| Valve spring compressor (#MD998735)
|
To Install:
| Cylinder head (2.4L)
|
NOTE: Apply clean engine oil to all moving parts before installing them.
NOTE: The valve spring for the intake is painted light blue. The valve spring for the exhaust is painted orange.
| Valve spring compressor (#MD998735)
|
| Cylinder head bolt wrench (#MB991654)
|
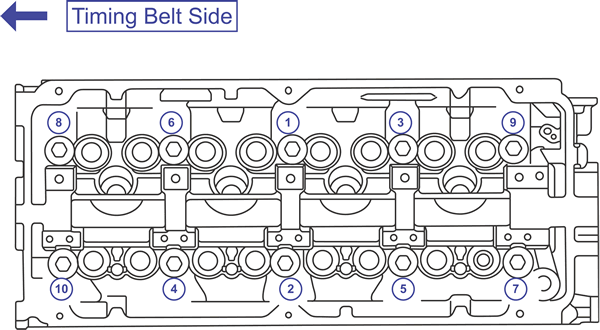
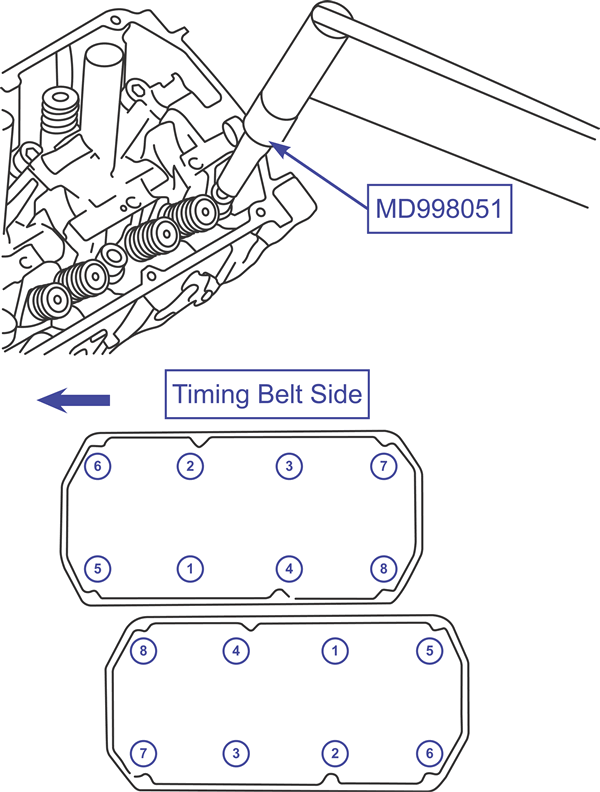
| Cylinder head bolt tightening sequence (2.4L)
|
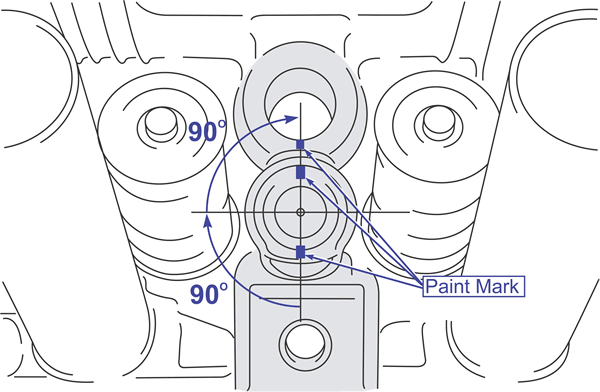
| Cylinder head bolt alignment (2.4L)
|
CAUTION
Make sure each bolt is tightened EXACTLY 90°. If a bolt is under tightened, it might not be correctly fastened, and if it is over tightened, loosen it fully and retighten it.
To Remove:
| Cylinder head (3.0L)
|
| Valve spring compressor (#MD998735)
|
NOTE: Be sure to make note of the correct location of removed parts to ensure their proper placement during installation.
To Install:
| Cylinder head (3.0L)
|
CAUTION
When installing the valve stem seals, be sure to install the correct ones by checking the color of the seals. Intake seals are gray and exhaust seals are grayish green.
CAUTION
Do not compress the valve spring excessively because this can cause the bottom end of the retainer to damage the stem seal.
|
CAUTION
Be sure to attach the head bolt washer in the direction illustrated.
| Cylinder head bolt installation (3.0L)
|