To Remove:
CAUTION
Cap all open refrigerant lines to prevent moisture and dirt from entering. The compressor oil and receiver absorb moisture quickly.
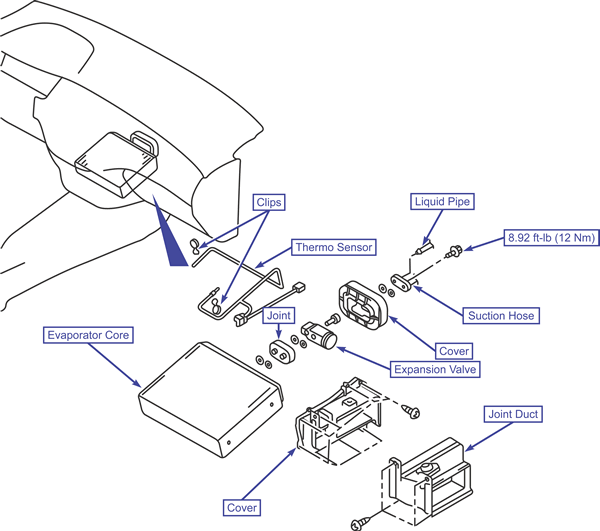
| Evaporator core and expansion valve removal/installation
|
- Recover the refrigerant from the A/C system.
- Remove the glove box.
- Remove the ECM or PCM.
- Disconnect the refrigerant hoses from the expansion valve. Cap the open refrigerant lines.
- Remove the expansion valve cover, expansion valve and joint.
- Remove the joint duct.
NOTE: When removing the evaporator core, cut the sides of the dashboard pad and fold the pad up. The thickness of the pad will interfere with evaporator removal.
- Remove the evaporator cover and evaporator.
To Install:
- Add the specified amount of refrigerant oil to the replacement evaporator. Install the evaporator and cover.
- Glue the dashboard pad into place with a suitable adhesive.
- Install the joint duct.
- Install the joint, expansion valve and expansion valve cover. Lubricate the o-rings with refrigerant oil.
- Connect the refrigerant hoses to the expansion valve. Lubricate the o-rings with refrigerant oil.
- Install the ECM or PCM.
- Install the glove box.
- Evacuate and charge the A/C system.