NOTE: Before removing the fuel lines, use two small pairs of
locking pliers to pinch off the fuel lines on both sides of the fuel filter.
Place a small piece of rubber between the jaws of the pliers to prevent damage
to the fuel lines.
On the carbureted models, the fuel filter is located in the engine compartment.
- Disconnect the negative battery cable. Loosen, but DO NOT remove,
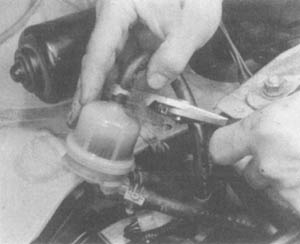
the two hose clamp retainers, located at either end of the filter.
| Fig. 1: Use pliers to loosen the two hose clamp retainers
|
- Work the hoses from the filter necks.
- Snap the filter out of it's mounting bracket.
- Discard the old filter.
WARNING
When removing the old filter, be careful not to allow any fuel to drop onto
hot engine components.
To install:
- Install the new filter in it's mounting bracket.
- Check the hoses for cracks and wear.
- Install the hoses on the filter necks and tighten the hose clamps securely.
- Connect the negative battery cable.
- Start the vehicle and check for leaks.
The fuel filter is located on a bracket in the engine compartment on the front-left
fender.
- Reduce the fuel pressure by performing the following procedures:
- Disconnect the electrical wiring connector from the fuel pump.
- Crank the engine for more than five seconds. If the engine starts, let
the engine run until it stops.
- Turn the ignition switch OFF and reconnect the electrical
wiring connector of the fuel pump.
- Disconnect the negative battery cable. Loosen the hose clamp screws and
pull the filter from the bracket.
| Fig. 2: Fuel filter location on fuel injected models
|
To install:
- Install the filter in the bracket.
- Install the hoses on the filter and tighten the hose clamps securely.
- Start the engine and check for leaks.


