Visually inspect the shock absorber. If there is evidence of leakage and the
shock absorber is covered with oil, the shock is defective and should be replaced.
If there is no sign of excessive leakage (a small amount of weeping is normal)
bounce the car at one corner by pressing down on the fender or bumper and releasing.
When you have the car bouncing as much as you can, release the fender or bumper.
The car should stop bouncing after the first rebound. If the bouncing continues
past the center point of the bounce more than once, the shock absorbers are
worn and should be replaced.
NOTE: Use this procedure if only shock absorber (strut) or
spring removal is desired.
- Remove the wheel cover (DL models) and loosen the lug nuts.
- Raise the front of the car and support it with jackstands.
CAUTION
Secure the spring with a spring compressor before loosening the upper strut
nut.
- Remove the lug nuts and wheels.
- Remove the bolts which secure the bottom of the strut assembly to the axle
housing.
- Remove the bolts which attach the strut bracket to the axle housing.
- Detach the end of the tie rod from the axle housing in order to prevent
ball joint damage.
- Remove the strut from the housing, gradually and carefully, by lowering
the housing.
- Remove the nuts which attach the upper end of the strut assembly to the
wheel arch.
- Remove the strut (shock and spring) from the body.
- Use a coil spring compressor to compress the coil spring until it can move
freely.
CAUTION
Do not suddenly release the tension on the coil spring by removing the compressor
too rapidly.
- Use a spanner or a large open end wrench to keep the upper spring seat from
turning, while removing the shock nut with a box wrench.
- Remove the components from the top of the shock, being careful to note their
order, and remove the spring in its compressed state.
CAUTION
Use care not to strike the upper shock absorber stud.
- Test the operation of the shock absorber by placing it in an upright position.
Push and pull on the shock, if it presents little resistance or binds, replace
it with a new shock.
- Examine the shock for leaks, a bent mounting stud, or other signs of wear
or damage to it. Replace it as necessary.
To install:
- Compress the spring and place the shock into the spring housing.
- Place the retaining components on the top of the shock in the reverse order
from which they were removed and tighten the shock nut.
- Place the strut into the body of the vehicle.
- Install the nuts which attach the upper end of the strut to the wheel arch.
- Slowly and carefully release the spring compressor and guide the strut into
the axle housing.
- Gradually raise the axle housing and attach the tie rod ends.
- Install the bolts which attach the strut bracket to the axle housing.
- Install the bolts which secure the bottom of the strut assembly to the axle
housing.
- Install the wheels, lug nuts and wheel covers.
- Lower the vehicle. Be sure to assemble the components on the top of the
shock in the correct order.
- Lubricate the oil seal lips and the thrust washers with a light coating
of grease.
- Tighten the shock absorber-to-mount locknut nut to 43–54 ft. lbs.
(58–73 Nm).
- Disconnect the negative (-) battery cable.
- Loosen the wheel nuts just slightly. Then, raise up the car and support
it with jackstands.
- Remove the wheels.
- Release the handbrake.
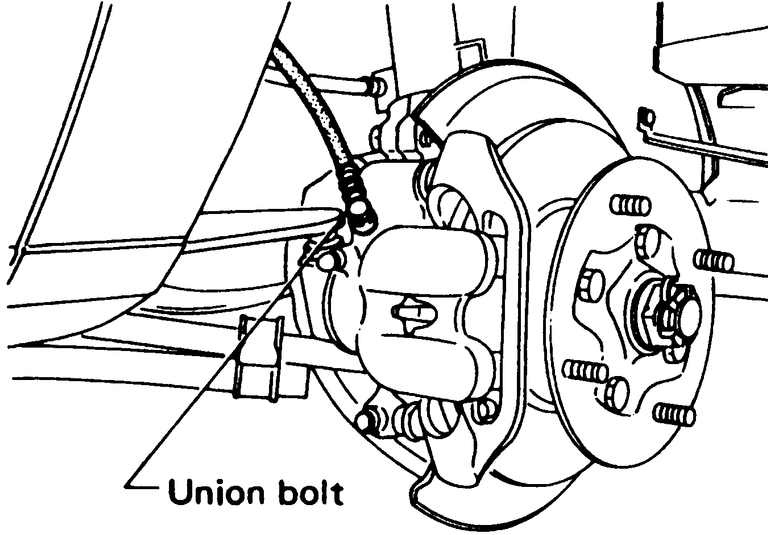
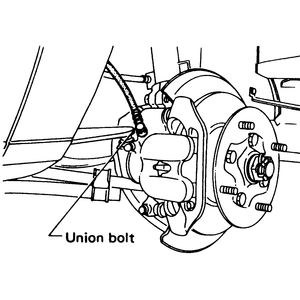
NOTE: When loosening the union bolt on the caliper, use
a flare nut wrench only.
- Disconnect the brake hose first at the pipe where it comes out of the body
and then at the caliper. Plug the brake line coming out of the body.
- Remove the clip and detach the brake hose from the damper strut.
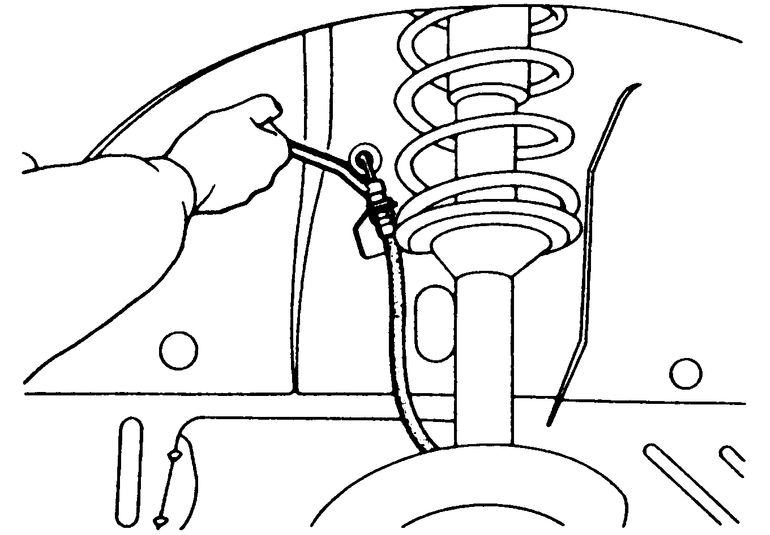
| Fig. 1: Always use a flare nut wrench to remove the
brake hose
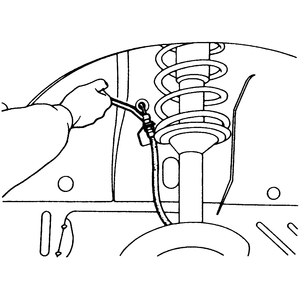
|
| Fig. 2: When loosening the union bolt on the caliper,
use a flare nut wrench only
|
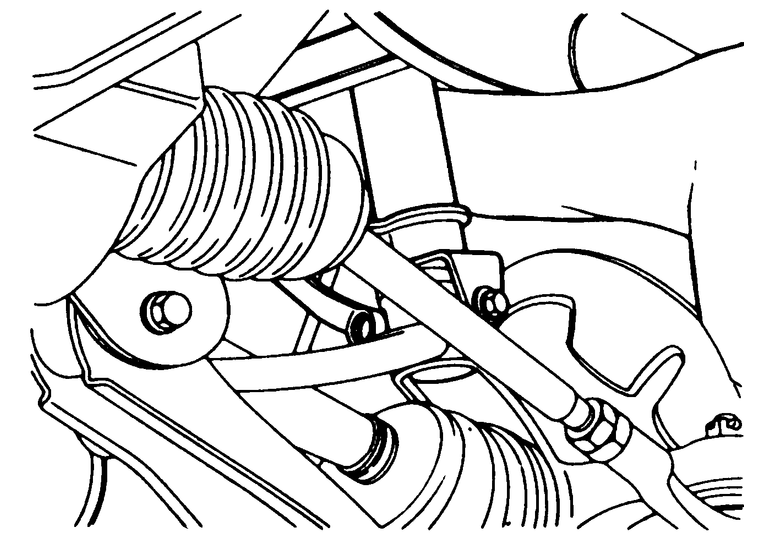
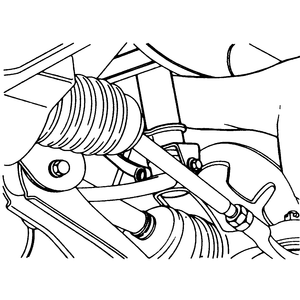
| Fig. 3: The damper strut attaching bolts attach the
strut to a housing to which the lower control arm, the other major
front suspension components, and the wheel spindle, are also attached
|
- Remove the two damper strut attaching bolts (these attach the strut to a
housing to which the lower control arm, the other major front suspension components,
and the wheel spindle, are also attached). This will loosen the grip of the
housing on the lower strut, but you may have to use a solvent to free the
strut from the housing if there is corrosion.
- Remove the two nuts that pass through the fender well and fasten the strut
at the top. Then, pull the strut downward and out of the body.
To install:
- Installation is the reverse of removal.
- Torque the strut-to-body nuts to 22–29 ft. lbs. (29–39 Nm) and
the strut-to-housing bolts to 22–29 ft. lbs. (29–39 Nm).
- Torque the brake line nut to 9–13 ft. lbs. (12–17 Nm) and the
brake line-to-caliper nut to 11–14 ft. lbs. (14–18 Nm).
- Torque the wheel nuts to 58–72 ft. lbs. (78–97 Nm).
- Bleed the brakes.
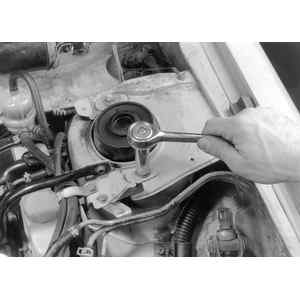
| Fig. 4: Using a socket remove the damper strut mounting
nut
|
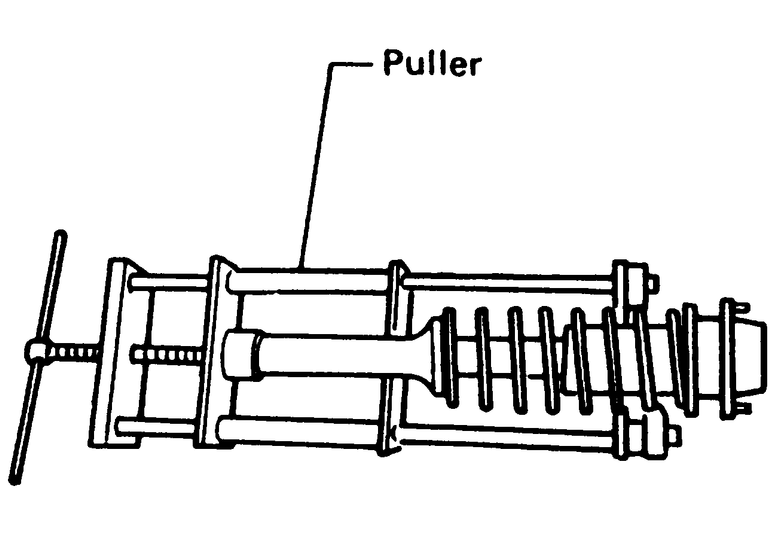
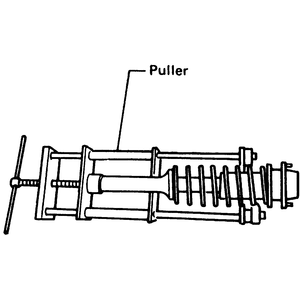
| Fig. 5: Use the puller to compress the spring when
disassembling the damper strut assembly
|