| Fig. 1: Exhaust manifold assembly — 1.2L
engine
|
NOTE: Do not attempt to remove the exhaust manifold when the
engine is hot. Allow adequate time for the engine to cool before removing.
- Disconnect the negative battery cable.
- Remove the bolts securing the heat shield to the exhaust manifold. Remove
the heat shield.
- Disconnect the O2sensor electrical harness.
- If the manifold is being replaced, remove the O2sensor.
- Remove the bolts securing the front exhaust pipe to the exhaust manifold.
Remove the gasket.
- Remove the six exhaust manifold-to-cylinder head mounting bolts.
- Remove the exhaust manifold.
- Clean all gasket material from both mating surfaces.
- Installation is the reverse of removal. Secure all components accordingly.
- Install the exhaust manifold using new gaskets.
- Tighen the manifold nuts to 14–22 ft. lbs. (20–29 Nm). Start
tightening in the middle of the manifold and work toward the ends.
- Using a new gasket attach the front exhaust pipe and tighten the bolts to
17–31 ft. lbs. (23–42 Nm).
- Tighen the heat shield mounting bolts to 10–18 ft. lbs. (13–23
Nm).
- Connect the negative battery cable.
- Start the engine and check for exhaust leaks.
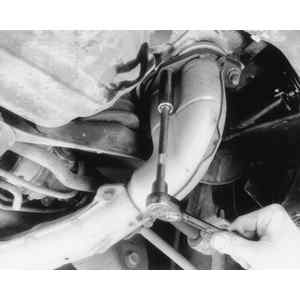
| Fig. 2: Loosen and remove the exhaust manifold the exhaust-to-exhaust
retainer nuts — 2.2L engine shown
|
CAUTION
The exhaust pipe may be hot; DO NOT perform any work until the system has completely
cooled.
- Disconnect the negative battery cable.
- Disconnect the O2sensor electrical wiring.
- Remove the front under cover.
- Remove the bolts securing the exhaust manifold covers and remove the covers.
- Remove the front pipe-to-center pipe mounting nuts.
- Remove the nuts that secure the exhaust pipe to the cylinder head and remove
the exhaust pipe.
- Discard the gaskets.
- Installation is the reverse of removal. Secure all components to specifications.
- Clean all gasket surfaces completely.
- Install the exhaust pipe to the cylinder head using new gaskets. Tighten
the mounting nuts as follows:
- Turbocharged engines — 28–33 ft. lbs. (34–44
Nm).
- Non-turbocharged engines — 22–30 ft. lbs. (30–40
Nm).
- Using new gaskets, connect the exhaust pipe to the center pipe. Tighten
the mounting nuts as follows:
- Turbocharged engines — 19–26 ft. lbs. (25–35
Nm).
- Non-turbocharged engines — 9–17 ft. lbs. (13–23
Nm).
- Start the engine and check for exhaust leaks.
| Fig. 3: Loosen the EGR pipe attached to the exhaust manifold — 3.3L
engine
|
- Disconnect the negative battery cable.
- Disconnect the O2sensor electrical harness.
- Remove the front undercover, if equipped.
- Remove the bolts securing the exhaust manifold covers and remove.
- Remove the front pipe-to-exhaust manifold mounting nuts.
- Disconnect the EGR pipe from the exhaust manifold, only if the right side
manifold is being removed.
- Remove the exhaust manifold mounting nuts, then remove the exhaust manifold.
- Clean all gasket material from both mating surfaces.
To install:
- Install the exhaust manifold using new gaskets. Install the mounting nuts
and tighten the nuts to 25–33 ft. lbs. (32–43 Nm).
- Connect the EGR pipe to the right manifold, if disconnected.
- Connect the exhaust pipe to the exhaust manifold and tighten the mounting
nuts to 22–29 ft. lbs. (29–38 Nm).
- Install the exhaust manifold covers and cover mounting bolts. Tighten the
bolts to 13–15 ft. lbs. (17–19 Nm).