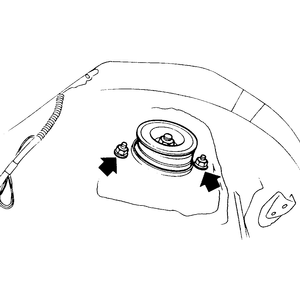
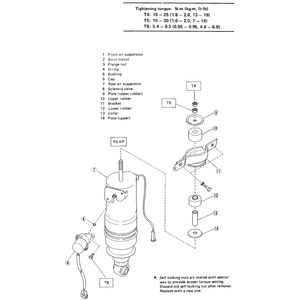
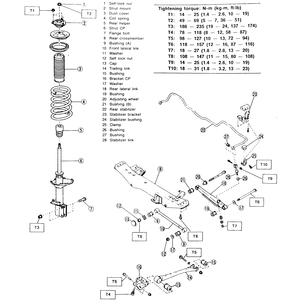
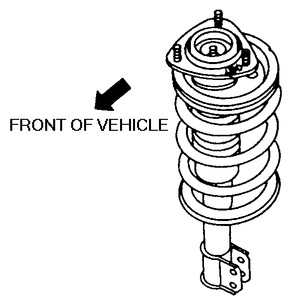
| Fig. 1: Rear strut upper retainer nuts — Justy
|
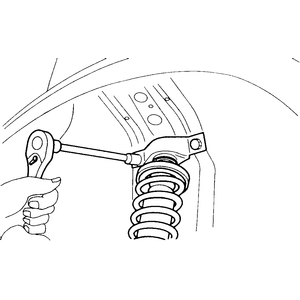
| Fig. 2: Loosening the lower strut retainer nuts and bolts
|
- Disconnect the negative battery cable.
- Raise and safely support the vehicle on jackstands.
- Remove the tire and wheel assembly.
- Remove the trim cover over the upper strut mount.
- Remove the 2 upper strut mounting nuts.
- Using a suitable prytool, push the lower control arm down and remove the
coil spring.
- Remove the 2 lower strut mounting bolts and remove the strut from the vehicle.
- Installation is the reverse of removal. Secure strut lower mounting bolts
to 57 ft. lbs. (79 Nm) and the upper strut mounting nuts to 47 ft. lbs. (64
Nm).
- Check the four-wheel alignment and adjust as necessary.
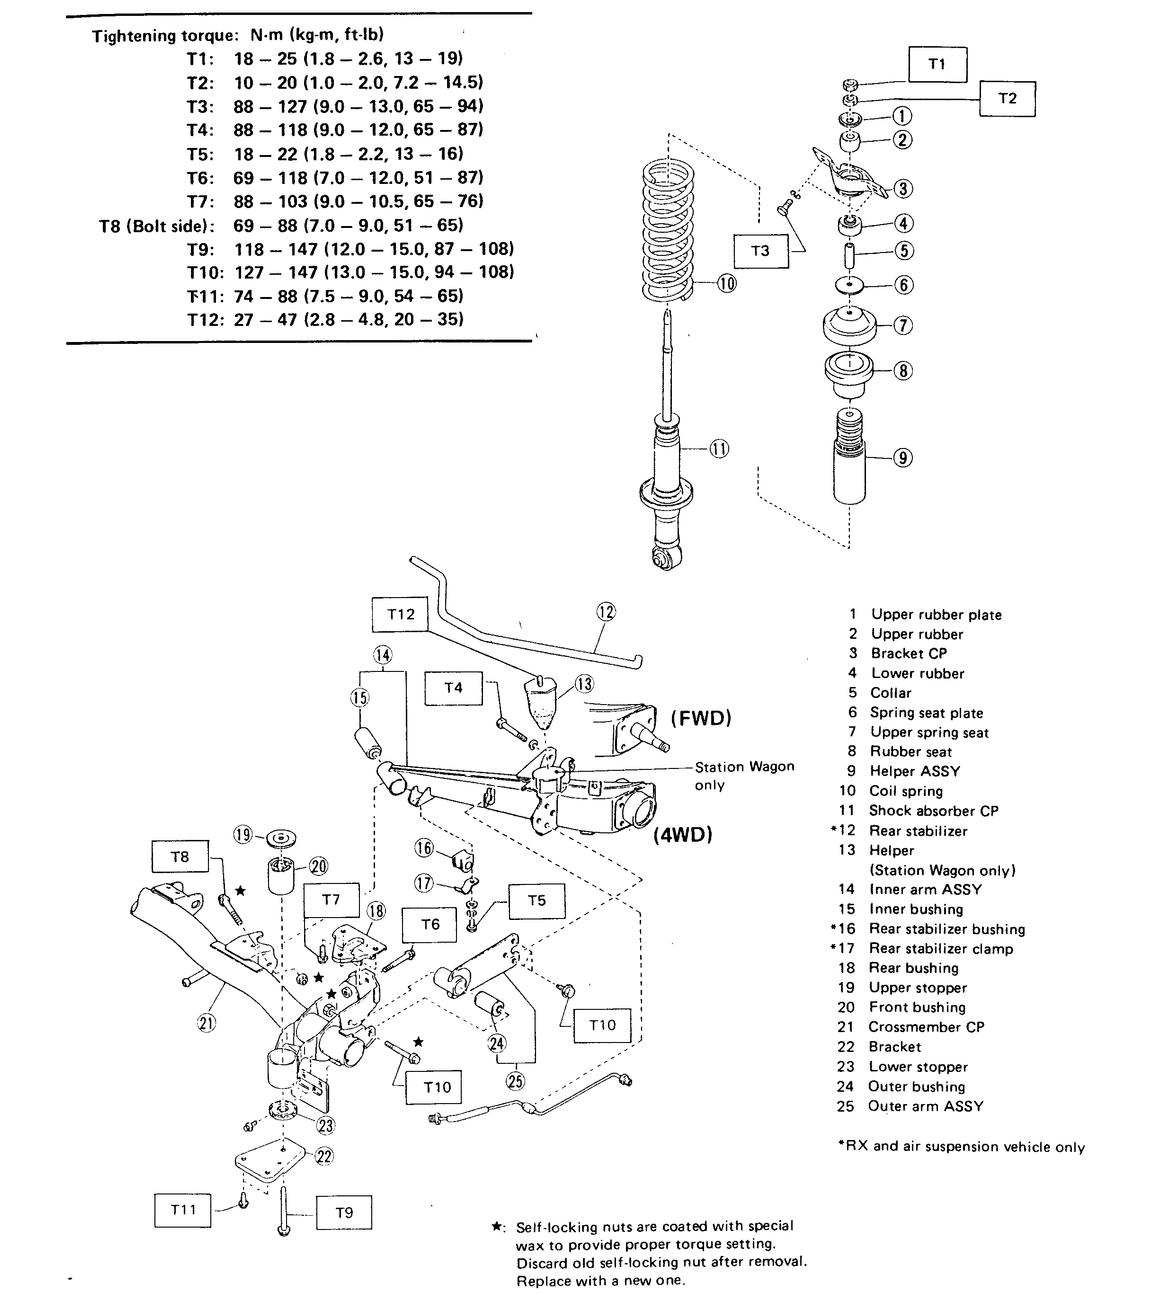
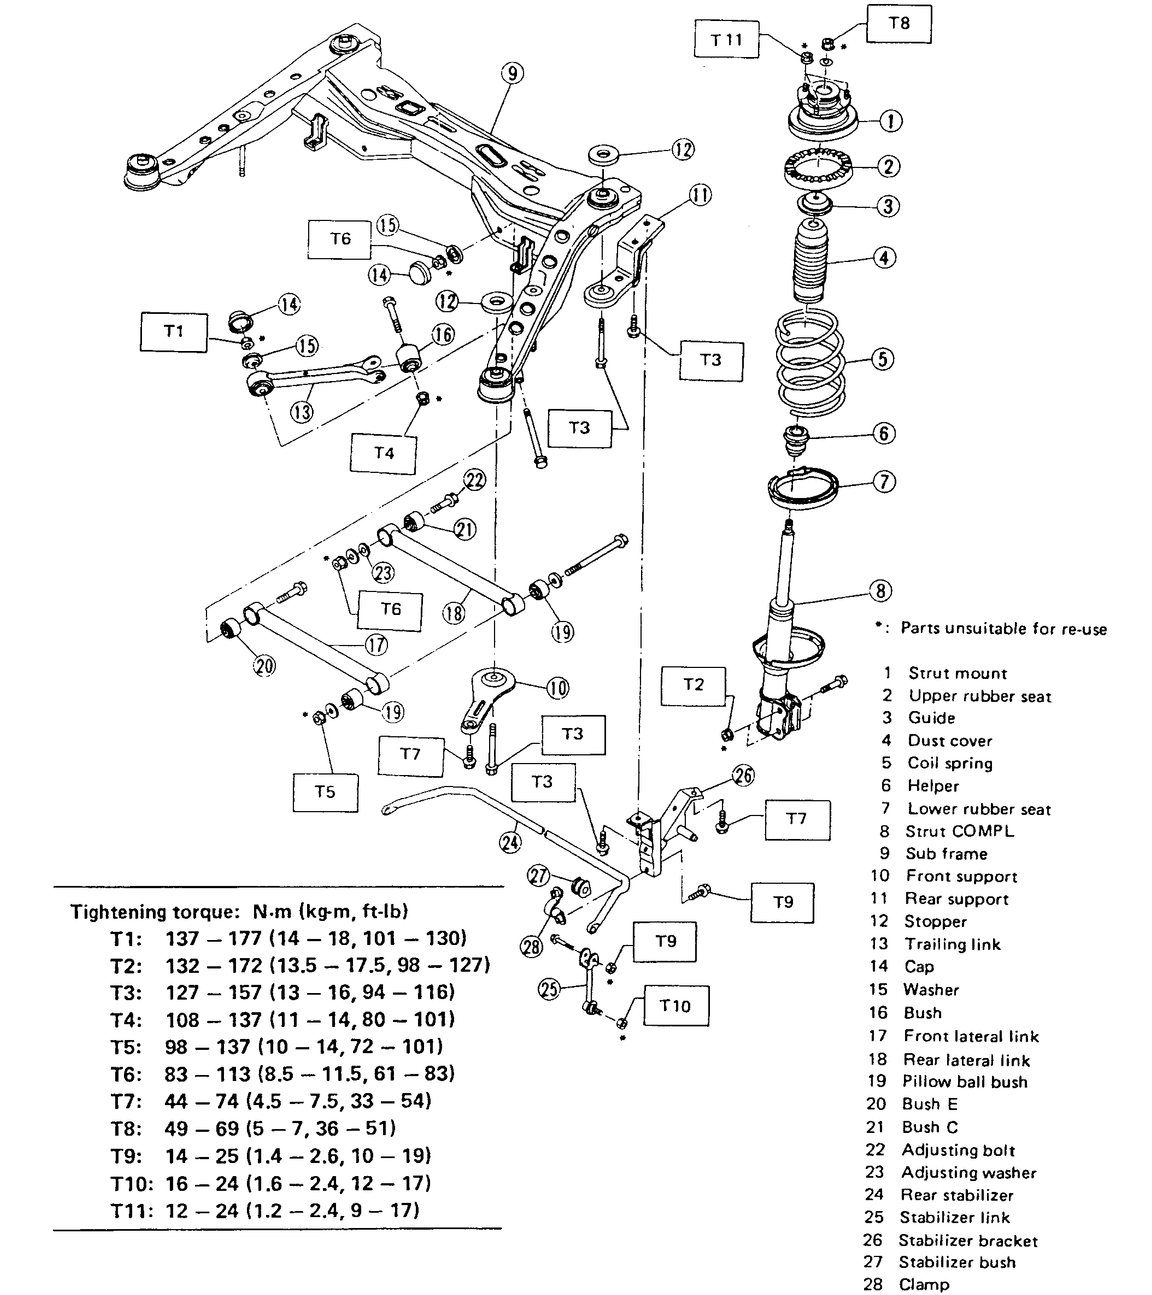
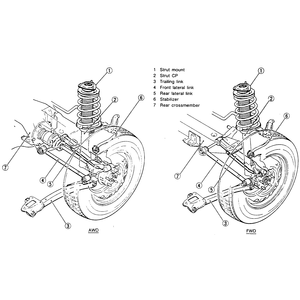
| Fig. 3: Rear suspension assembly — Sedan,
Coupe, Loyale, XT, Wagon and Brat
|
| Fig. 4: Loosening the rear upper strut bracket-to-body
retainer bolts
|
The rear coil spring on this vehicle is similar in design to the front struts.
The coil spring is mounted on the strut, and requires a special procedure to
remove.
CAUTION
DO NOT remove the center nut on the upper shock plate, or personal injury and/or
component damage may result.
- Raise and safely support the vehicle on jackstands.
- Remove the tire and wheel assemblies.
- Support the lower control arm with a suitable jack.
- Remove the two upper shock-to-body mounting bolts from inside the wheel
arch.
- Remove the lower shock mounting bolt, then remove the strut assembly.
- Installation is the reverse of removal. Secure the upper mounting bolts
to 27 ft. lbs. (36 Nm) and the lower mounting bolt to 87 ft. lbs. (118 ft.
lbs).
- Check the four-wheel alignment and adjust as necessary.
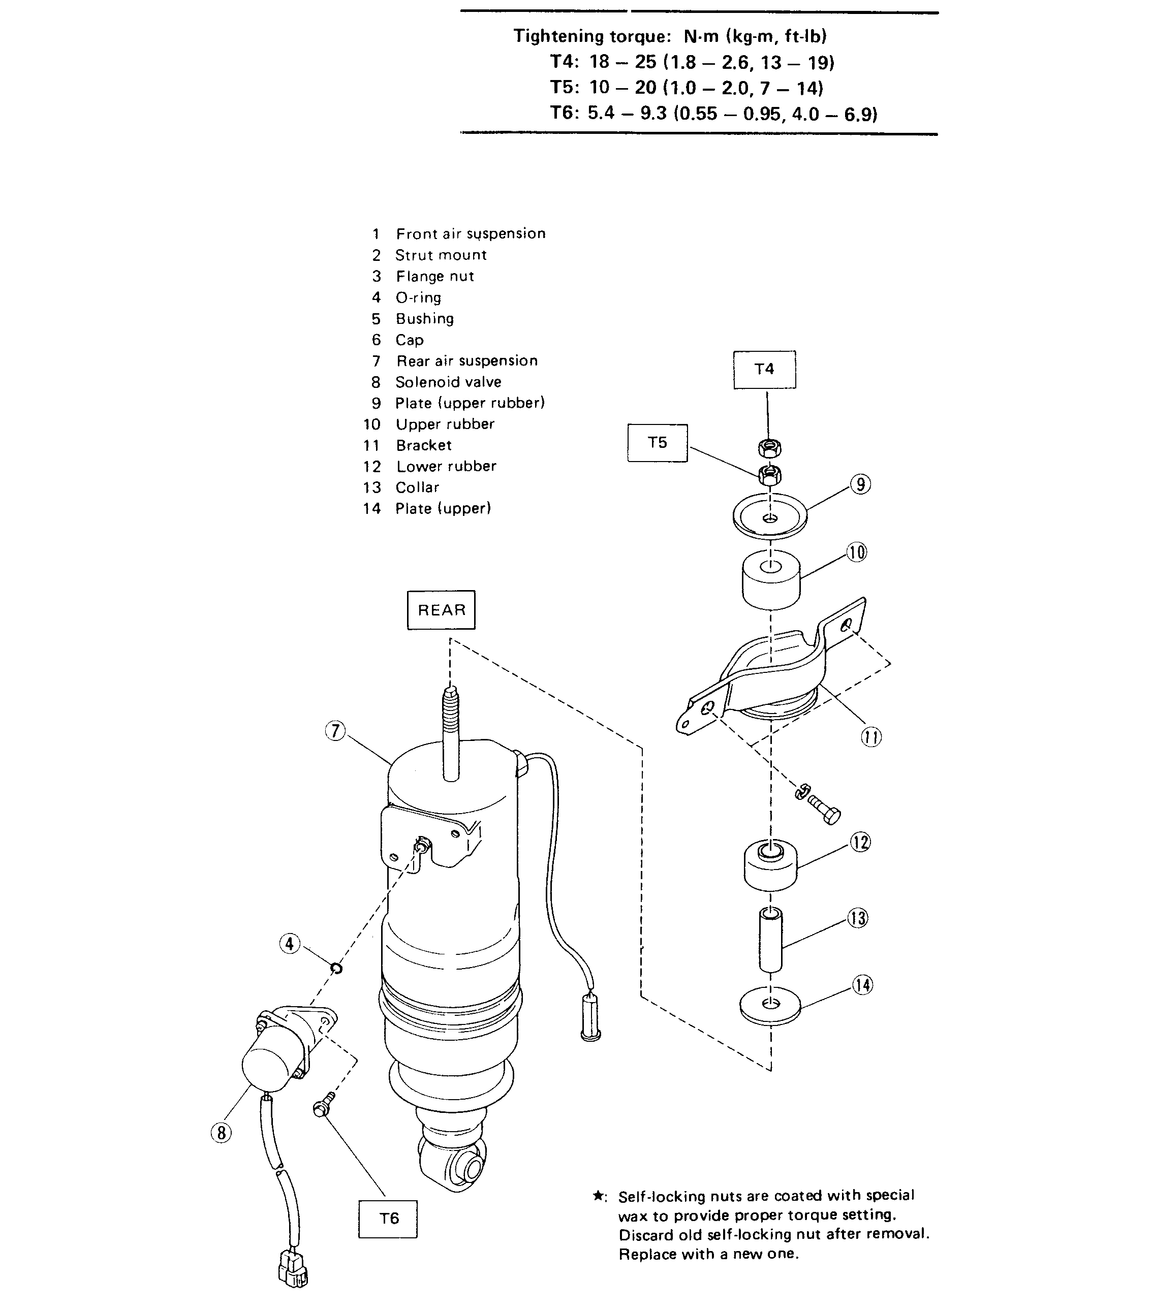
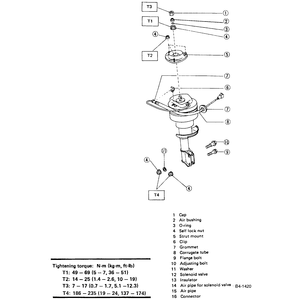
| Fig. 5: Rear pneumatic suspension assembly — Sedan,
Coupe, Loyale, XT, Wagon and Brat
|
- Disconnect the negative battery cable.
- Raise and safely support the vehicle on jackstands.
- Disconnect the air line from the top of the strut assembly.
- Disconnect the height sensor and solenoid valve wire harnesses from the
strut assembly.
- Remove the tire and wheel assemblies.
- Support the lower control arm with a suitable jack.
- Remove the two upper shock-to-body mounting bolts from inside the wheel
arch.
- Remove the lower shock mounting bolt, then remove the strut assembly.
- If replacing the strut. remove the solenoid valve from the side of the strut.
- Installation is the reverse of removal. Secure the upper mounting bolts
to 27 ft. lbs. (36 Nm) and the lower mounting bolt to 87 ft. lbs. (118 Nm).
- Start the vehicle, and allow enough time for the shock to pressurize before
driving the vehicle.
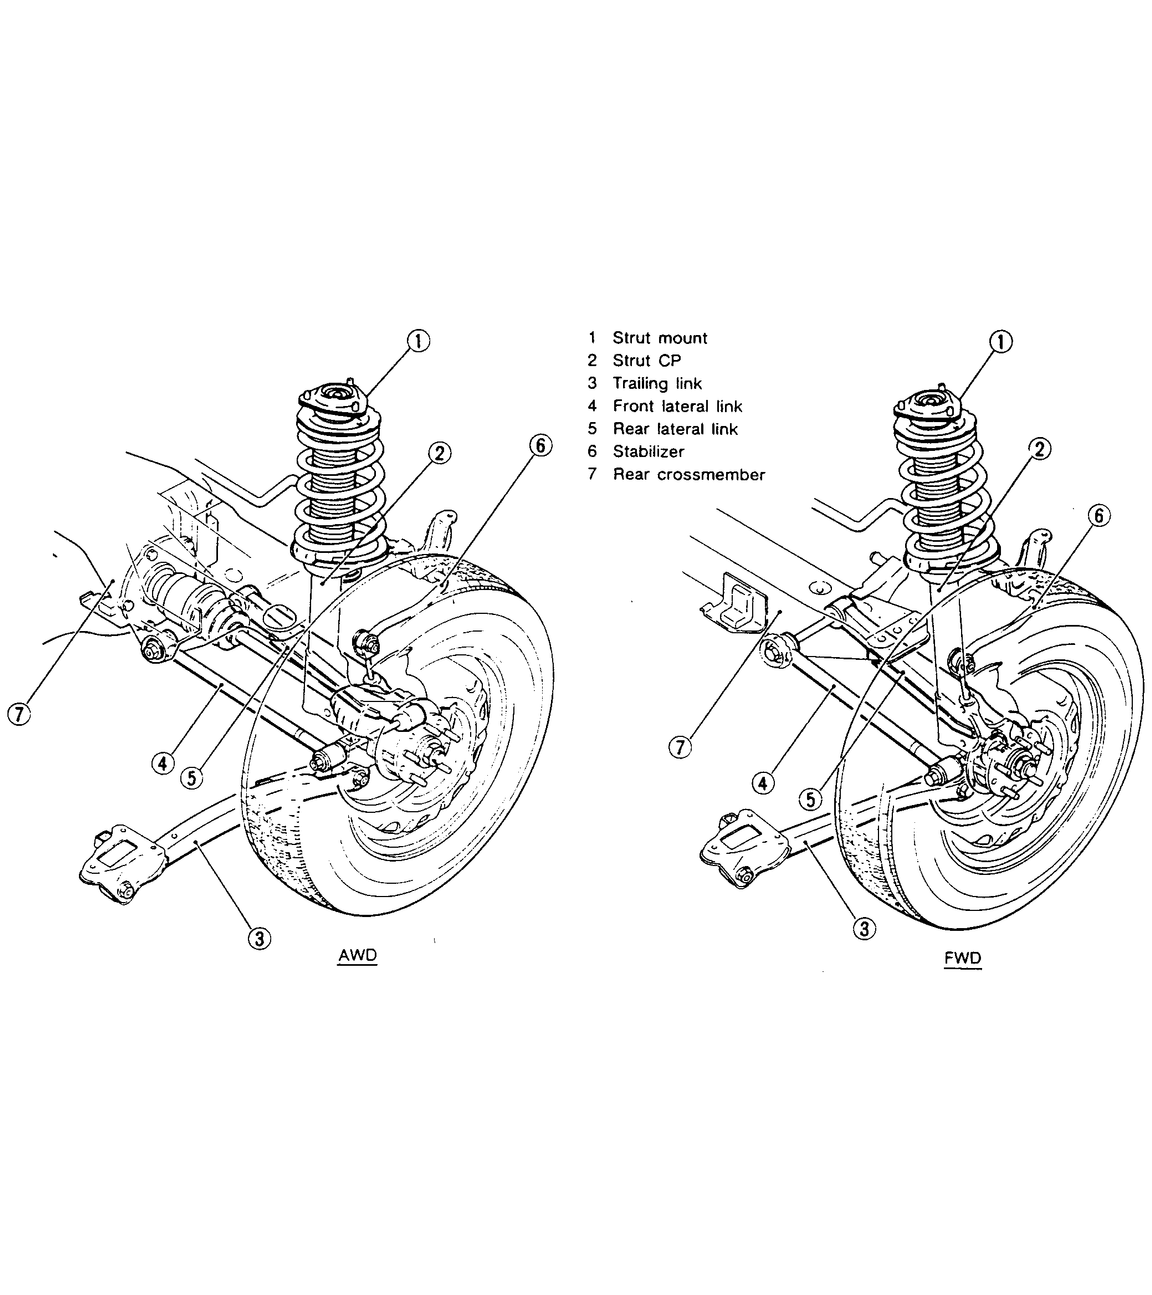
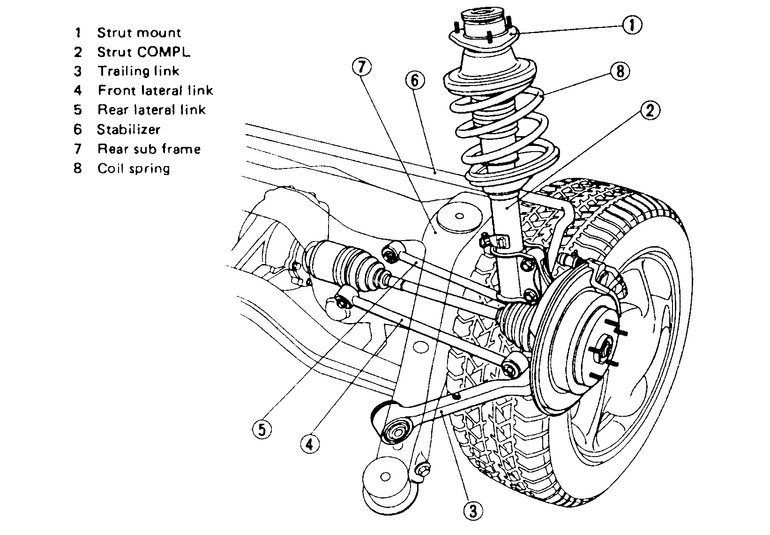
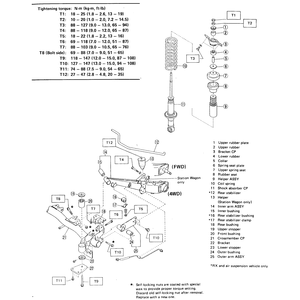
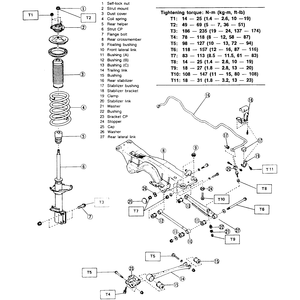
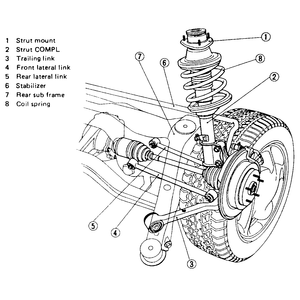
| Fig. 6: Rear standard suspension assembly — FWD
and AWD Legacy and Impreza
|
| Fig. 7: Rear standard strut assembly — AWD
Legacy and Impreza
|
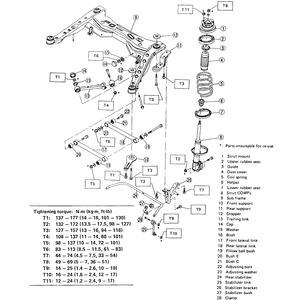
| Fig. 8: Rear standard suspension assembly — FWD
Legacy and Impreza
|
| Fig. 9: Rear strut upper mounting location — Legacy
and Impreza sedan
|
| Fig. 10: Rear strut upper mounting location — Legacy
and Impreza wagon
|
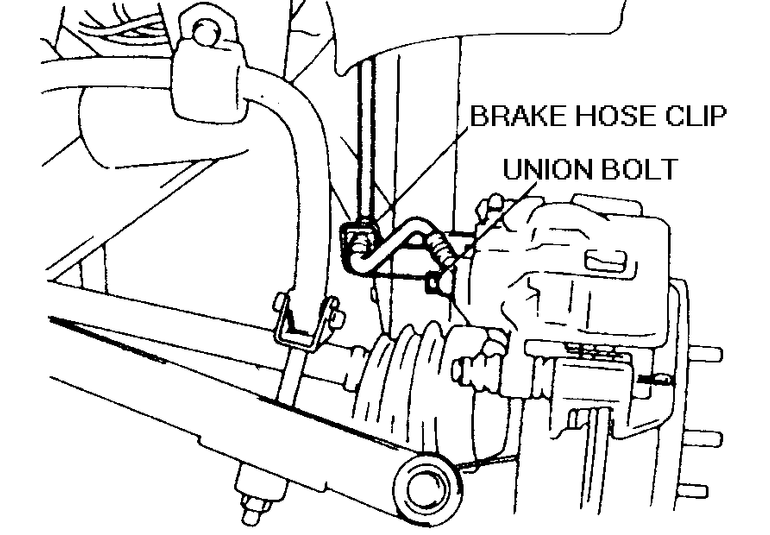
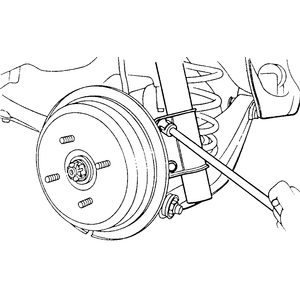
| Fig. 11: Brake hose retainer points on the strut assembly
|
| Fig. 12: Rear strut lower retainer bolts

|
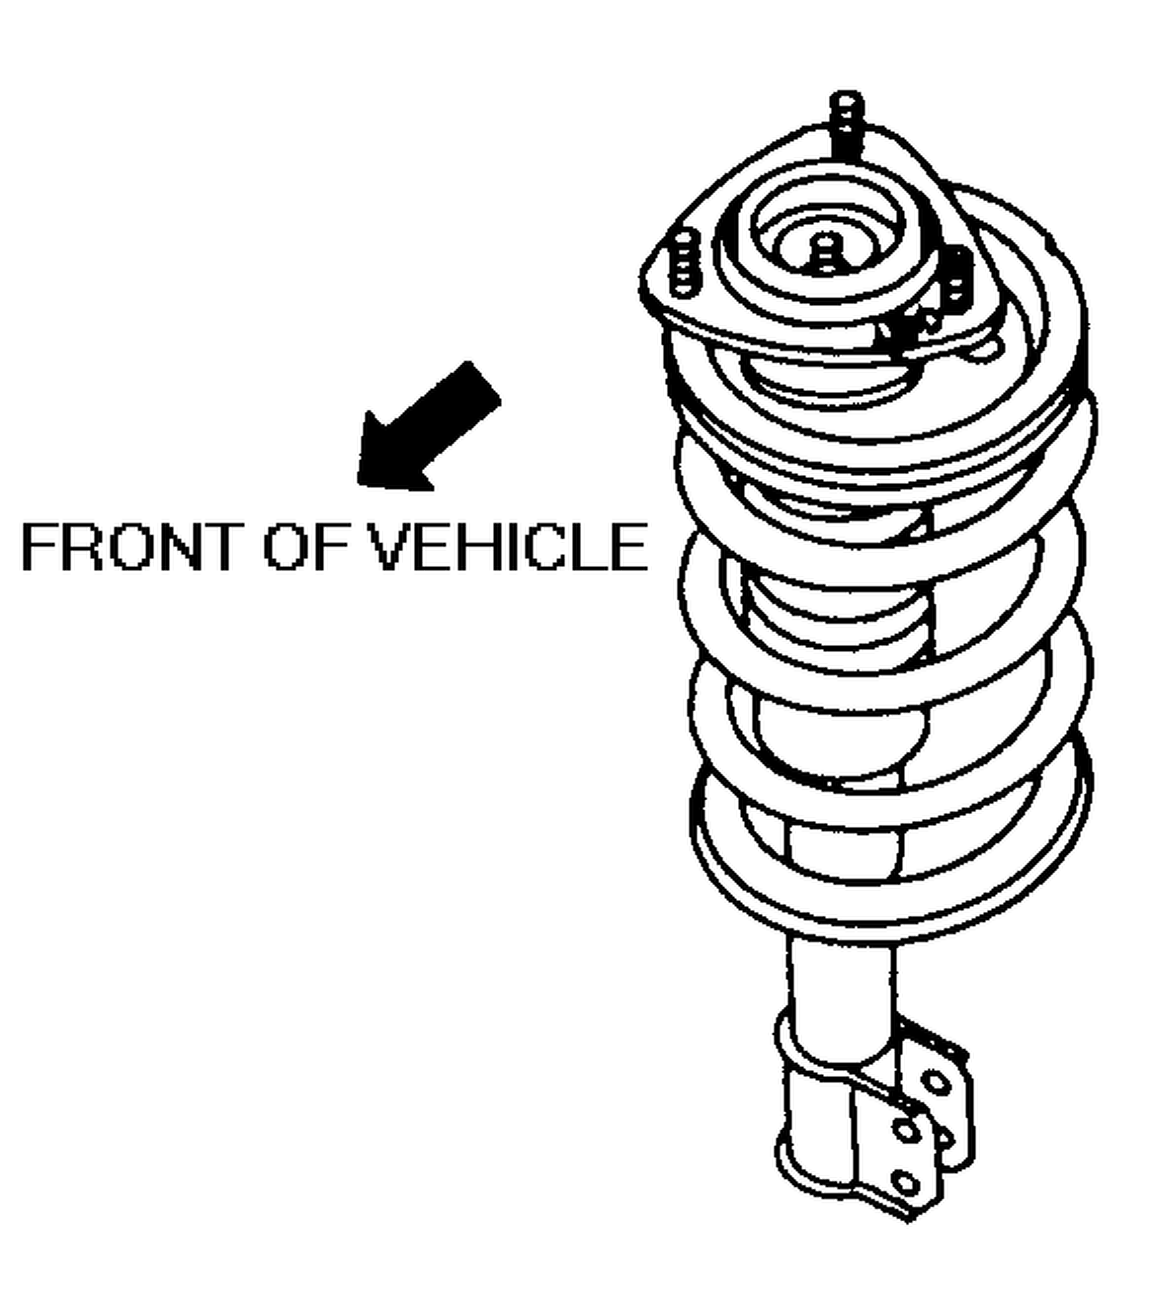
| Fig. 13: Proper rear strut placement. Notice the position
of the coil
|
CAUTION
Do not remove the large nut on top of the strut assembly unless the coil spring
is properly retained with a spring compressor.
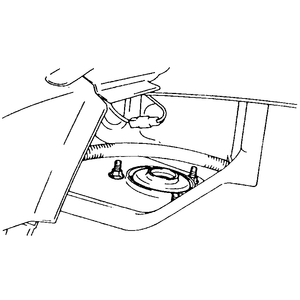
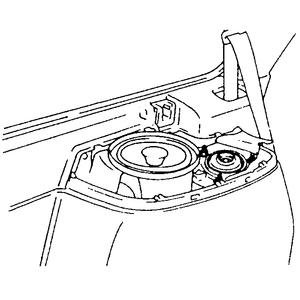
- On the Sedan, remove the rear seat assembly.
- On the Wagon, remove the rear speaker grille and service hole cap.
- Remove the strut mount cap.
- Raise and support the vehicle safely on jackstands.
- Remove the wheel and tire assembly.
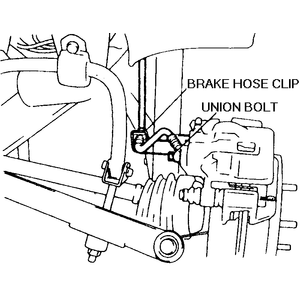
- Remove the brake hose clip.
- Remove the union bolt from the brake caliper. Move the brake hose out of
the way.
- Remove the lower nuts and bolts securing the strut to the rear wheel housing.
- From inside the vehicle, loosen and remove the retainer nuts securing the
strut bearing cap to the strut tower.
- Lower and remove the strut from the vehicle.
- Installation is the reverse of removal. Install the strut on to the vehicle,
making sure to position the strut properly in the upper strut tower mounts.
Refer to the illustration if needed. Install the retainer nuts, and tighten
to 11 ft. lbs. (15 Nm).
- Secure the strut to the rear wheel knuckle and tighten the bolts to 145
ft. lbs. (196 Nm). Tighten the brake union bolt to 13 ft. lbs. (18 Nm).
- Bleed the brakes.
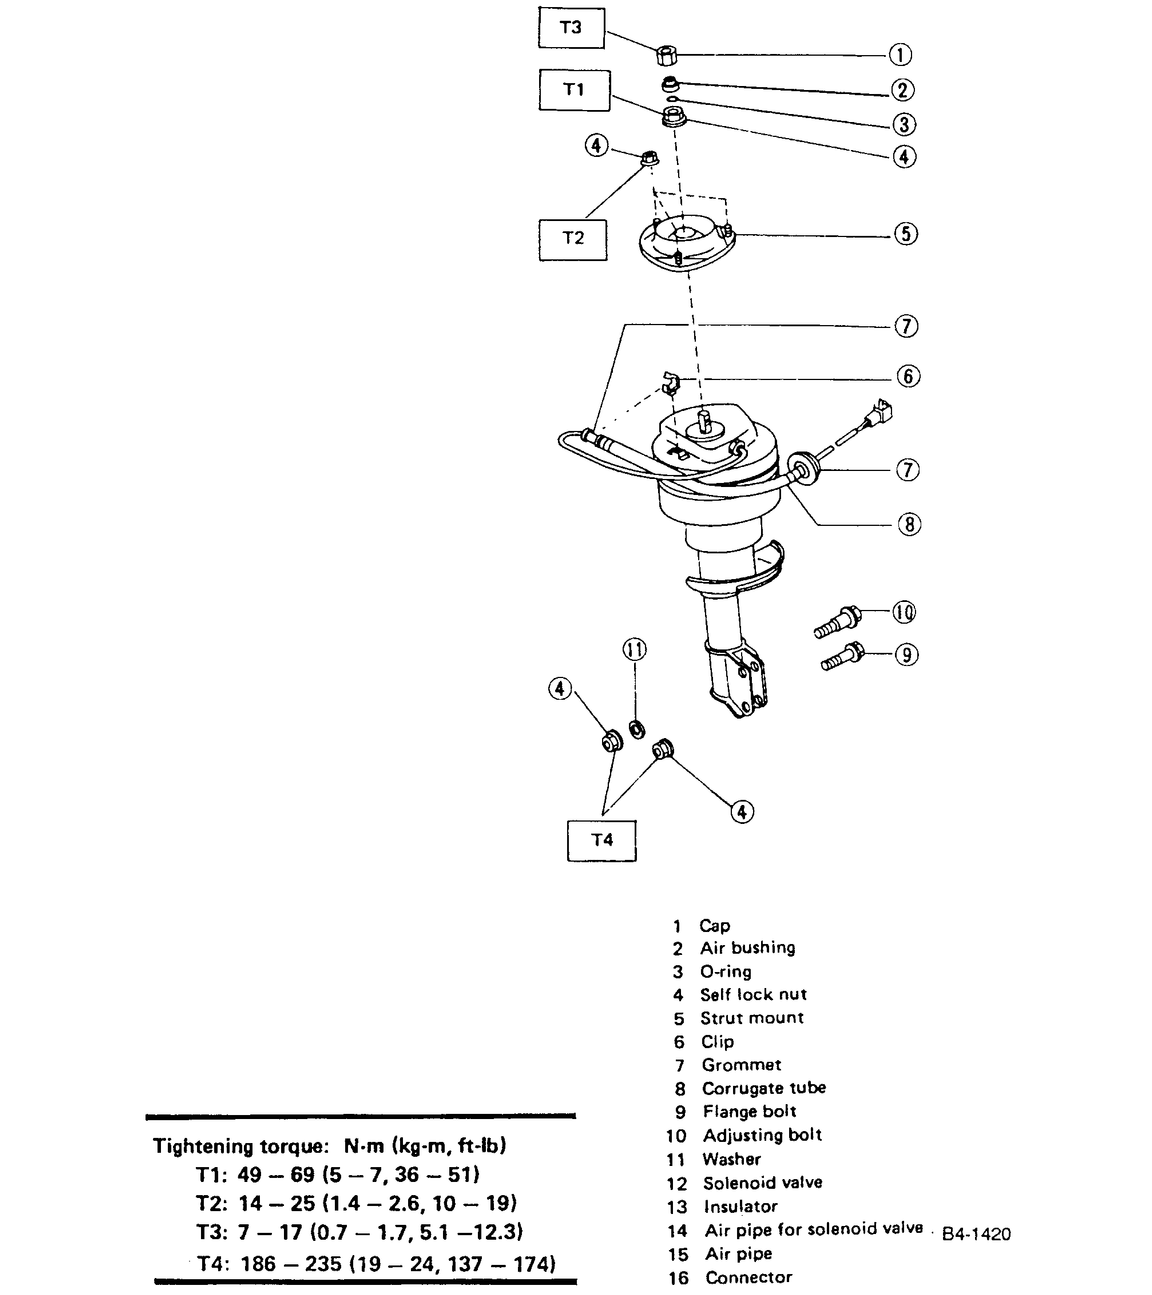
| Fig. 14: Rear pneumatic strut assembly — Legacy
and Impreza
|
- Disconnect the negative battery cable.
- On the Sedan, remove the rear seat assembly.
- On the Wagon, remove the rear speaker grille and service hole cap.
- Remove the strut mount cap.
- Disconnect the air line from the top of the strut assembly.
- Disconnect the height sensor and solenoid valve wire harnesses from the
strut assembly.
- Raise and support the vehicle safely on jackstands.
- Remove the wheel and tire assembly.
- Remove the brake hose clip.
- Remove the union bolt from the brake caliper. Move the brake hose out of
the way.
- Remove the lower nuts and bolts securing the strut to the rear wheel housing.
- From inside the vehicle, loosen and remove the retainer nuts securing the
strut bearing cap to the strut tower.
- Lower and remove the strut from the vehicle. To install:
- Install the strut on to the vehicle, making sure to position the strut properly
in the upper strut tower mounts. Refer to the illustration if needed. Install
the retainer nuts, and tighten to 11 ft. lbs. (15 Nm).
- Connect the strut to the rear wheel knuckle assembly, using the retainer
nuts and bolts, and tighten the bolts to 145 ft. lbs. (196 Nm).
- Install the brake union bolt, and tighten to 13 ft. lbs. (18 Nm). Insert
the brake hose clip.
- Bleed the brakes. Install all remaining components.
- Start the vehicle, and allow enough time for the shock to pressurize before
driving the vehicle.
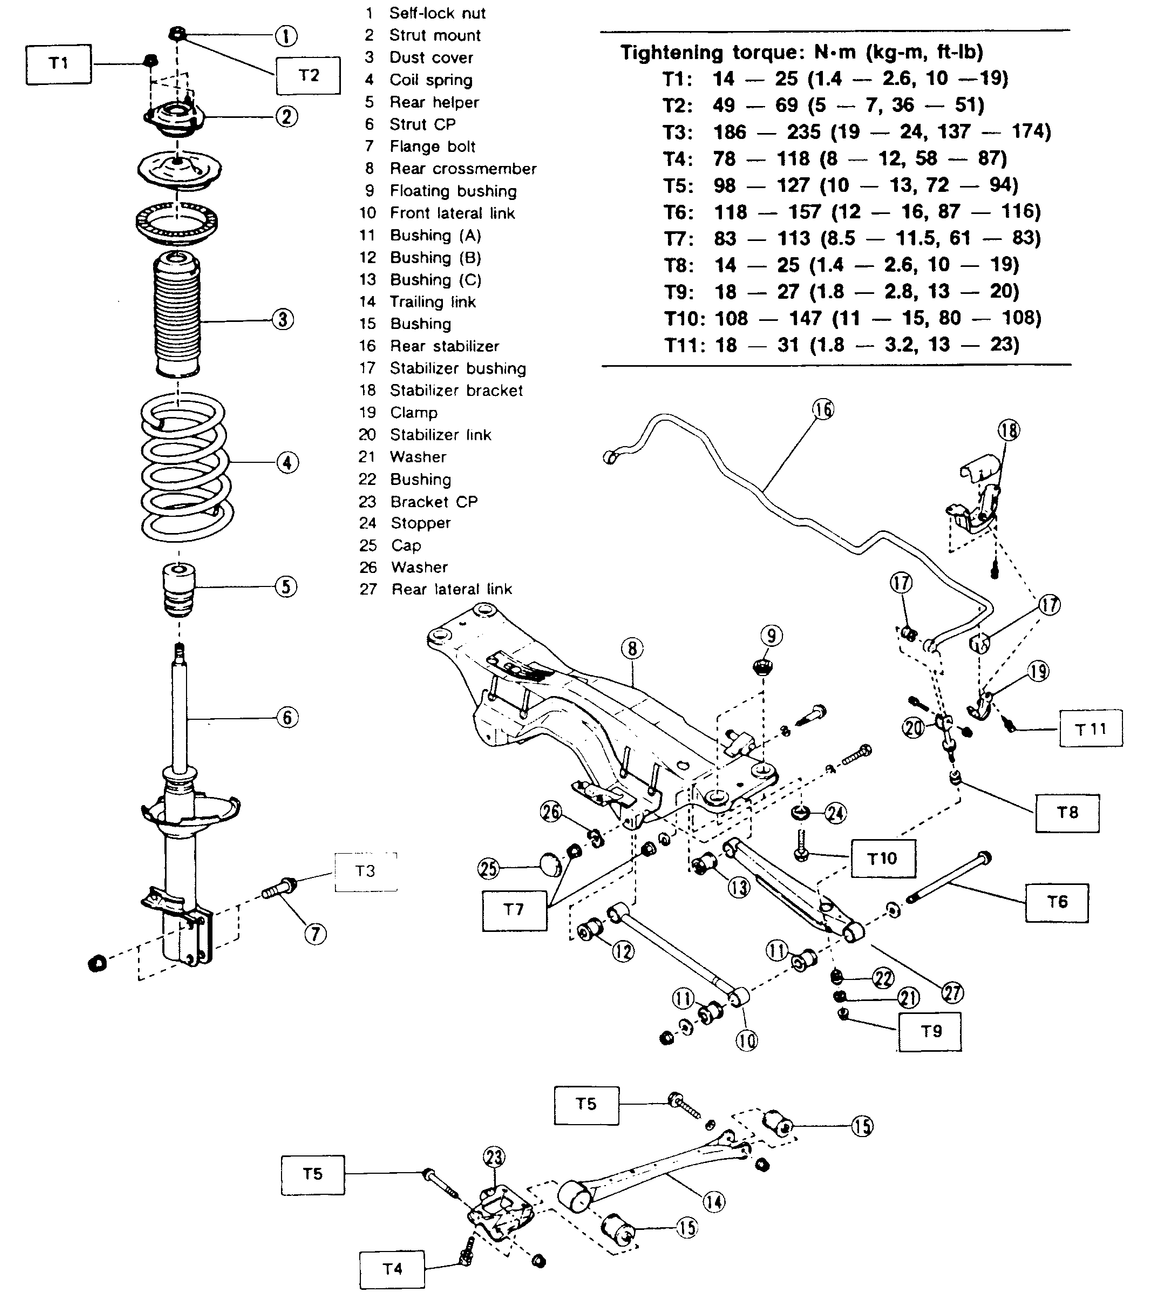
| Fig. 15: Rear strut and suspension assembly — SVX
sedan
|
| Fig. 16: Disassembled rear strut and suspension assembly — SVX
|
| Fig. 17: Proper strut placement. Notice the word "out''
written on the upper spring plate
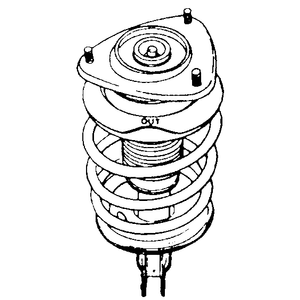
|
- Raise and safely support the vehicle on jackstands.
- Remove the tire and wheel assembly.
- Remove the rear quarter interior trim panel.
- Remove the bolt securing the brake hose bracket to the strut and position
the bracket out of the way.
- Remove the knuckle-to-strut mounting nuts and remove the lower bolt. Leave
the upper bolt in place.
- Support the rear knuckle assembly with a suitable jack.
- Remove the three upper strut plate mounting nuts.
- Lower the jack about and inch and remove the upper mounting bolt from the
knuckle assembly.
- Remove the strut from the vehicle.
To install:
- Install the strut in the vehicle and install the three upper mounting nuts.
Tighten the nuts to 13 ft. lbs. (18 Nm).
- Raise the jack to line up the knuckle with the strut bracket, and install
the mounting bolts and nuts. Tighten the mounting nuts to 112 ft. lbs. (152
Nm).
- Install all remaining components then check the alignment and adjust as
necessary.