Previous Next

OVERHAUL

Justy

Because of the design of the Justy strut assembly, the strut on this vehicle cannot be disassembled and overhauled. If the strut fails, the entire strut must be removed and replaced.

Except Justy

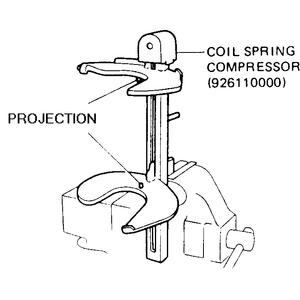
Fig. 1: Example of a spring compressor tool. This tool is secured in a vise, and the strut assembly is attached to it — Sedan, Coupe, Loyale, XT, Wagon and Brat

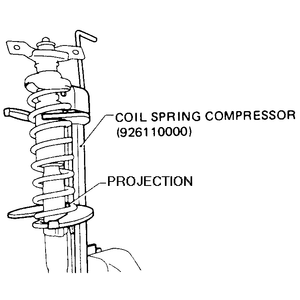
Fig. 2: Compressing the coil spring

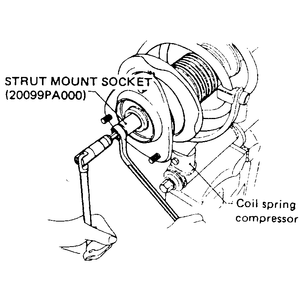
Fig. 3: With the spring compressed, remove the upper strut mounting nut

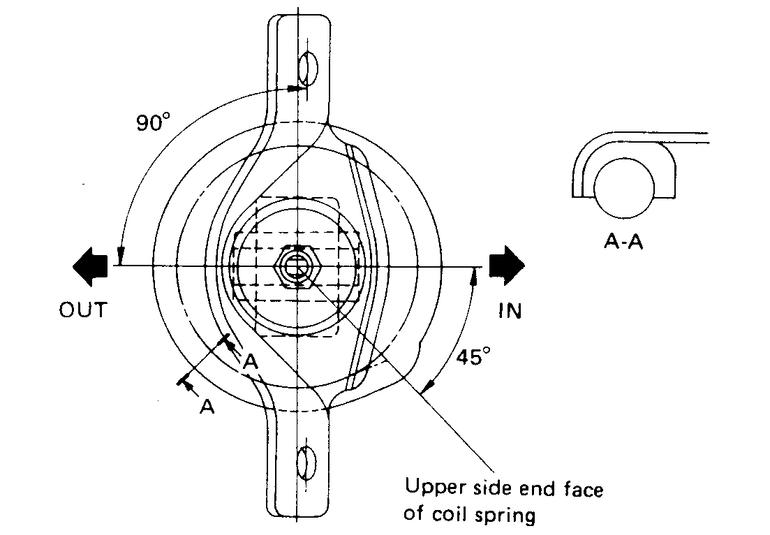
Fig. 4: Proper upper mount placement

CAUTION
Do not remove the large nut on top of the strut assembly unless the coil spring is properly retained with a spring compressor.

  1. Remove the strut assembly from the vehicle and secure in a soft jawed vise.
  2. Compress the coil spring with a spring compressor until the upper spring seat can be turned by hand.
  3. Remove the self locking nut on the top of the strut assembly, then remove the upper spring seat.
  4. Remove the coil spring and compressor. If the spring is being replaced, slowly release the spring from the compressor and compress the new coil spring.

    To install:

  5. Place the proper end of the coil spring on the lower spring seat on the strut.

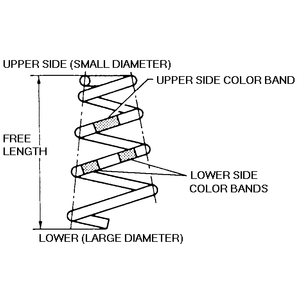
    Fig. 5: Proper coil spring placement — Legacy and Impreza

  6. Install the insulator, upper spring seat and strut mount on the strut piston. Install a new self locking nut. Tighten the nut to 43 ft. lbs. (59 Nm).
  7. Slowly release the spring compressor. Install the strut on to the vehicle.

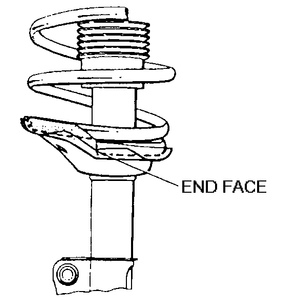
    Fig. 6: Proper spring placement in the lower spring plate

Previous Next