Fuel Tank Removal and Installation
Precautions: Precautions for Fuel System Service · General safety (00)
Before performing the following procedure, observe Precautions for Fuel System Service:M16A.
Removal
1)Relieve fuel pressure from fuel feed line. 
2)Disconnect negative (–) cable at battery.
3)Remove fuel filler cap.
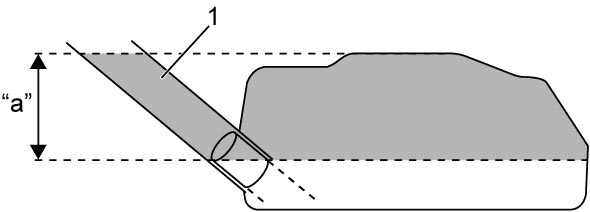
4)Insert hose of a hand operated pump into fuel filler hose (1) and pump out fuel in space “a” shown in figure.
 WARNING:

WARNING:
There is a risk of fire or explosion due to static electricity if the drained fuel is stored in an open container or plastic container.
Store the fuel in a sealed metal container.
NOTICE:
The hose of the hand operated pump could damage the fuel tank inlet valve if excessive force is applied when inserting or removing it from the fuel tank.
Do not apply excessive force when inserting or removing the hose of the hand operated pump.
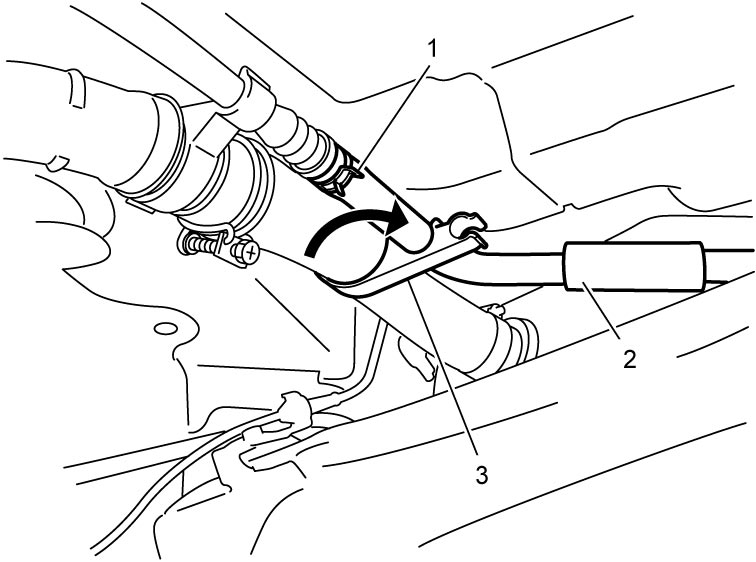
5)Hoist vehicle and remove clamp (1).
6)Remove breather hose (2) from fuel filler neck and turn plastic clamp (3).
NOTICE:
The plastic clamp could be damaged if excessive force is applied when turning it.
Turn plastic clamp carefully.
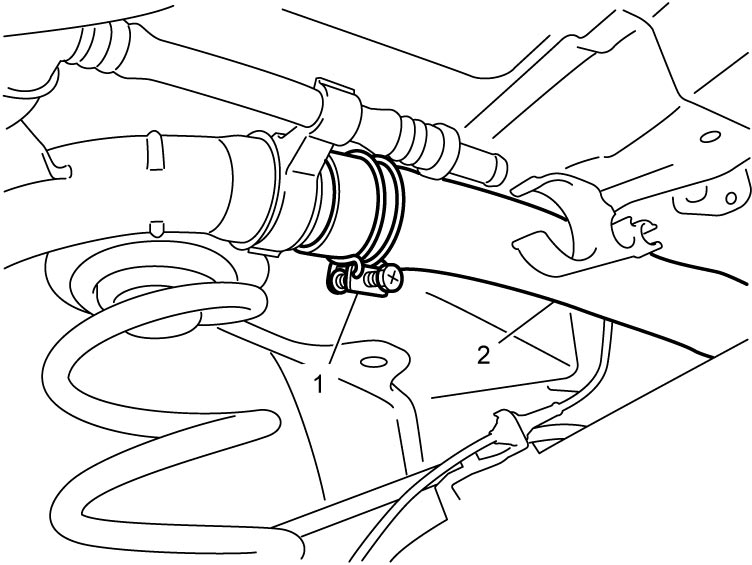
7)Remove clamp (1) and fuel filler hose (2) from fuel filler neck.
8)Remove exhaust center pipe.
9)For 4WD model, remove propeller shaft.
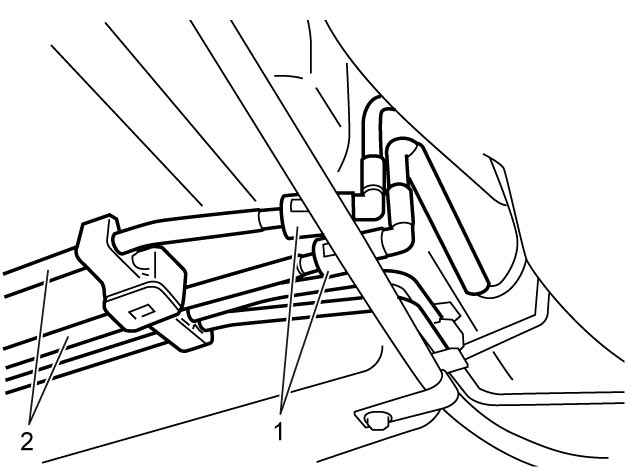
10)Disconnect quick joints (1) from fuel pipes (2).
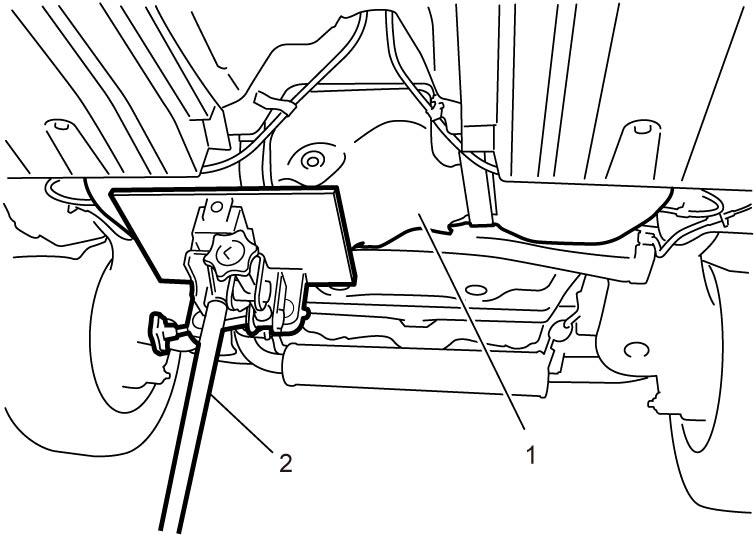
11)Support fuel tank (1) with jack (2) and remove its mounting bolts.
12)Lower fuel tank a little to disconnect fuel pump connector (1), and then remove fuel tank.
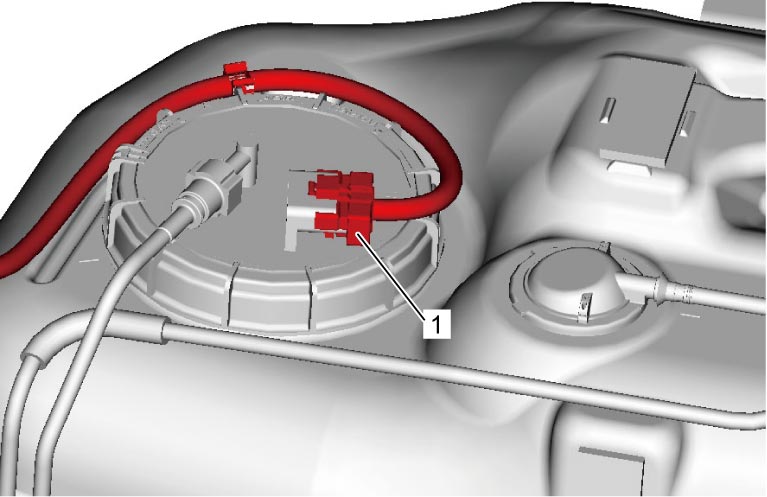
NOTICE:
Applying tension to the fuel pump harness will cause damage to the fuel pump and the fuel pump harness when lowering the fuel tank.
Disconnect the fuel pump connector with the fuel tank lowered to a height at which tension is not applied to the fuel pump harness.
Installation
WARNING:
Failure to take proper precautions when reinstalling the fuel tank connections can result in fuel leakage or damage.
Clean the outside surface of the pipe where each quick joint is to be installed, push the pipe into the joint until the joint lock clicks, and then check that the pipe is connected securely.
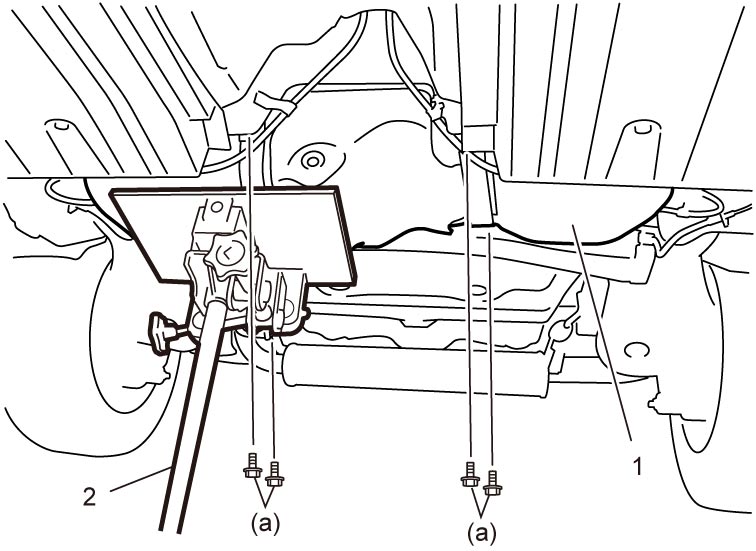
1)Raise fuel tank (1) with jack (2) and connect fuel pump connector and clamp wire harness.
2)Install fuel tank to vehicle and tighten new fuel tank bolts to specified torque.
NOTICE:
The fuel tank bolts are pre-coated with friction stabilizer. If the bolts are reused, they may work loose.
Use the new fuel tank bolts.
3)Connect fuel filler hose (2) to fuel filler neck and clamp (1) them securely.
For proper installation, refer to Fuel Hose Disconnection and Reconnection:M16A.
For proper installation, refer to Fuel Hose Disconnection and Reconnection:M16A.
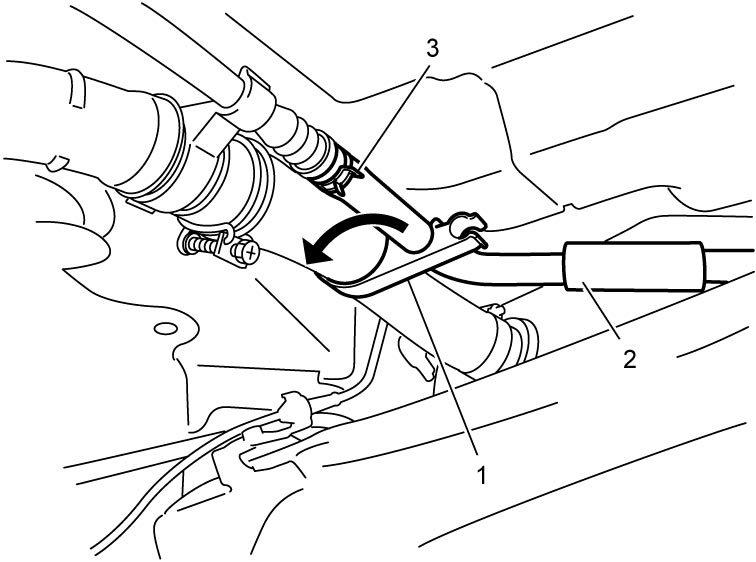
4)Turn plastic clamp (1).
NOTICE:
The plastic clamp could be damaged if excessive force is applied when turning it.
Turn plastic clamp carefully.
5)Connect breather hose (2) to fuel filler neck and clamp (3) them securely.
For proper installation, refer to Fuel Hose Disconnection and Reconnection:M16A.
For proper installation, refer to Fuel Hose Disconnection and Reconnection:M16A.
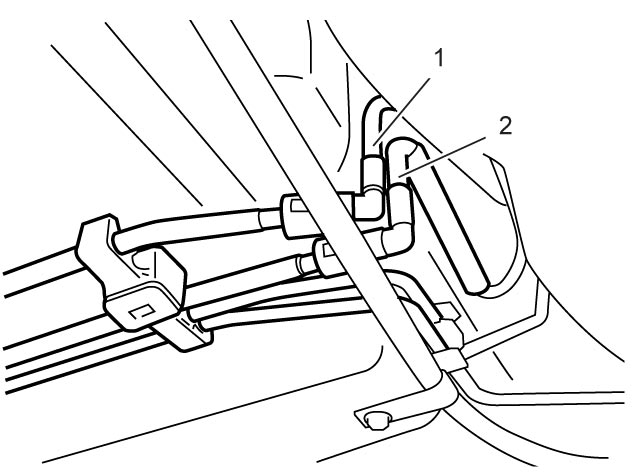
6)Connect fuel feed hose (1) and vapor hose (2) to each pipe as shown in figure, and clamp them securely.
7)For 4WD model, install propeller shaft.
8)Install exhaust center pipe.
9)Install fuel filler cap.
10)Connect negative (–) cable at battery.
11)With engine stopped, set ignition “ON” and check for fuel leakage.