Propeller Shaft Assembly Removal and Installation
Precautions: Precautions for Driveline / Axle · General safety (00)
Removal
1)Hoist vehicle.
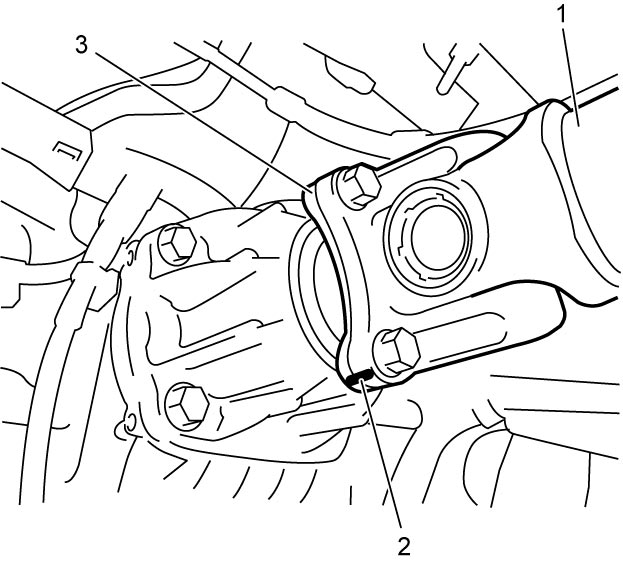
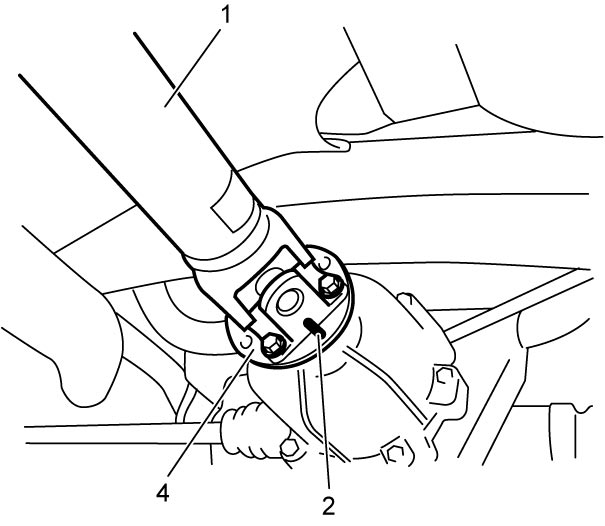
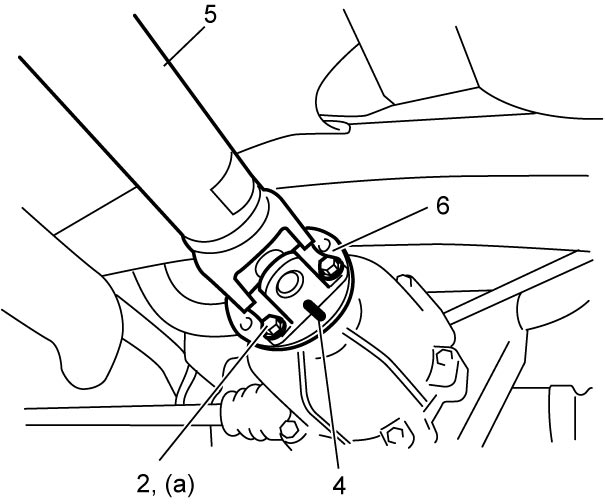
2)Give matchmarks (2) on joint flanges of propeller shaft, transfer and rear differential as shown.
3)Separate propeller shaft assembly (1) from transfer output flange (3) and rear differential flange (4).

4)Remove propeller shaft by removing center support nuts (1).
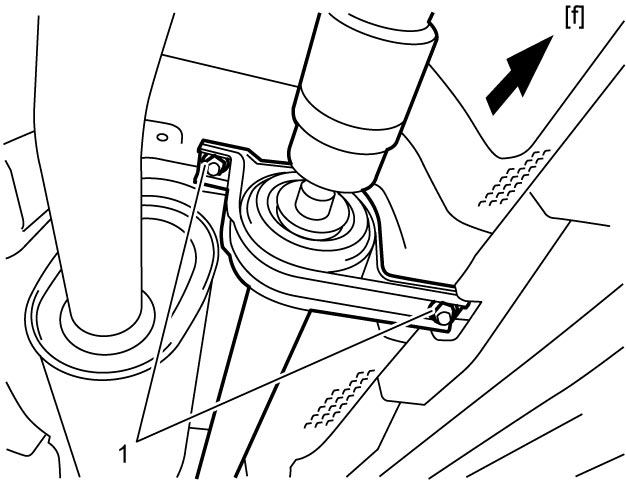
| [f]: | Vehicle front |
Installation
NOTICE:
The following bolts are pre-coated with adhesive. If these bolts are reused, they may work loose.
Replace the following bolts with new ones whenever they are removed.
•Propeller shaft front bolt
•Propeller shaft rear bolt
•Propeller shaft rear bolt
Reverse removal procedure noting the following points.
•Align matchmark (4) of each flange when installing propeller shaft.
•Temporarily tighten center support nuts, and then tighten propeller shaft new rear bolts (2) and new front bolts (1) to specified torque.
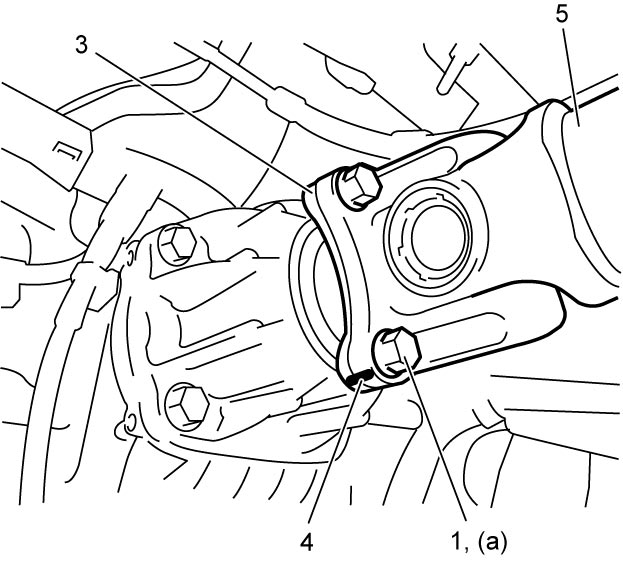
•Tighten center support nuts (1) to specified torque.
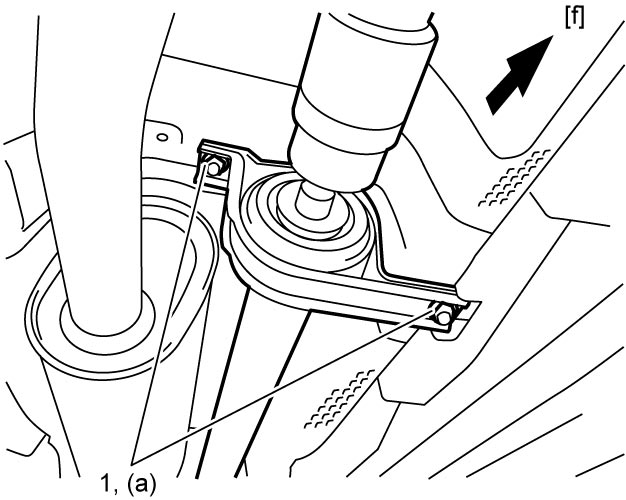
•Temporarily tighten center support nuts, and then tighten propeller shaft new rear bolts (2) and new front bolts (1) to specified torque.
Front
Rear
| 3. | Transfer output flange | 6. | Rear differential flange |
| 5. | Propeller shaft assembly |
| [f]: | Vehicle front |