Fuel Injector Removal and Installation
Precautions: Precautions for Fuel System Service · General safety (00)
Before performing the following procedure, observe Precautions for Fuel System Service:K14C.
Removal
1)Relieve fuel pressure. 
2)Disconnect negative (–) cable at battery.
3)Remove intake manifold.
4)Disconnect fuel injector connectors and fuel pressure sensor connector.
5)Remove high pressure pipe.
6)Remove fuel delivery pipe.
7)Remove fuel injectors.
If it is hard to remove, use special tool as follows.
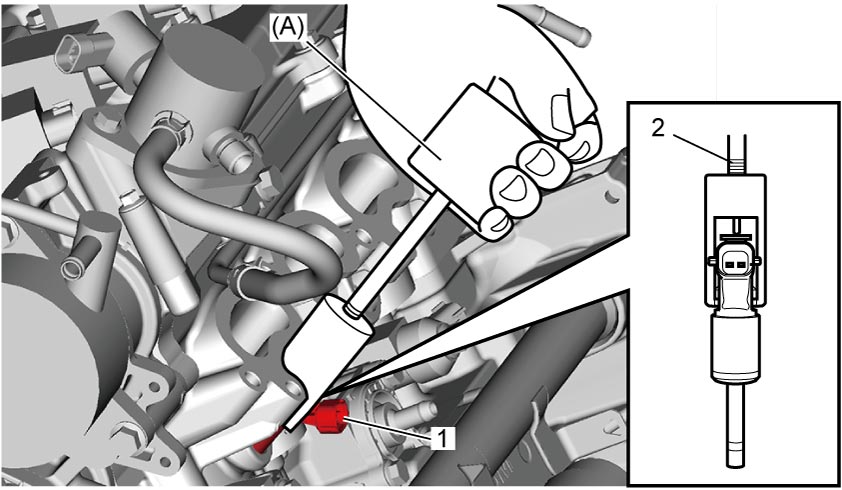

If it is hard to remove, use special tool as follows.
NOTICE:
Removal of fuel injector using special tool may damage the injector.
Replace the fuel injector removed by special tool with new one.
a)Set special tool (A) on fuel injector (1) and fix it tightening bolt (2) by hand.
b)Giving impact to fuel injector with special tool, pull it out of cylinder head.
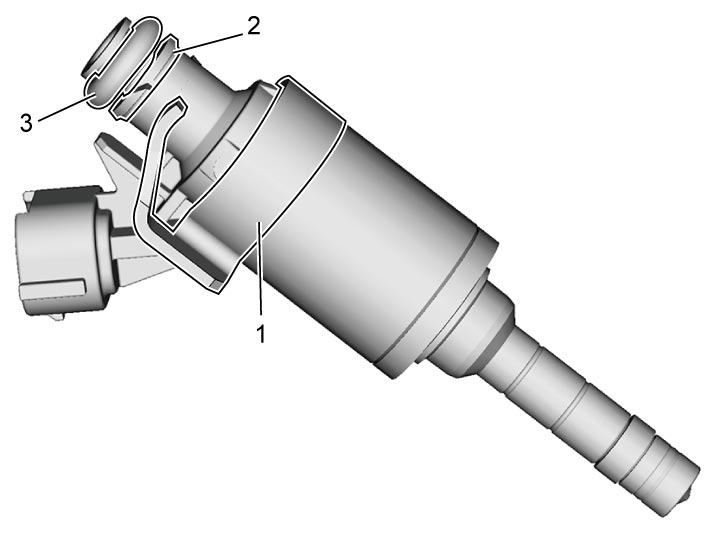
8)Remove fuel injector clip (1), O-ring (2) and back up ring (3) from fuel injector.
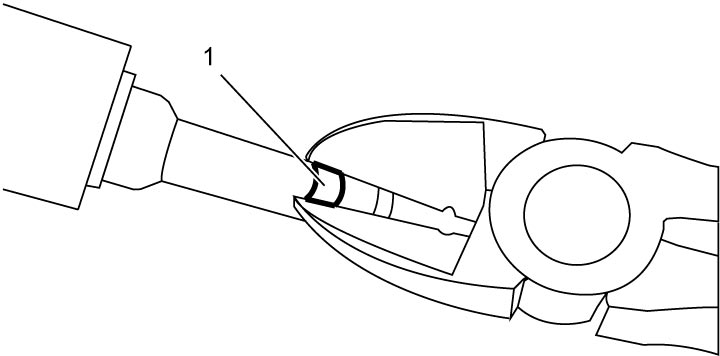
9)Using nippers, cut seal ring (1) and remove it. Take special care not to damage fuel injector surface.
Installation
NOTICE:
Failure to take the following precautions may cause leakage of high pressure fuel.
•Removed fuel injector using special tool could be damaged. Do not reuse such injector.
•Replace O-ring in clean condition.
•To avoid damaging injector, do not use metal tool for removal of O-ring.
•Check injector groove for cleanliness before fitting O-ring.
•Fit new O-ring with a minimum stretch.
•Do not reuse O-ring once removed.
•After fitting O-ring, check for proper seating and cleanliness.
•Replace O-ring in clean condition.
•To avoid damaging injector, do not use metal tool for removal of O-ring.
•Check injector groove for cleanliness before fitting O-ring.
•Fit new O-ring with a minimum stretch.
•Do not reuse O-ring once removed.
•After fitting O-ring, check for proper seating and cleanliness.
NOTE:
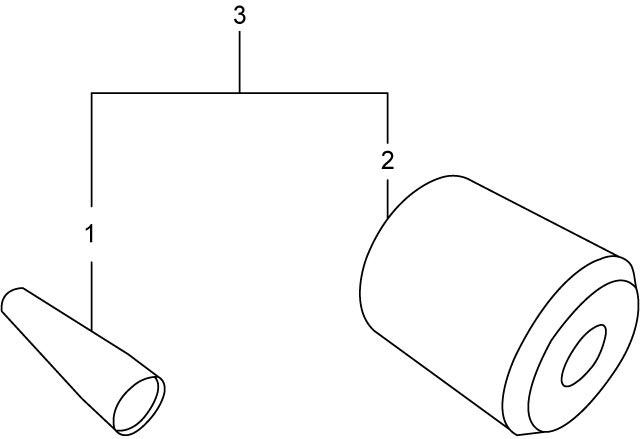
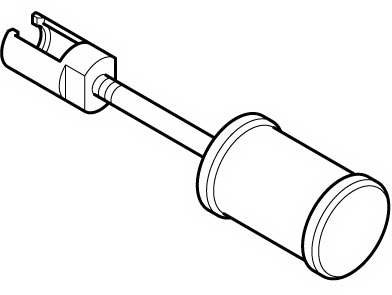
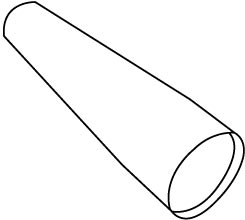
Injector seal ring installation tools are handled in Suzuki and Bosch as following table.
| Suzuki special tool number | Bosch tool number | |
|---|---|---|
| Tool A (1) | 09912-97140 | 0 986 616 098 |
| Tool B (2) | 09912-97130 | 0 986 616 099 |
| Tool kit (3) | Not available | 0 986 616 097 |
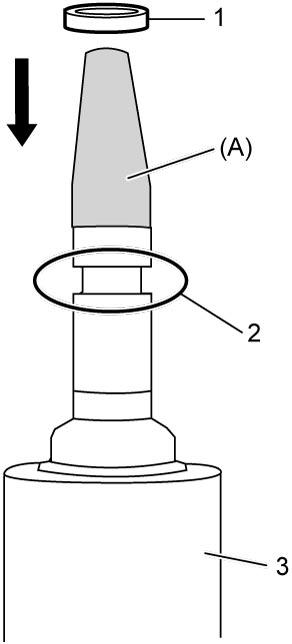
1)Using special tools, set fuel injector seal ring as follows.
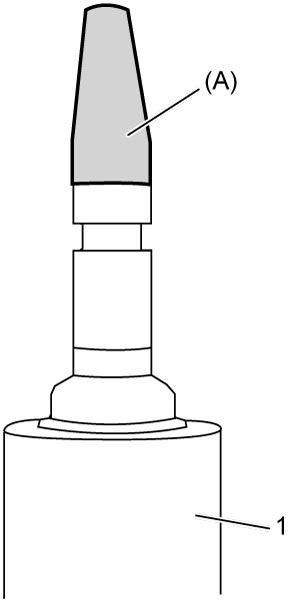
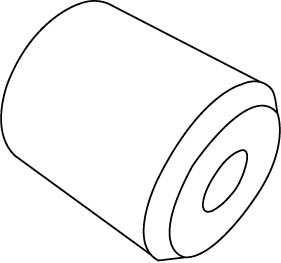
b)Fit new seal ring (1) into groove (2) through tool (A).
| 3. | Fuel injector |
c)Remove special tool (A) and place special tool (B) with chamfered side down onto injector and then depress the tool up to the position shown in figure.
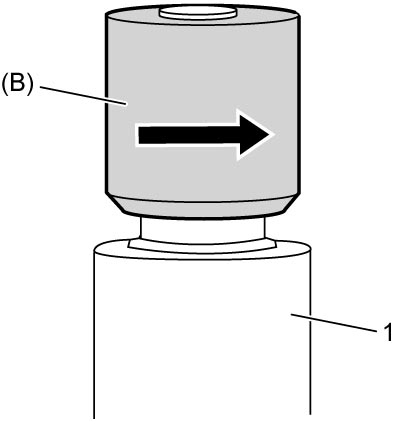
d)Turn special tool (B) 180° in arrow direction and then reverse it to the starting position.
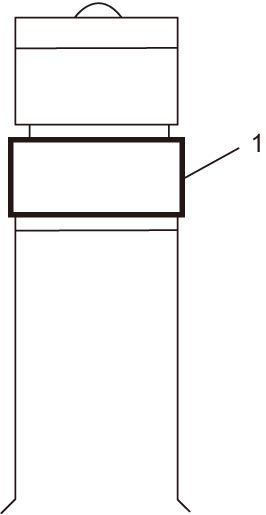
e)Remove special tool (B) and check seal ring (1) for seating conditions compared with standard positioning shown in figure. If misalignment, crack or collapse is found, replace seal ring with new one again.
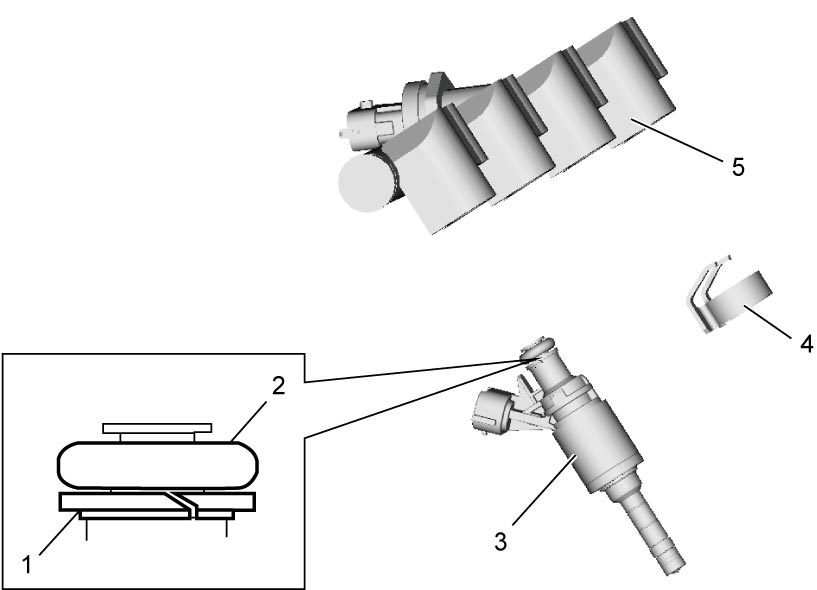
2)Fit new back up ring (1) and new O-ring (2) to fuel injector (3) noting the following points.
•Clean injector surface thoroughly.
•Face wide flat surface side of back up ring upward.
•Use full care not to damage O-ring.
•Face wide flat surface side of back up ring upward.
•Use full care not to damage O-ring.
3)Apply a bit of gasoline to O-ring.
4)Set new fuel injector clip (4).
5)Set fuel injectors to new fuel delivery pipe (5).
6)Install fuel delivery pipe with fuel injectors to cylinder head.
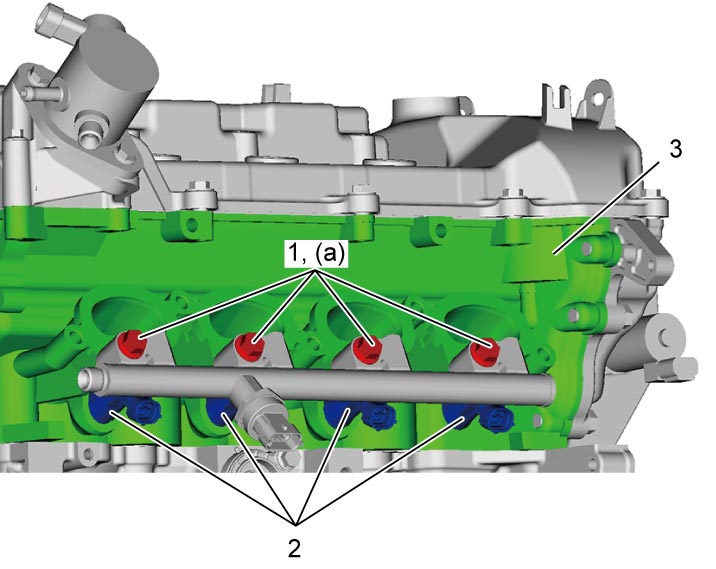
7)Tighten fuel delivery pipe bolts (1) as follows.
a)Tighten the bolts evenly and carefully until fuel injectors (2) are inserted in the holes of cylinder head (3) fully.
b)Tighten fuel delivery pipe bolts to specified torque.
NOTE:
•If reinstallation of injectors is necessary, replace each back up ring and O-ring with new one again.
•Check the state of each seal ring and replace it if any abnormality is found.
•Check the state of each seal ring and replace it if any abnormality is found.
8)Set fuel delivery pipe silencer to fuel delivery pipe.
9)Install new high pressure pipe.
10)Connect fuel injector connectors and fuel pressure sensor connector.
11)Install intake manifold.
12)Check for fuel leakage.