Fuel Injector Removal and Installation
Precautions: Precautions for Fuel System Service · General safety (00)
NOTE:
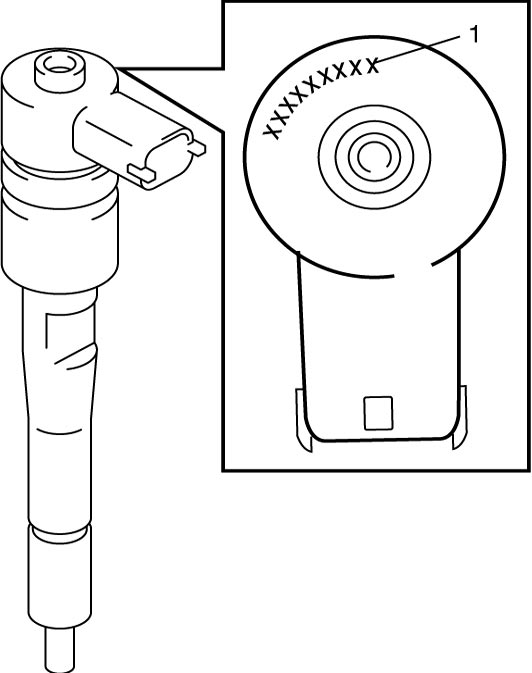

The calibration code (1) is given to each fuel injector, and it represents the performance characteristics of the fuel injector. It is registered in ECM, and ECM controls fuel injection according to the performance characteristics of the fuel injector.
Therefore, after removing fuel injectors, install them as they were. In case that the fuel injectors is replaced with new one, register each calibration code in ECM. For details, refer to Description of ECM Registration:D16AA. If it is not registered correctly, DTC is stored in ECM and MIL lights up.
Also calibration codes registration in ECM can be checked by SUZUKI scan tool.
Before performing the following procedure, observe Precautions for Fuel System Service:D16AA.
Removal
1)Disconnect negative (–) cable at battery.
2)Remove engine cover.
3)Remove high pressure pipes between fuel injectors and common rail. 
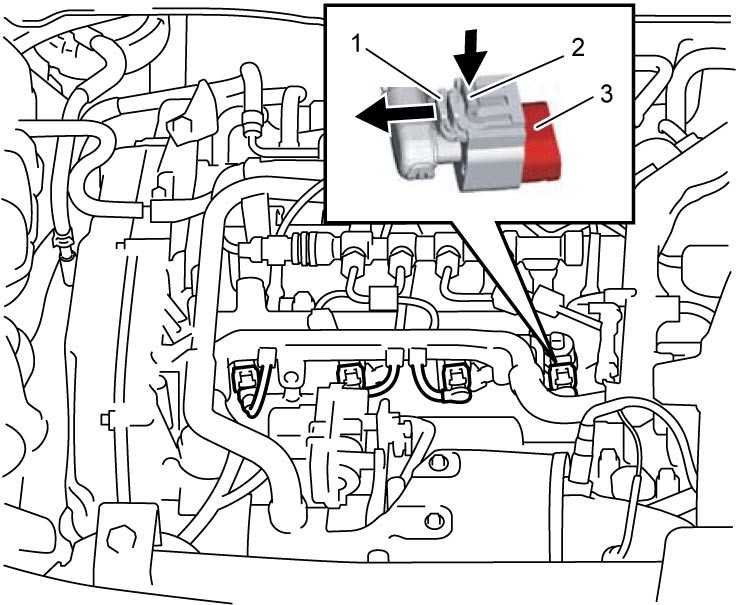
4)Disconnect connectors from fuel injectors as follows.
a)Move connector lock pin (1) in arrow direction as shown in figure.
b)Push connector lock lever (2) and disconnect connector from fuel injector (3).
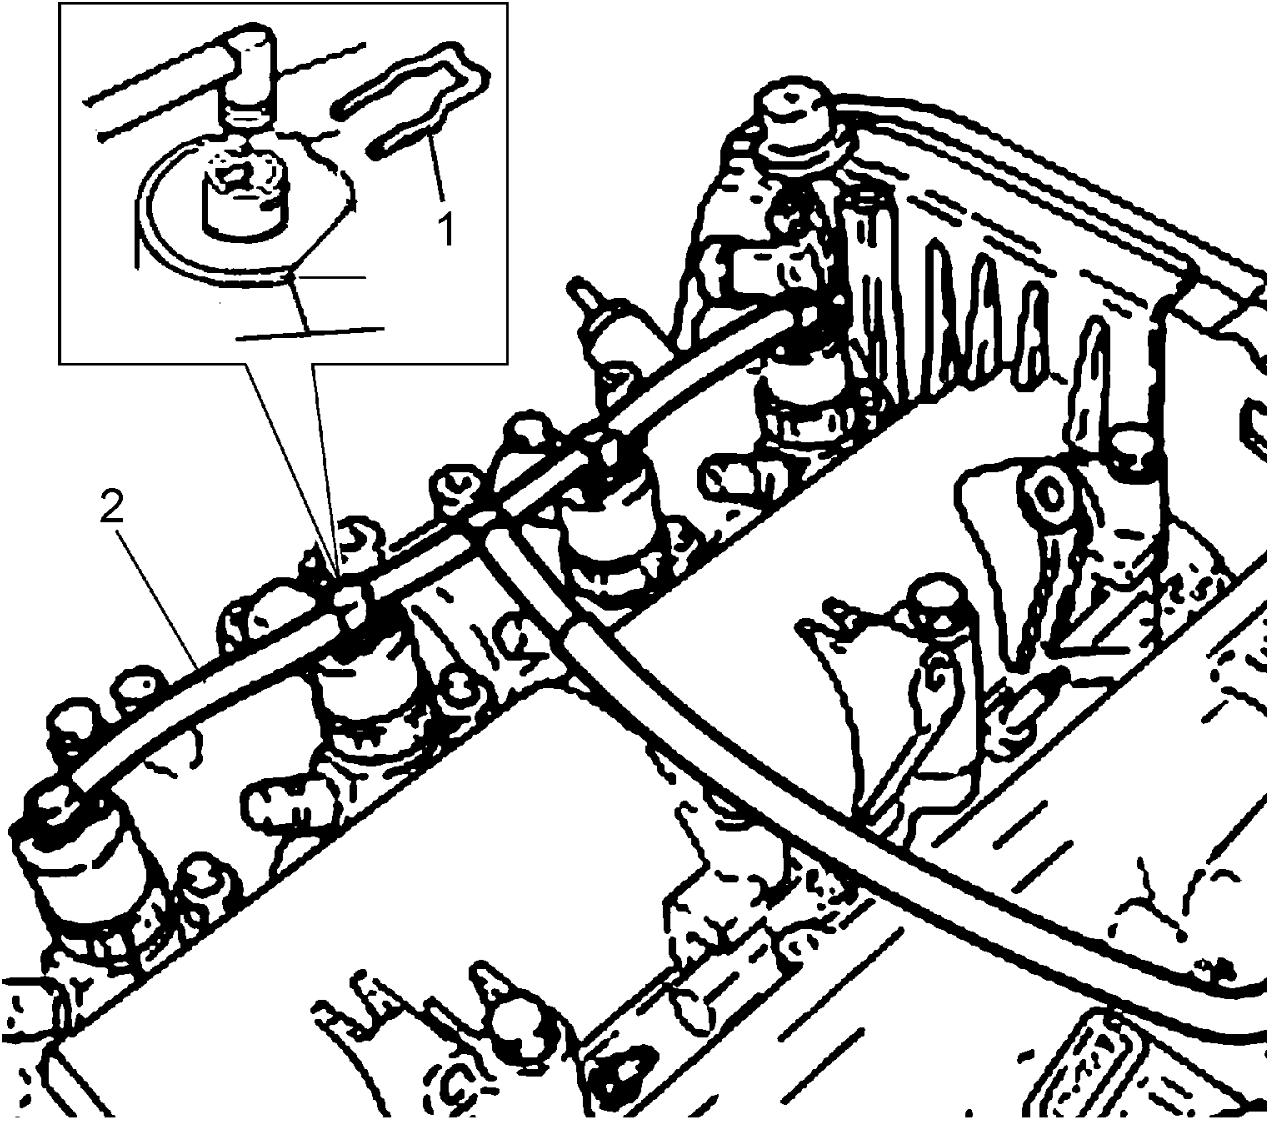
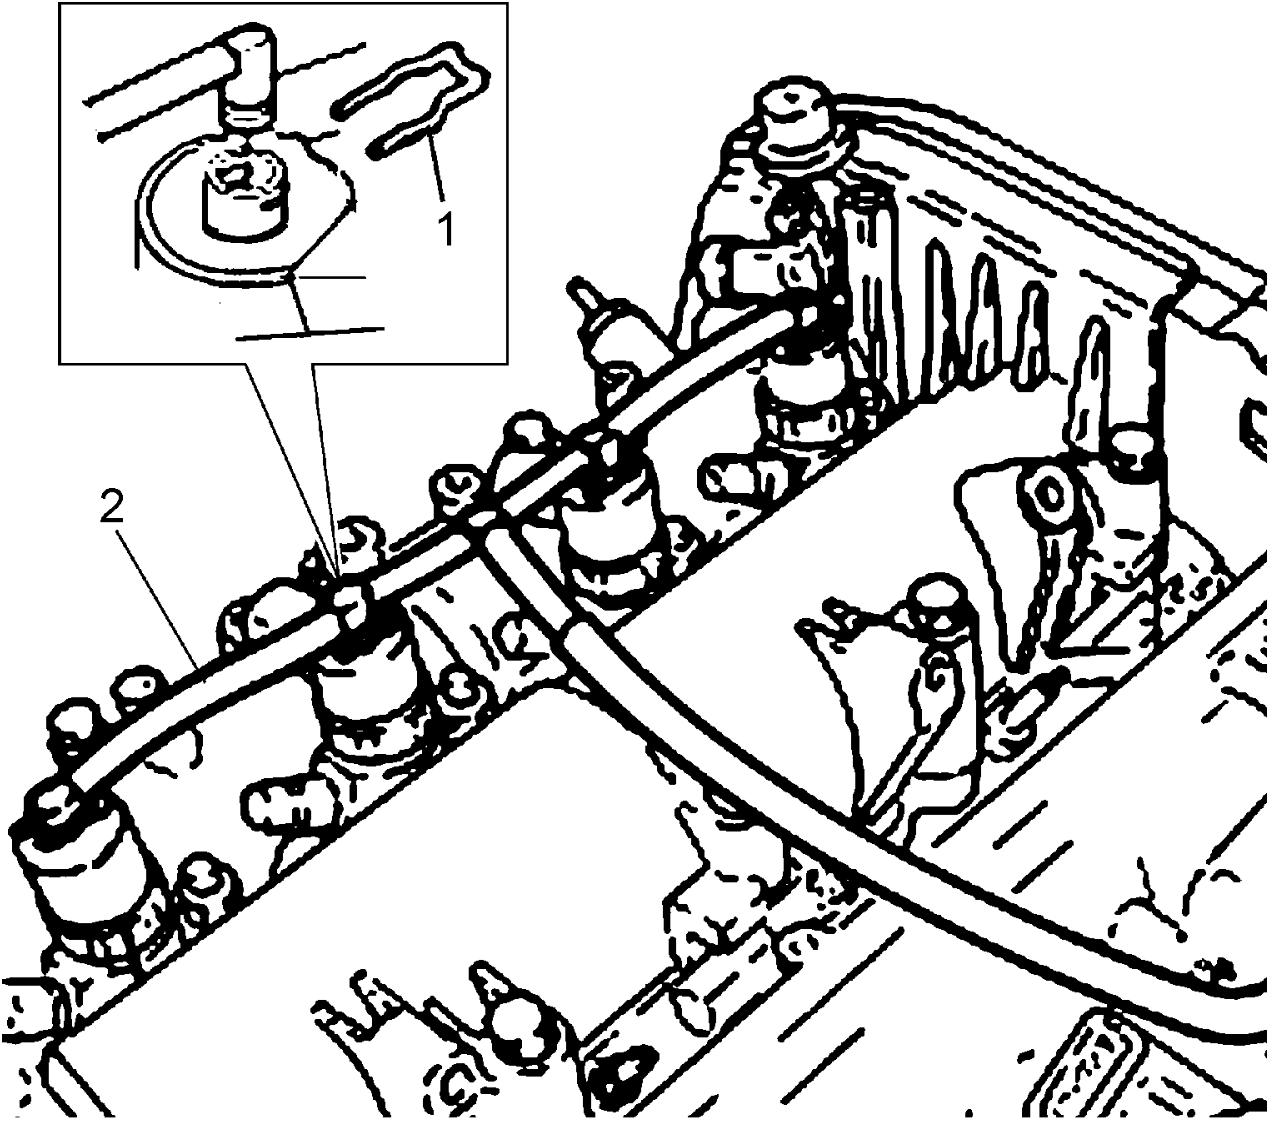
5)Remove clips (1), and then disconnect return hose (2) from fuel injectors.
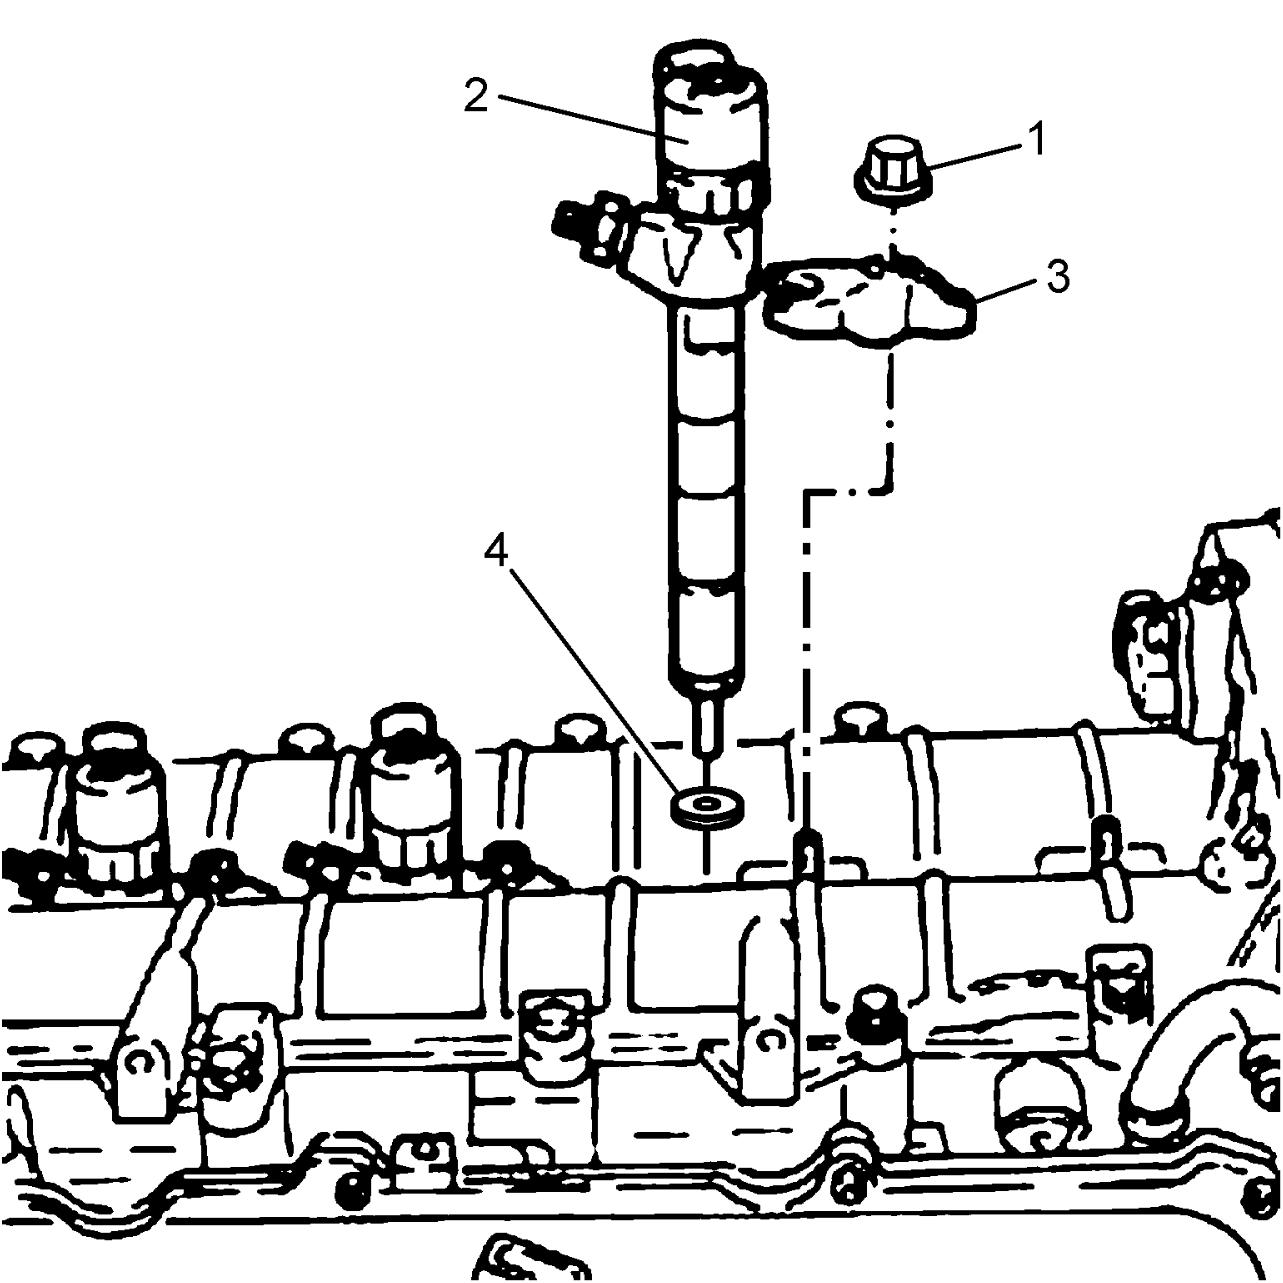
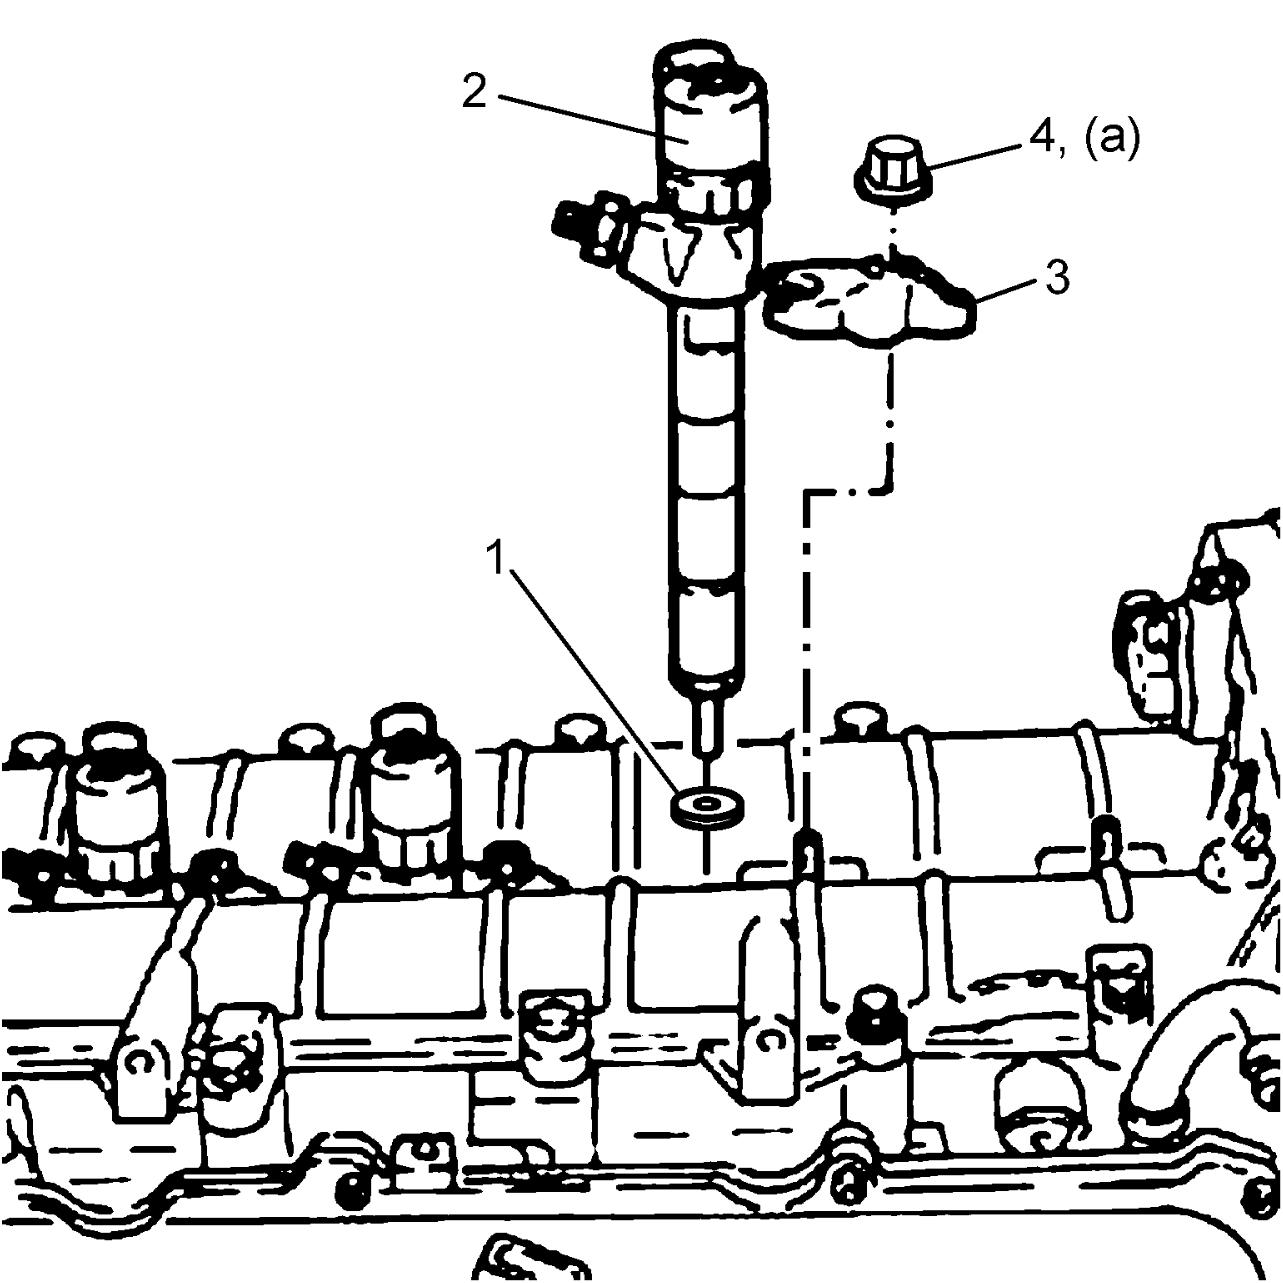
6)Remove fuel injector bracket nut (1).
7)Remove fuel injectors (2) with its bracket (3) from camshaft housing.
8)Remove gaskets (4) from camshaft housing.
 If fuel injector cannot be removed by hand, pull out fuel injector using special tools according to the following procedure.
NOTICE:
•Removal of fuel injector with special tools requires its partial disassembling and the injector will lose the original performance even though it is reassembled and reinstalled.
Do not reuse the fuel injector removed with special tools.
•When removing solenoid valve from injector, inner parts such as spring etc. may jump out and enter into engine through injector hole if other injector(s) is removed, and cause engine damage.
When removing solenoid valve from an injector, plug or cover other injector hole(s).
Do not reuse the fuel injector removed with special tools.
•When removing solenoid valve from injector, inner parts such as spring etc. may jump out and enter into engine through injector hole if other injector(s) is removed, and cause engine damage.
When removing solenoid valve from an injector, plug or cover other injector hole(s).
NOTE:
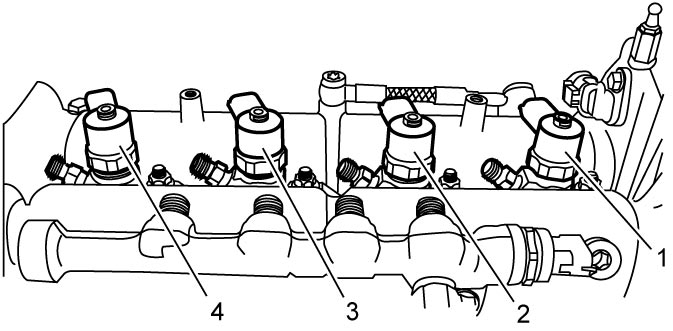
When removing injector No.2 – No.4, next injector interferes with removing injector bracket (No.1 interferes with No.2). Therefore, it is necessary to remove fuel injector No.1 first and then next fuel injector No.2 in numerical order.
| 1. | Fuel injector No.1 | 3. | Fuel injector No.3 |
| 2. | Fuel injector No.2 | 4. | Fuel injector No.4 |
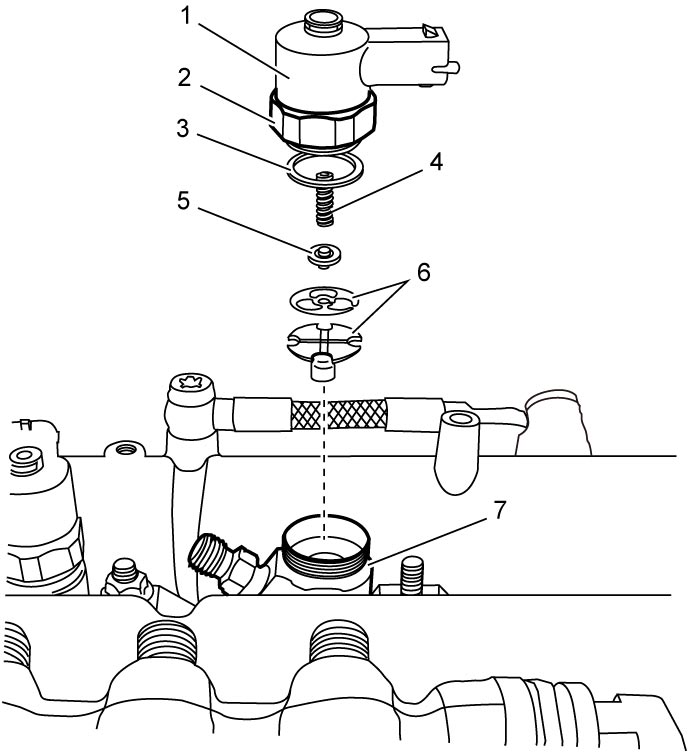
a)Remove solenoid valve (1) loosening mounting nut (2) and then remove washer (3), spring (4), valve (5) and check valve (6) from injector (7).
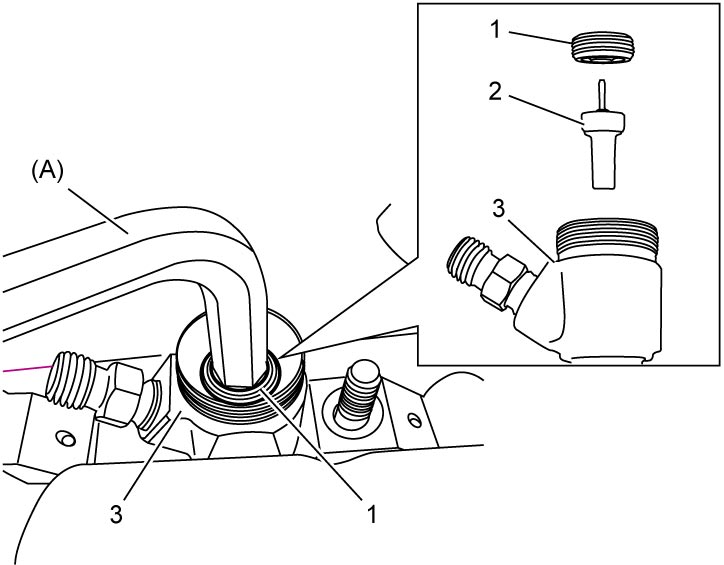
b)Remove nut (1) using special tool (A).
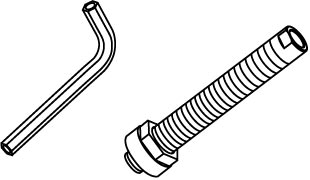
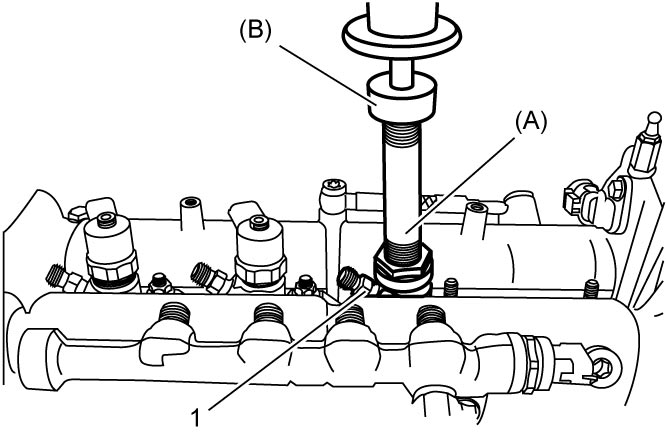
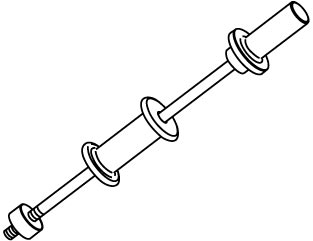
d)Pull out fuel injector (1) with its bracket from camshaft housing using special tools (A) and (B) as shown in figure.
NOTE:
After removing injector, check that gasket does not remain in the bottom of the injector hole.
Installation
1)Install new gasket (1) to fuel injectors (2).
2)Install fuel injectors and brackets (3) to camshaft housing.
3)Tighten fuel injector bracket nut (4) to specified torque.
4)Connect return hose (2) to fuel injectors, and then install clips (1) to fuel injectors.
5)Connect fuel injector connectors.
6)Install new high pressure pipes.
7)Install engine cover.
8)Connect negative (–) cable at battery.
9)Check for fuel leakage.
10)When replacing any one of injectors, register injector calibration code in ECM.