Rear Drive Shaft Assembly Removal and Installation
Precautions: General safety (00)
Removal
1)Hoist vehicle and remove rear wheel.
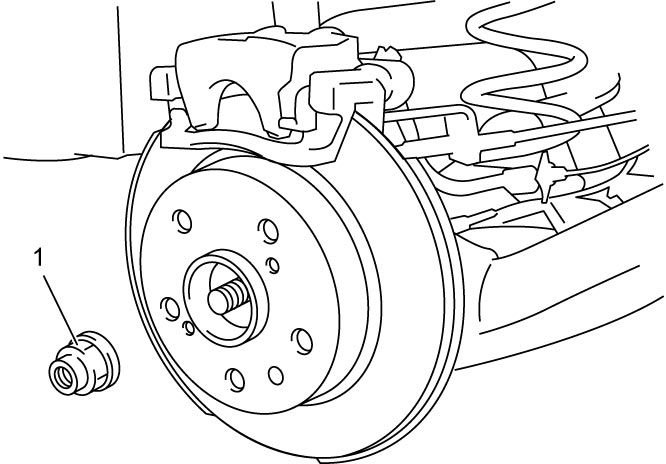
2)Release caulking from drive shaft nut (1) and remove drive shaft nut with brake pedal depressed.

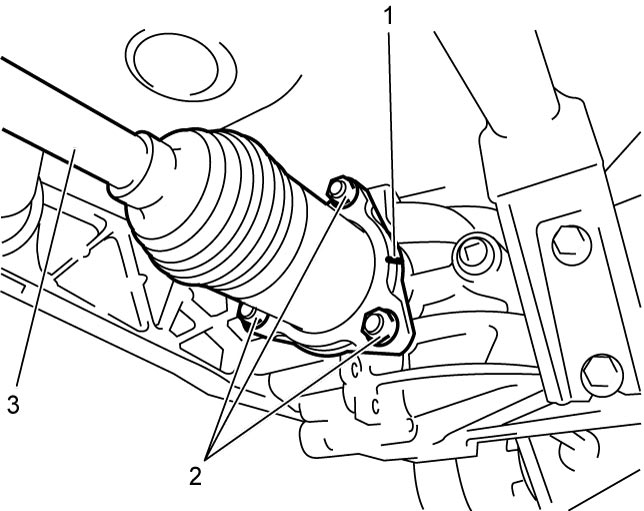
3)Give matchmark (1) on joint housing of rear drive shaft assembly and drive shaft flange of rear differential as shown.
4)Remove rear drive shaft flange nuts (2), and then remove rear drive shaft assembly (3).
Installation
Reverse removal procedure noting the following points.
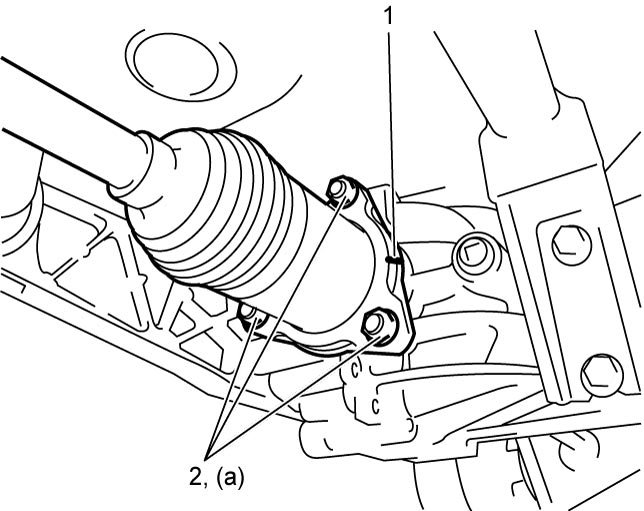
•Align matchmark (1) on joint housing of rear drive shaft assembly and drive shaft flange of rear differential.
•Temporarily tighten new drive shaft nut, and then tighten drive shaft flange nuts (2) to specified torque.
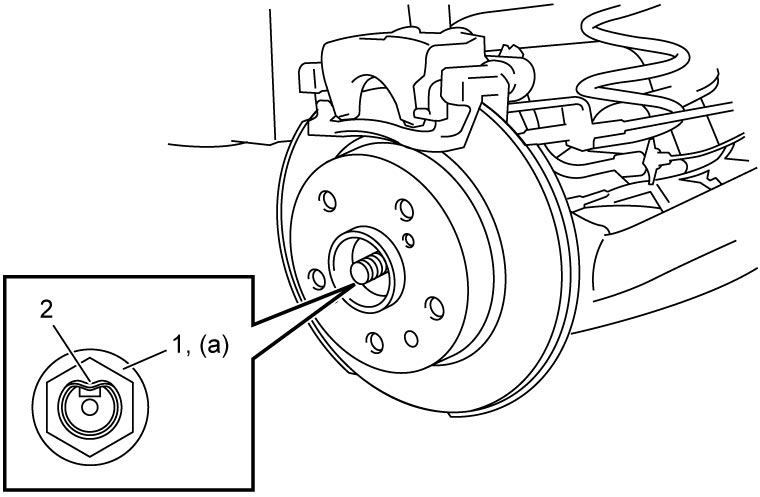
 •Tighten drive shaft nut (1) to specified torque.
•Caulk drive shaft nut (1) as shown.
•Temporarily tighten new drive shaft nut, and then tighten drive shaft flange nuts (2) to specified torque.
•Caulk drive shaft nut (1) as shown.
| 2. | Caulking part |
•Install rear wheel. 