Manual Transaxle Assembly Disassembly and Reassembly
Precautions: General safety (00)
Disassembly
1)Remove gear shift locating bolt (1), and then take out locating spring and steel ball.
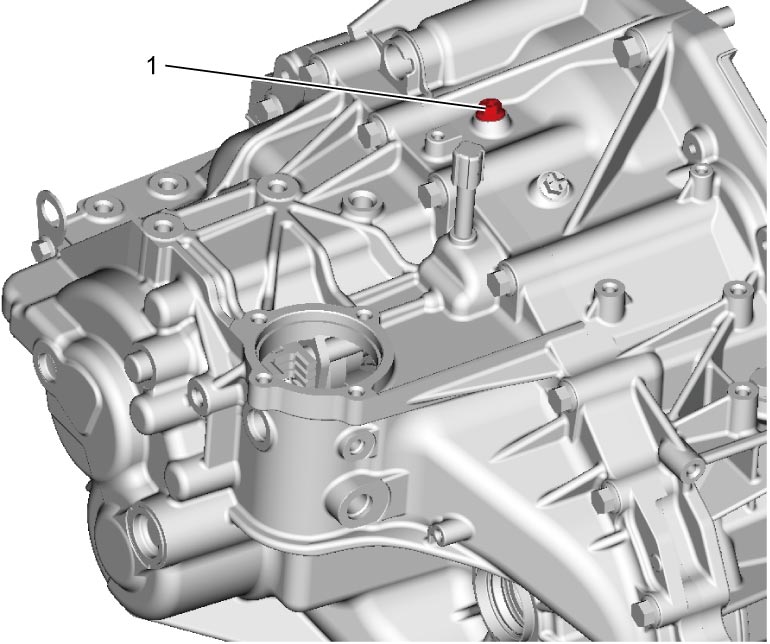

2)Remove transaxle case bolts.
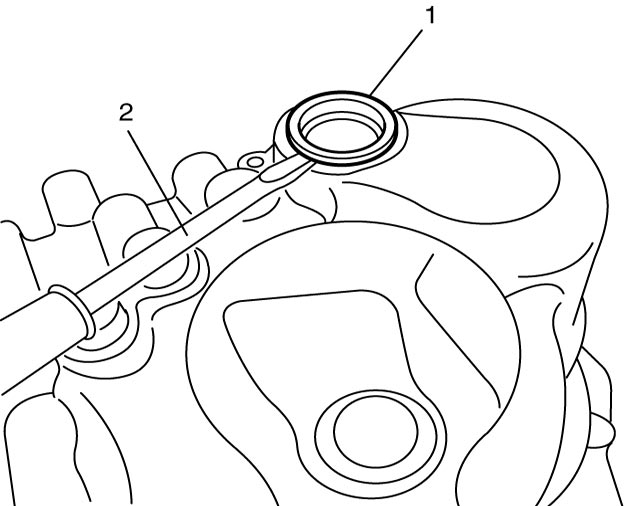
3)Remove hole cap (1) using flat-bladed screwdriver (2) or the like.
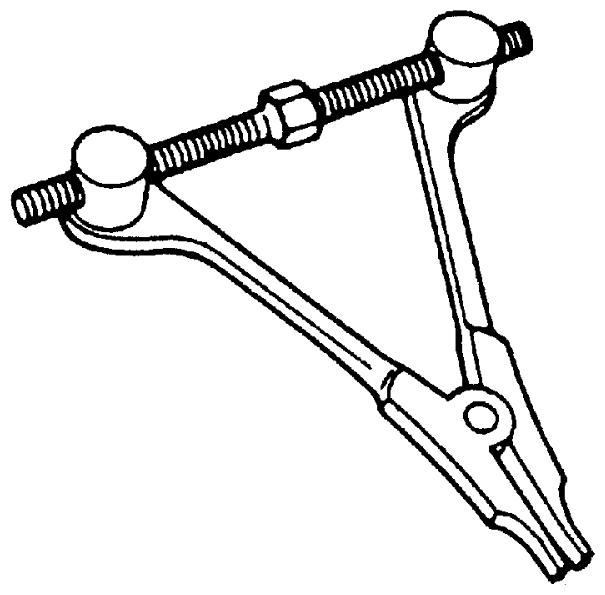
4)Open countershaft circlip (2) and remove transaxle left side case (1) from right case using special tool while opening circlip.
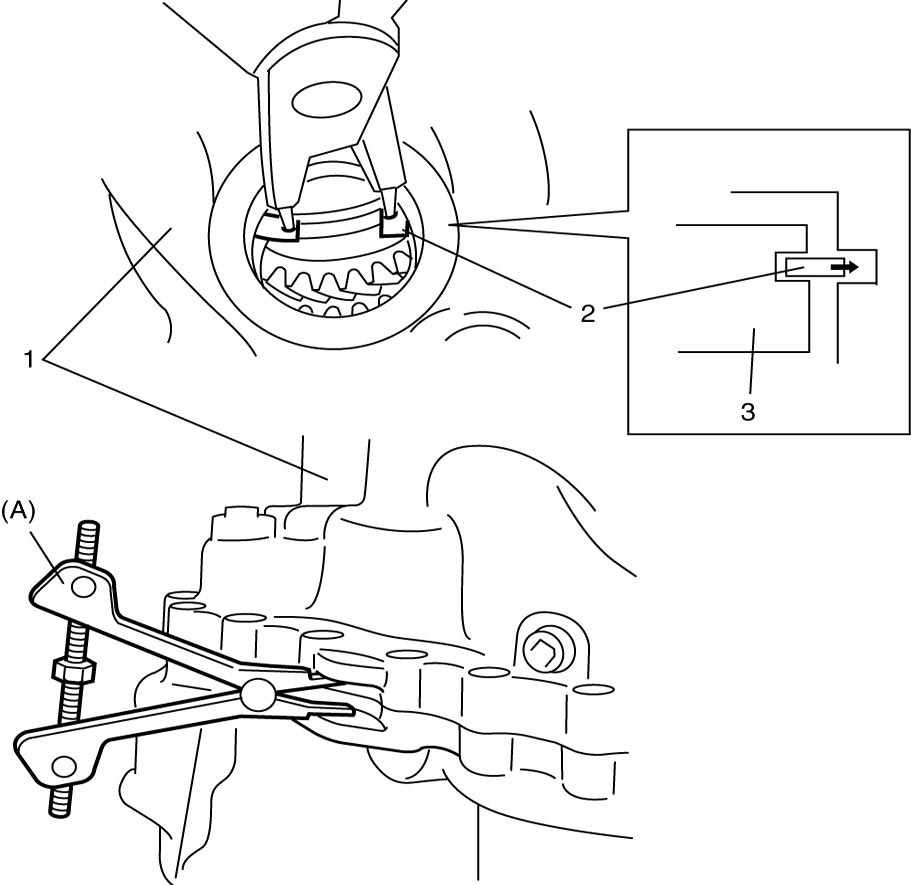
| 3. | Countershaft left bearing |
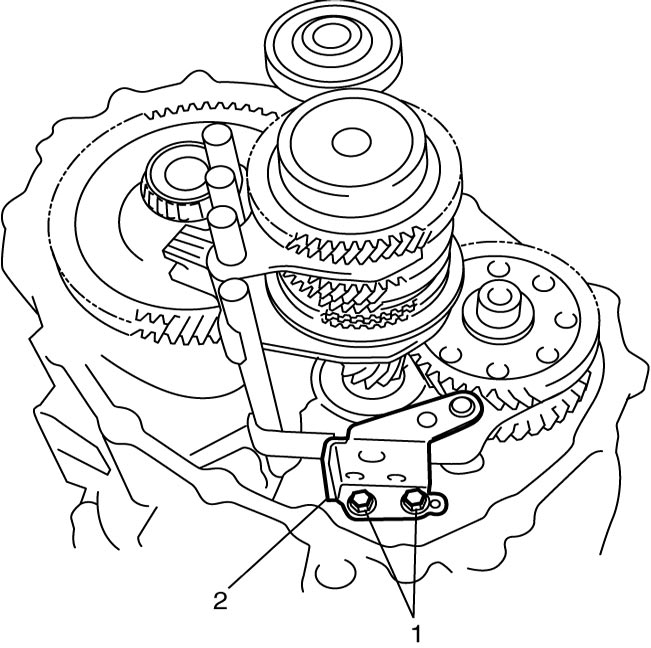
5)Remove reverse gear shift lever bolts (1) and reverse gear shift lever (2).
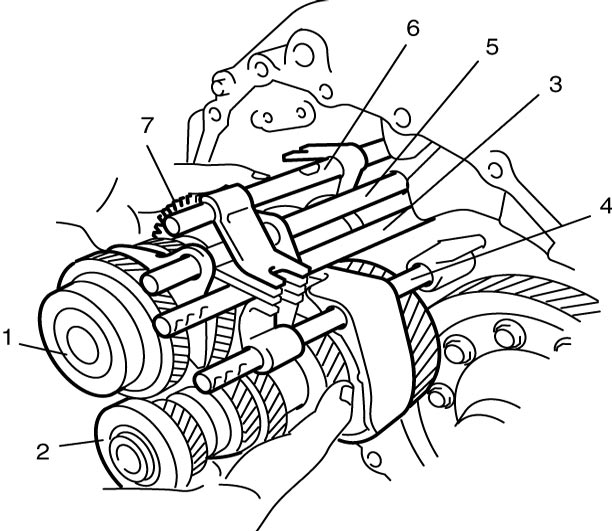
6)Tapping input shaft end with plastic hammer, push it out as assembly from case a little, and then take out input shaft assembly (1), countershaft assembly (2), high speed gear shift shaft (3), low speed gear shift shaft (4), 5th and 6th gear shift shaft (5), reverse gear shift (6) and reverse gears (7).
7)Remove countershaft circlip from left case, if necessary.
8)Remove differential assembly from right case.
Reassembly
1)Install differential assembly into right case.
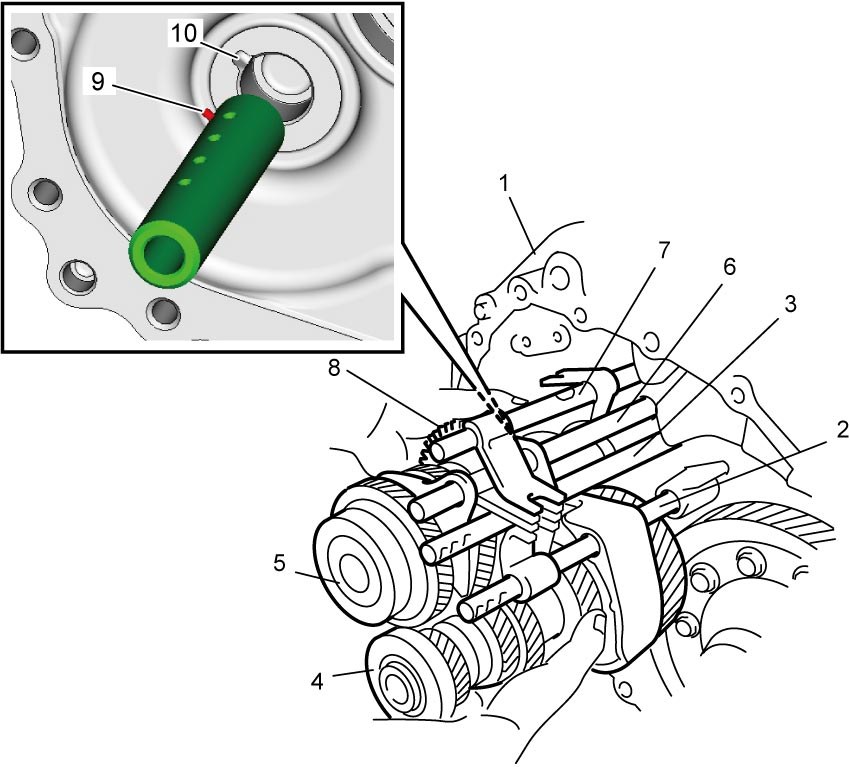
2)Join input shaft (5), countershaft (4), low speed gear shift shaft (2), high speed gear shift shaft (3), 5th and 6th gear shift shaft (6), reverse gear shift shaft (7) and reverse gears (8) assemblies all together, and then install them into right case (1) so as not to damage oil seal by input shaft spline.
NOTE:
•Input shaft right bearing on shaft can be installed into right case (1) by tapping shaft with plastic hammer.
•While installing shafts and gears, check the following points.
•While installing shafts and gears, check the following points.
—Countershaft is engaged with final gear.
—Reverse gear shaft pin (9) is engaged with cutout (10).
—Reverse gear shaft pin (9) is engaged with cutout (10).
3)Select input shaft shim and reverse gear washer as follows.
a)Measure depth “a” of left case (1) and “b” of right case (2) and measure depth “e” of left case and “f” of right case.
b)Measure distance “c” of input shaft assembly (3) and measure distance “g” of reverse gear assembly (4).
c)Calculate the clearance of “d” and “h” by the following formulas.
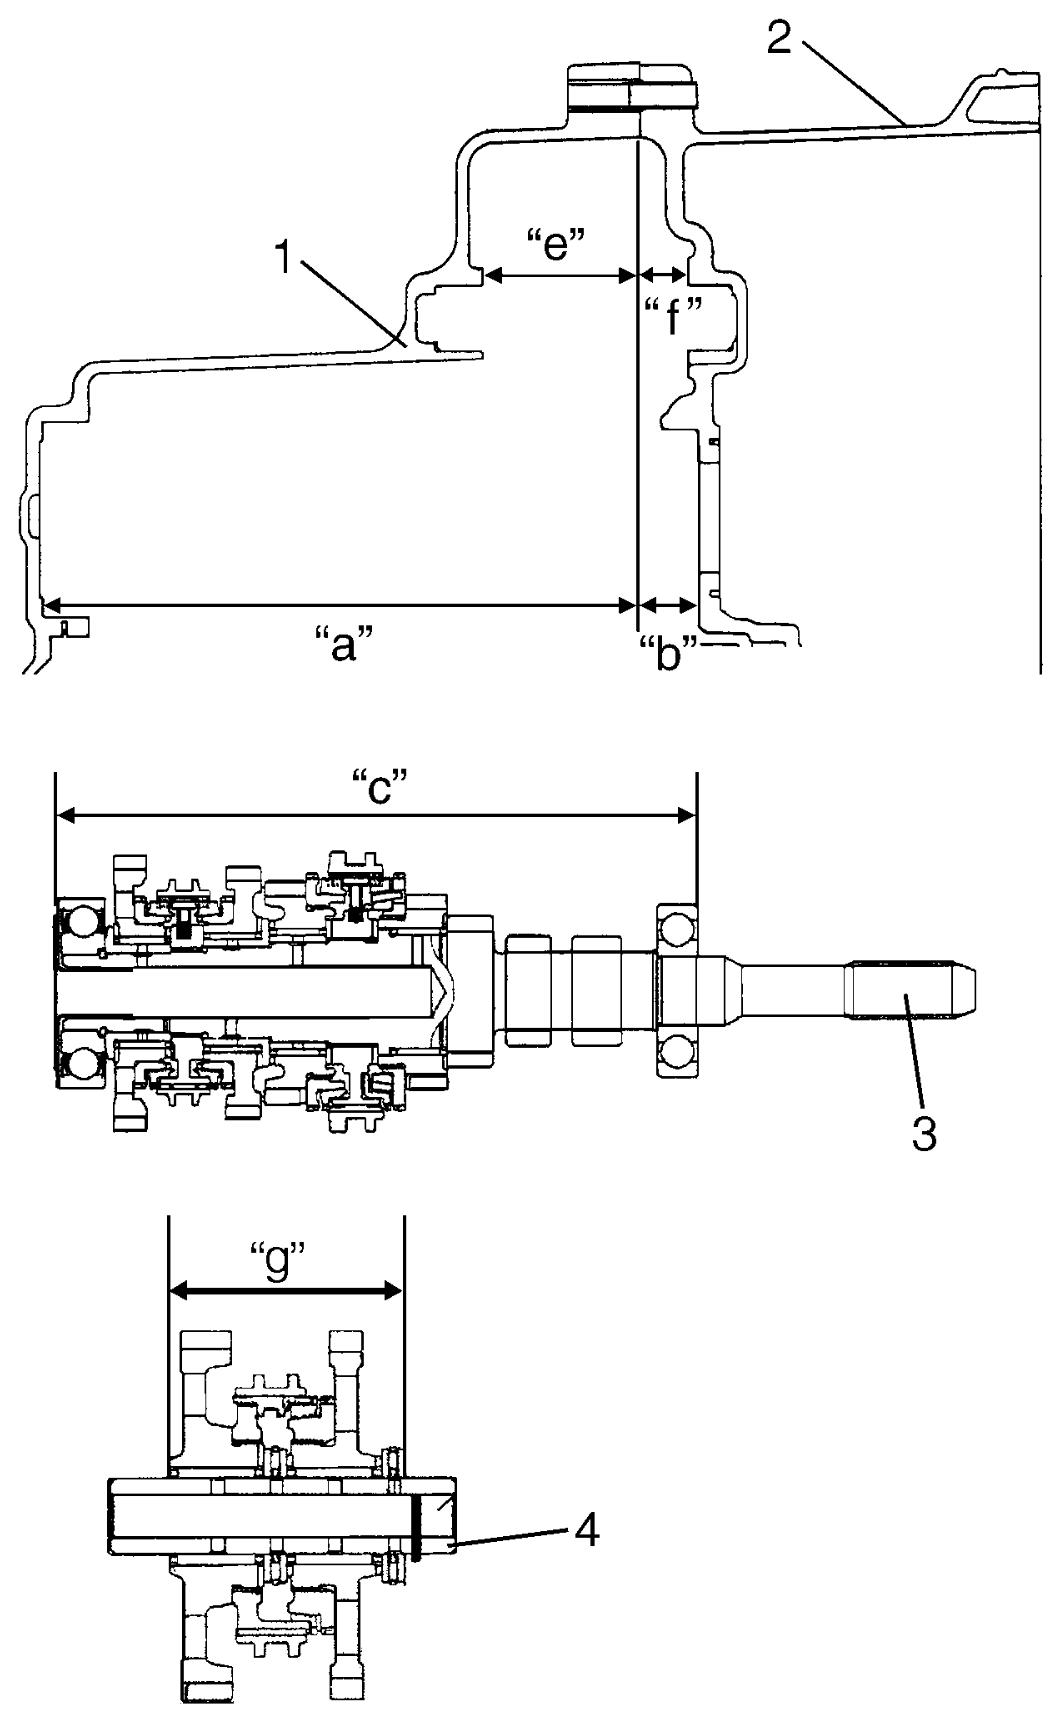
| Clearance “d” = Depth “a” + Depth “b” – Distance “c” |
| Clearance “h” = Depth “e” + Depth “f” – Distance “g” |
d)Select shims closest to clearance “d” and select washer closest to clearance “h” from the following available sizes.
Available shim thickness
| Clearance “d” | Applicable shim |
|---|---|
| 1.055 – 1.095 mm (0.0415 – 0.0394 in.) |
1.04 mm (0.0409 in.) |
| 1.095 – 1.135 mm (0.0394 – 0.0447 in.) |
1.08 mm (0.0425 in.) |
| 1.135 – 1.175 mm (0.0447 – 0.0463 in.) |
1.12 mm (0.0441 in.) |
| 1.175 – 1.215 mm (0.0463 – 0.0478 in.) |
1.16 mm (0.0457 in.) |
| 1.215 – 1.255 mm (0.0478 – 0.0494 in.) |
1.20 mm (0.0472 in.) |
| 1.255 – 1.295 mm (0.0494 – 0.0510 in.) |
1.24 mm (0.0488 in.) |
| 1.295 – 1.335 mm (0.0510 – 0.0526 in.) |
1.28 mm (0.0504 in.) |
| 1.335 – 1.375 mm (0.0526 – 0.0541 in.) |
1.32 mm (0.0520 in.) |
| 1.375 – 1.415 mm (0.0541 – 0.0557 in.) |
1.36 mm (0.0535 in.) |
| 1.415 – 1.455 mm (0.0557 – 0.0573 in.) |
1.40 mm (0.0551 in.) |
| 1.455 – 1.495 mm (0.0573 – 0.0589 in.) |
1.44 mm (0.0567 in.) |
| 1.495 – 1.535 mm (0.0589 – 0.0604 in.) |
1.48 mm (0.0583 in.) |
| 1.535 – 1.575 mm (0.0604 – 0.0620 in.) |
1.52 mm (0.0598 in.) |
| 1.575 – 1.615 mm (0.0620 – 0.0636 in.) |
1.56 mm (0.0614 in.) |
Available washer thickness
| Clearance “h” | Applicable washer |
|---|---|
| 1.815 – 1.895 mm (0.0715 – 0.0746 in.) |
1.76 mm (0.0694 in.) |
| 1.895 – 1.975 mm (0.0746 – 0.0778 in.) |
1.84 mm (0.0724 in.) |
| 1.975 – 2.055 mm (0.0778 – 0.0809 in.) |
1.92 mm (0.0760 in.) |
| 2.055 – 2.135 mm (0.0809 – 0.0841 in.) |
2.00 mm (0.0787 in.) |
| 2.135 – 2.215 mm (0.0841 – 0.0872 in.) |
2.08 mm (0.0819 in.) |
| 2.215 – 2.295 mm (0.0872 – 0.0904 in.) |
2.16 mm (0.0850 in.) |
| 2.295 – 2.375 mm (0.0904 – 0.0935 in.) |
2.24 mm (0.0882 in.) |
| 2.375 – 2.455 mm (0.0935 – 0.0967 in.) |
2.32 mm (0.0913 in.) |
| 2.455 – 2.535 mm (0.0967 – 0.0998 in.) |
2.40 mm (0.0945 in.) |
| 2.535 – 2.615 mm (0.0998 – 0.1030 in.) |
2.48 mm (0.0976 in.) |
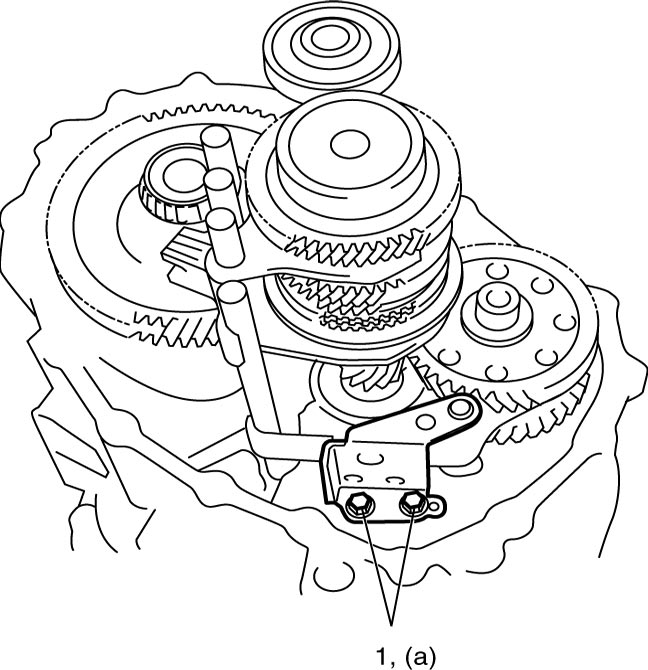
4)Tighten reverse gear shift lever new bolts (1).
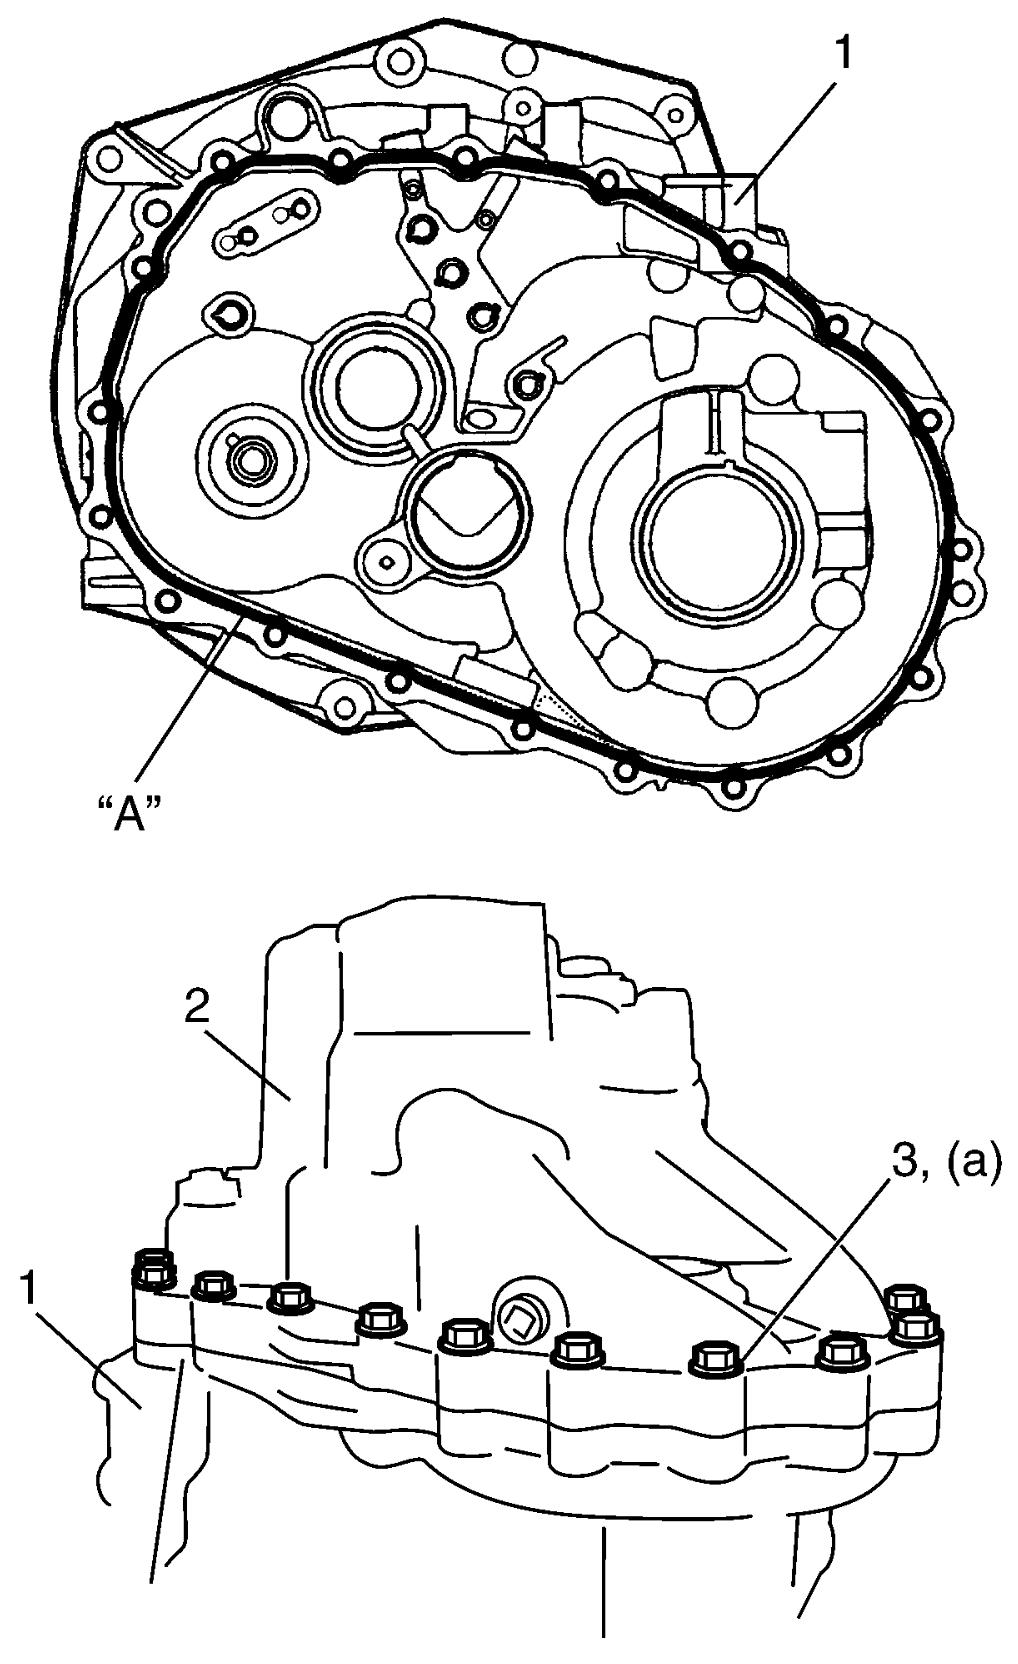
5)Clean mating surfaces of both right and left cases, apply sealant to right case (1) as shown in figure by such amount that its section is 1.5 mm (0.059 in.) in diameter and mate it with left case (2).
6)Tighten case bolts (3) to specified torque.
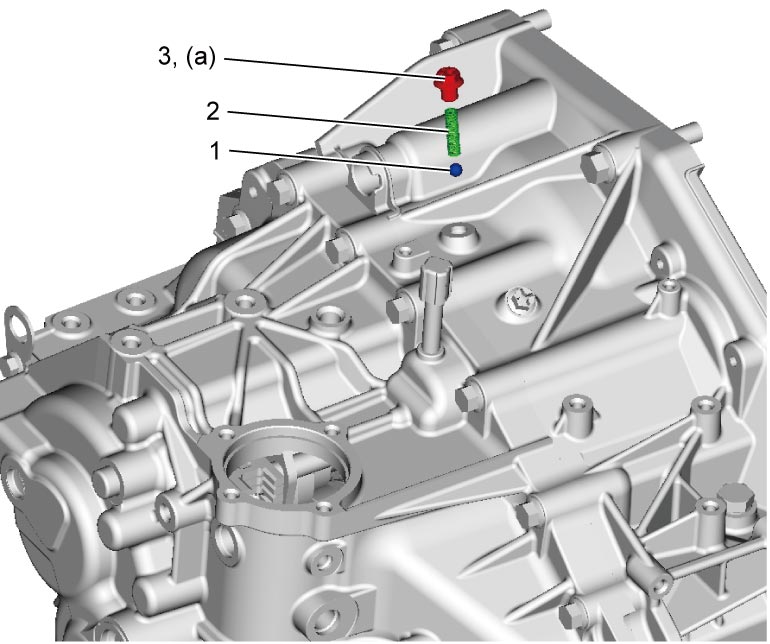
7)Install steel ball (1) and locating spring (2) and tighten new bolt (3).
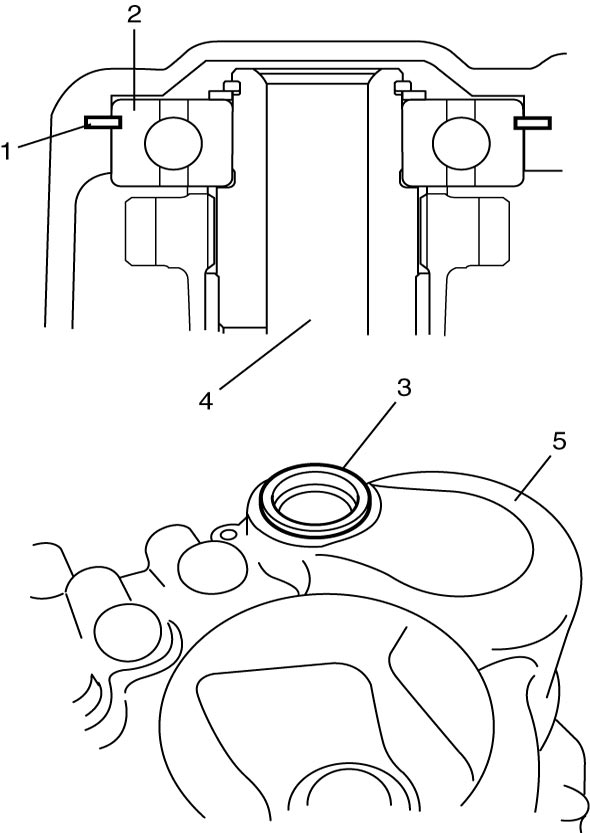
8)Check that new circlip (1) is installed to countershaft left side bearing (2) and then press-fit new hole cap (3) to left case (5).
| 4. | Countershaft |