Contact Coil Assembly Removal and Installation
Precautions: Precautions for Steering Wheel and Column · Precautions for Steering · General safety (00)
NOTICE:
The coil in the contact coil assembly will break if the contact coil is turned too much.
Do not turn the contact coil more than about two and a half turns in either direction from the neutral position.
Removal
1)Remove steering wheel from steering column. 
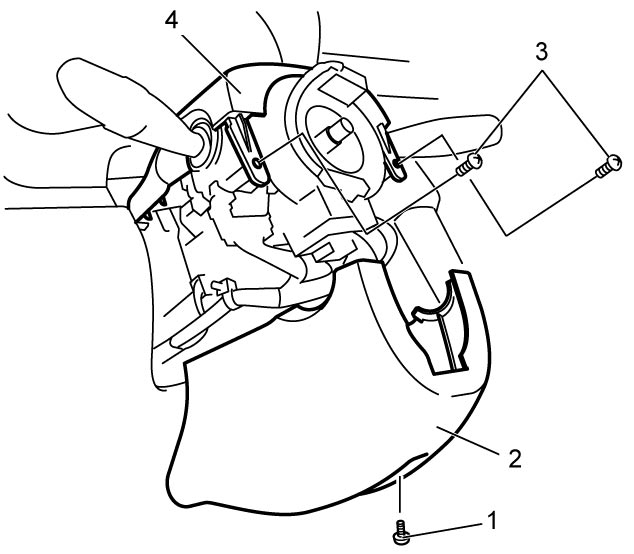
2)Remove standard screw (1), and then detach steering column lower cover (2).
3)Remove tapping screws (3), and then detach steering column upper cover (4).

4)Disconnect contact coil assembly connector (1) as follows.
a)Release locking slider (2) by sliding it in arrow direction “1”.
b)After unlocking, disconnect contact coil assembly connector by pulling it in arrow direction “2”.
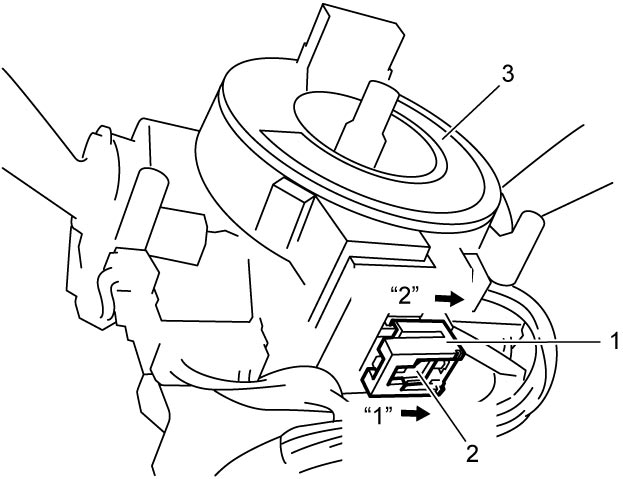
| 3: | Contact coil assembly |
5)Disconnect horn connector (2) and steering angle sensor connector (1) (if equipped).
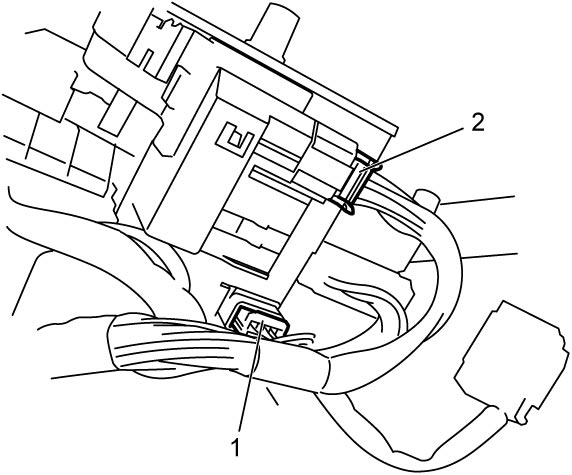
6)Release claws (2) and remove contact coil assembly (1).
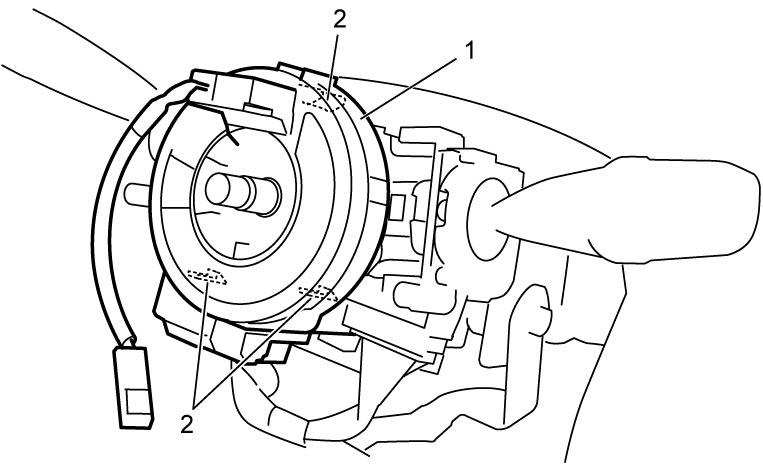
7)Remove steering angle sensor (if equipped) from contact coil assembly.
Installation
1)Check that vehicle’s front wheels are in straight ahead position.
2)Install steering angle sensor (if equipped) to contact coil assembly securely.
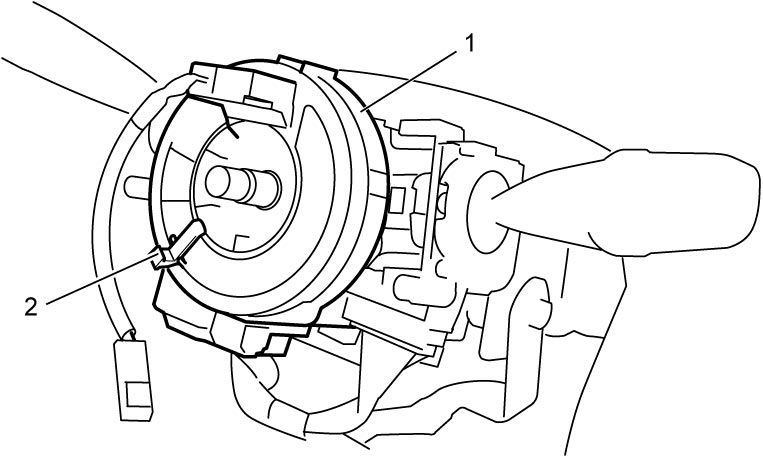
3)Install contact coil assembly (1) with steering angle sensor (if equipped) to steering column securely.
NOTE:
New contact coil assembly is supplied with contact coil set and held at its center position with a lock pin (2). Remove this lock pin after installing contact coil assembly to steering column.
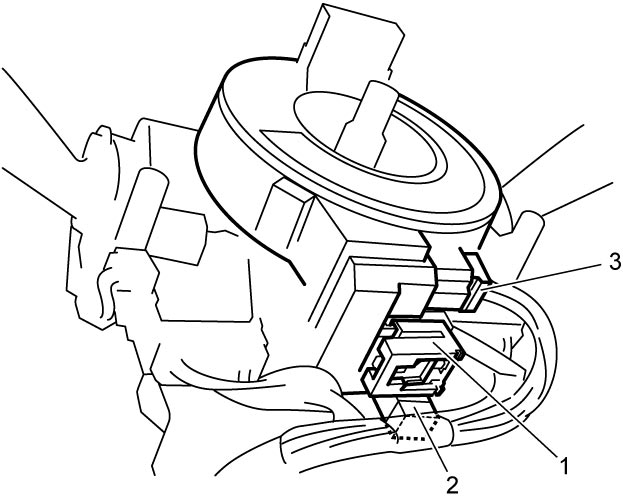
4)Connect contact coil assembly connector (1) and horn connector (3) to contact coil assembly, and steering angle sensor connector (2) to steering angle sensor (if equipped) securely.
NOTE:
Lock contact coil assembly connector.
5)Install steering column upper cover (4) with tapping screws (3).
6)Install steering column lower cover (2) with standard screw (1).
NOTICE:
Lead wires will be damaged if they get pinched when you install the covers.
Check that there is no wire caught between the covers before securing the covers.
7)Install steering wheel to steering column.