B-Pillar Outer Panel Removal and Installation
Precautions: Precautions for Body Structure · Precautions for Body, Cab and Accessories · General safety (00)
NOTE:
The figure below shows condition where the following parts are removed.
•Front fender 
•Fuel filler door panel
•Fuel filler door panel
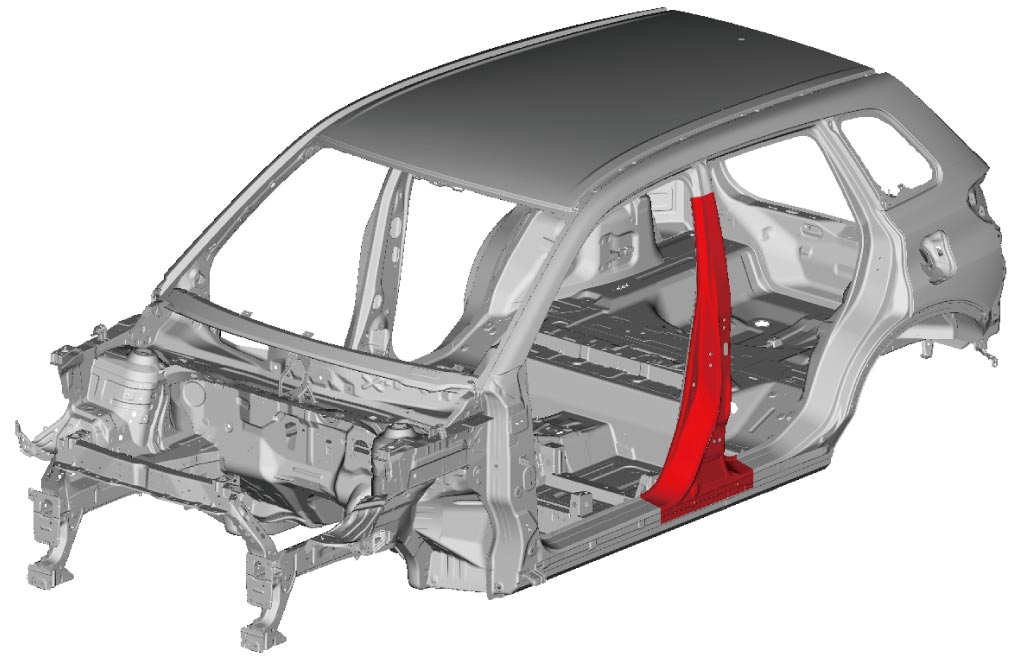
General Notes
•Welding method and number of welding points are the same on both sides. This repair instruction shows procedure for left side.
•Part filled with foamed material is included in parts of this repair. Therefore, repair referring to Foamed Material Filling Area Repair for precautions and repair procedure.
•The dimensions shown in the figure are reference values when cutting replacement part placed on top of existing part. Determine the most appropriate cutting (or joint) line considering both size of replacement part and condition of existing part.
•Part filled with foamed material is included in parts of this repair. Therefore, repair referring to Foamed Material Filling Area Repair for precautions and repair procedure.
•The dimensions shown in the figure are reference values when cutting replacement part placed on top of existing part. Determine the most appropriate cutting (or joint) line considering both size of replacement part and condition of existing part.
Removal
1)Mark at the shown position and cut B-pillar outer panel.
NOTICE:
You may accidentally cut the parts under the B-pillar outer panel or the parts under the side sill outer panel when cutting the B-pillar outer panel.
Take sufficient care not to damage the parts under the B-pillar outer panel or the parts under the side sill outer panel when cutting the B-pillar outer panel.
2)Drill out welding spots and remove B-pillar outer panel.
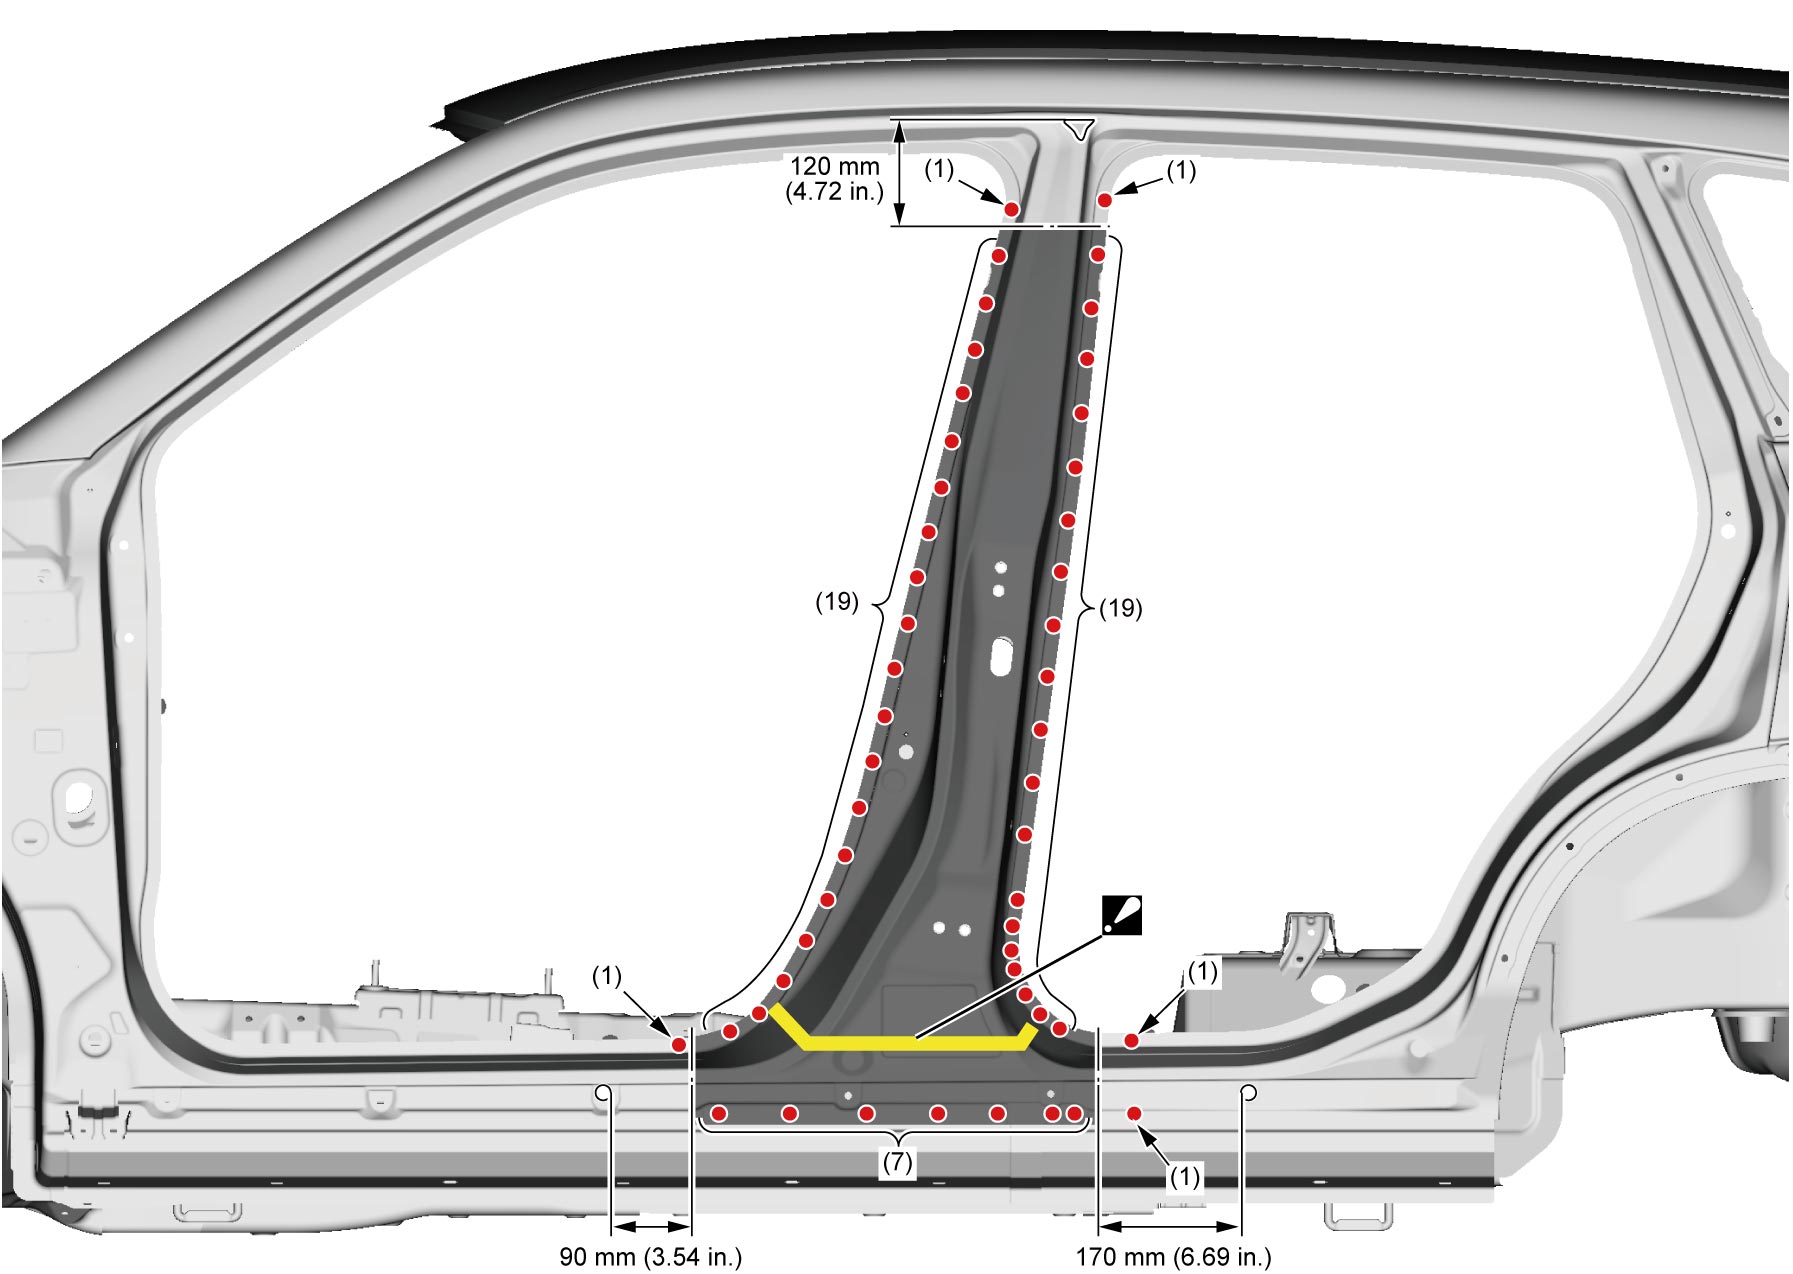

 : : |
When heating around foamed material application portion to detach foamed material, be sure that temperature of said portion does not reach 170 °C (338 °F). |
Installation
NOTE:
•Before conducting any weld, check installation position and condition for installation part(s).
•Perform repair while taking into consideration installation of parts that affect appearance.
•Perform repair while taking into consideration installation of parts that affect appearance.
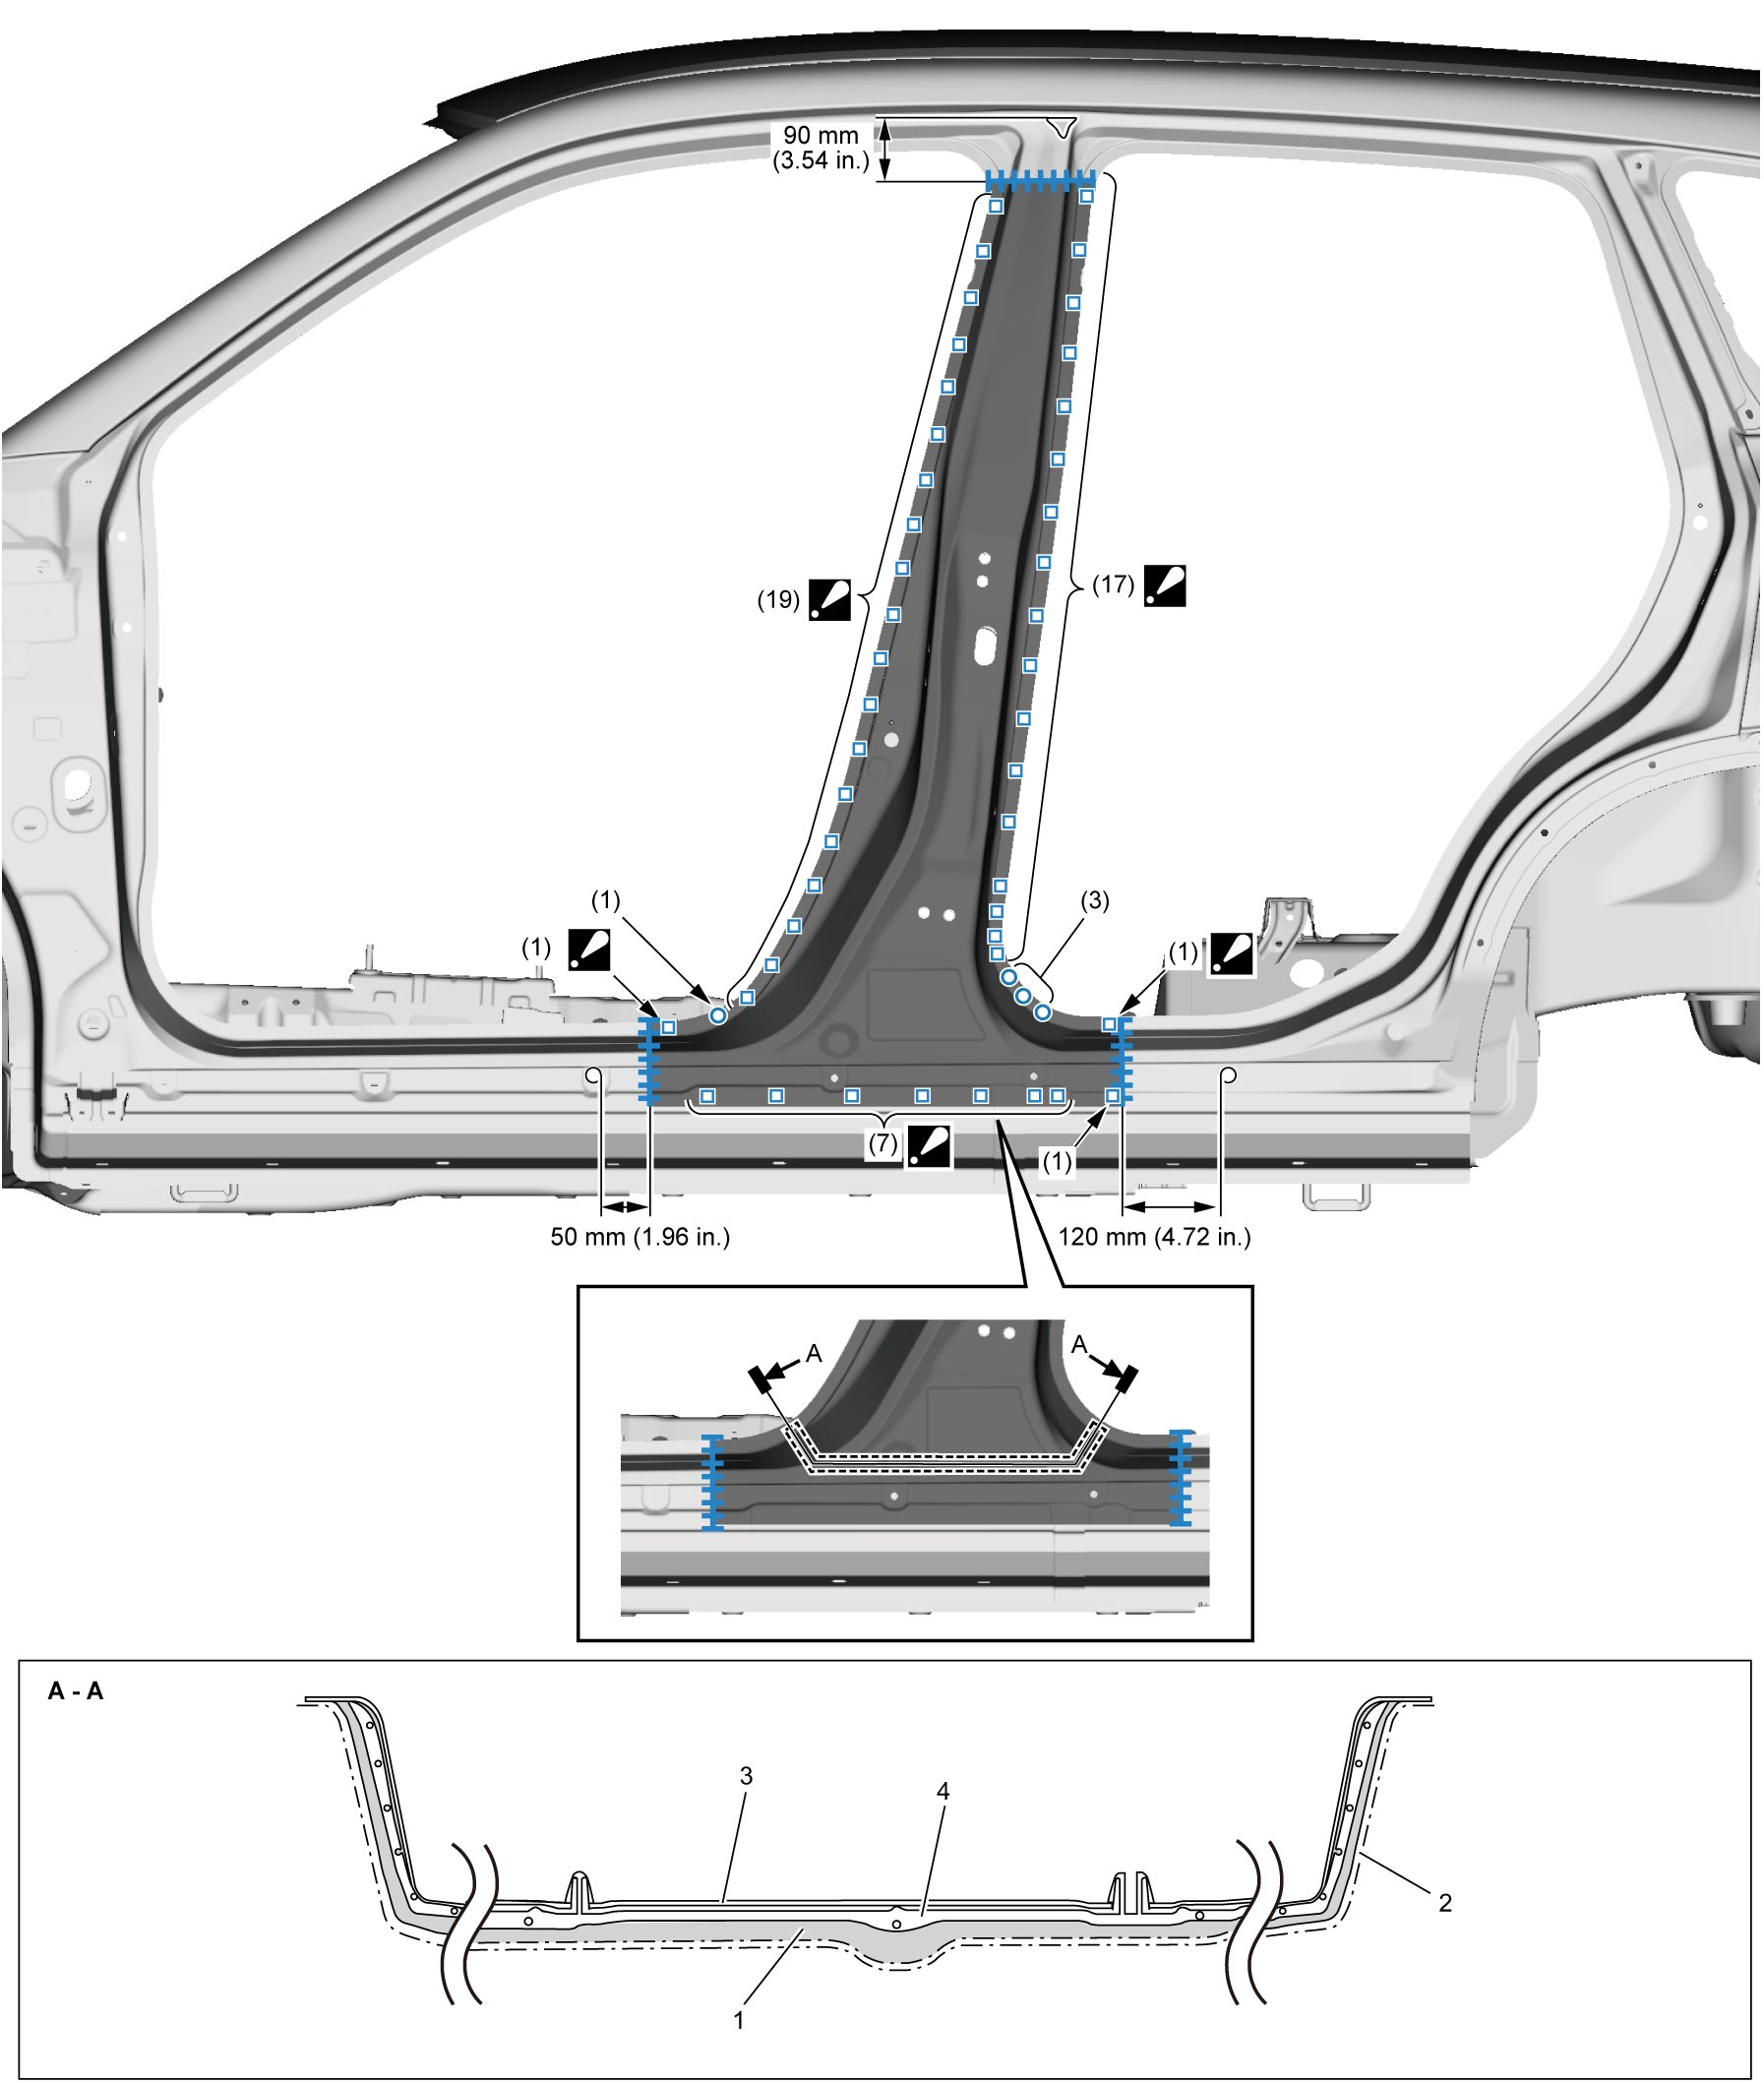
1)Install new B-pillar outer panel to vehicle body and cut in stacked condition.
2)Repair the position of B-pillar outer panel where foamed material had been filled.
3)Install B-pillar outer panel.
4)Conduct plug weld or resistance spot weld.
5)Conduct continuous weld.
6)Apply anti-corrosion wax to back side of continuous weld part.
|
: |
Conduct resistance spot weld as three panel thickness. | 2. | B-pillar outer panel | 4. | Baffle plate |
| 1. | Foamed material. | 3. | Rear door hinge reinforcement |