 |
Remove the service hole cover from the engine under cover No. 1.
ENGINE ASSEMBLY > REMOVAL |
| 1. DISCHARGE FUEL SYSTEM PRESSURE |
| 2. REMOVE AUTOMATIC TRANSMISSION ASSEMBLY (for 2WD) |
| 3. REMOVE AUTOMATIC TRANSMISSION ASSEMBLY (for 4WD) |
| 4. REMOVE HOOD SUB-ASSEMBLY |
Disconnect the windshield washer hose.
Disconnect the hood dampers.
Remove the 4 bolts and hood sub-assembly.
| 5. REMOVE THROTTLE BODY COVER SUB-ASSEMBLY |
Remove the 2 nuts and throttle body cover sub-assembly.
| 6. REMOVE AIR CLEANER HOSE ASSEMBLY |
Disconnect the vacuum hoses (for P/S idle up and for fuel pressure regulator) and ventilation hose.
| 7. REMOVE AIR CLEANER ASSEMBLY |
Disconnect the intake air flow meter connector.
Disconnect the ground cable from the body.
Remove the air cleaner cap and air cleaner element.
Remove the 3 bolts and air cleaner assembly.
| 8. REMOVE NO. 1 ENGINE UNDER COVER SUB-ASSEMBLY |
| 9. REMOVE ENGINE UNDER COVER ASSEMBLY REAR |
| 10. DRAIN ENGINE COOLANT |
Remove the radiator cap.
|
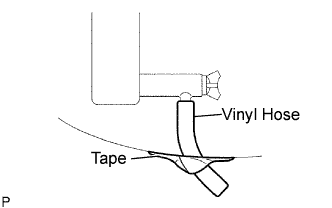
Remove the service hole cover from the engine under cover No. 1.
Install a vinyl hose onto the drain on the radiator side.
Fix the vinyl hose with tape.
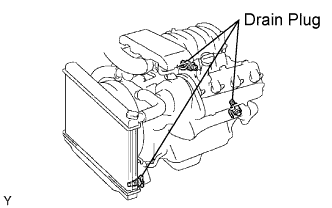 |
Loosen the 3 drain plugs on the engine and radiator, and drain the coolant.
Drain the coolant from the reservoir tank.
Tighten the 3 drain plugs.
Remove the vinyl hose from the radiator.
| 11. DRAIN ENGINE OIL |
Remove the oil pan drain plug and drain the engine oil.
Clean the oil pan drain plug and install a new gasket and the drain plug.
| 12. REMOVE RADIATOR ASSEMBLY |
| 13. REMOVE FAN SHROUD |
Disconnect the fasteners of the clamp and oil cooler hoses from the fan shroud in sequence.
Remove the fan shroud with fan.
| 14. DISCONNECT NO. 2 FUEL HOSE |
 |
Observe the following precautions when disconnecting the fuel tube connector:
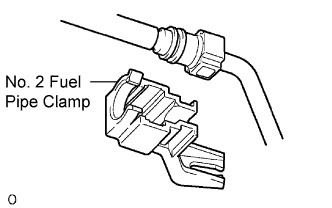
Remove the No. 2 fuel pipe clamp.
Check if there is any dirt on the pipe and around the connector before disconnecting them. Clean the dirt away if necessary.
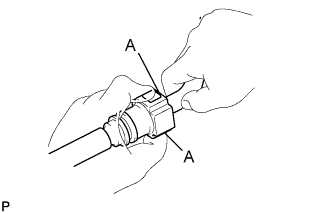 |
Disconnect the connector from the hose while pinching part A with fingers as shown in the illustration.
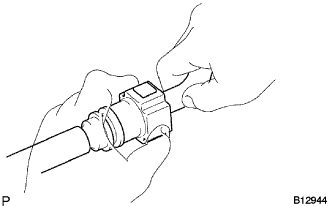 |
When the connector and the pipe are stuck, pinch the fuel pipe with fingers and push the fuel tube connector to the fuel pipe by pressing the release buttons, then pull the connector out from the pipe. Do not use any tool at this time.
Check if there is any dirt or other foreign objects on the seal surface of the disconnected pipe and clean it away.
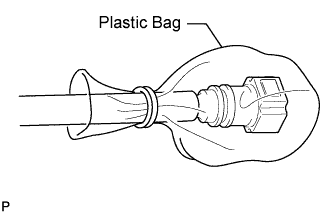 |
Do not damage the disconnected pipe and connector, and prevent intrusion of foreign objects by covering them with a plastic bag.
| 15. DISCONNECT FUEL HOSE |
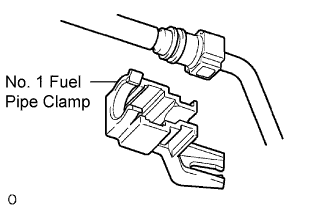 |
Observe the following precautions when disconnecting the fuel tube connector:
Remove the No. 1 fuel pipe clamp.
Check if there is any dirt on the pipe and around the connector before disconnecting them. Clean the dirt away if necessary.
|
Disconnect the connector from the hose while pinching part A with fingers as shown in the illustration.
|
When the connector and the pipe are stuck, pinch the fuel pipe with fingers and push the fuel tube connector to the fuel pipe by pressing the release buttons, then pull the connector out from the pipe. Do not use any tool at this time.
Check if there is any dirt or other foreign objects on the seal surface of the disconnected pipe and clean it away.
|
Do not damage the disconnected pipe and connector, and prevent intrusion of foreign objects by covering them with a plastic bag.
| 16. DISCONNECT FUEL VAPOR FEED HOSE ASSEMBLY |
| 17. REMOVE FAN AND GENERATOR V BELT |
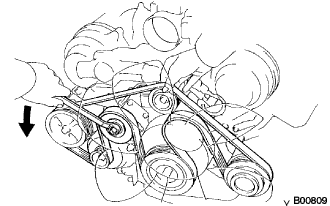 |
Loosen the belt tension by turning the belt tensioner counterclockwise, and then remove the fan and generator V belt.
| 18. SEPARATE VANE PUMP ASSEMBLY |
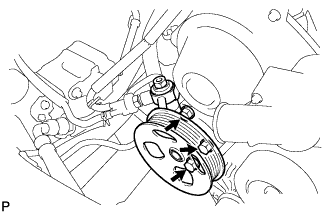 |
Disconnect the vacuum hose.
Remove the nut, 2 bolts and vane pump assembly.
| 19. SEPARATE COMPRESSOR |
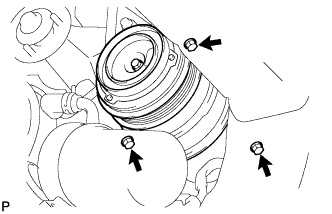 |
Disconnect the compressor connector.
Remove the nut, 3 bolts, compressor stay and compressor.
| 20. REMOVE FAN WITH FLUID COUPLING |
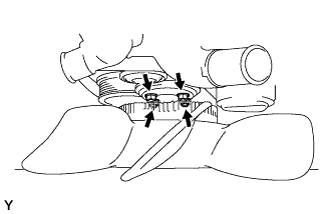 |
Remove the 4 nuts and fan with fluid coupling.
Remove the fan pulley.
| 21. REMOVE TRANSMISSION OIL FILLER TUBE SUB-ASSEMBLY |
Remove the bolt and transmission oil filler tube.
| 22. REMOVE OIL LEVEL GAUGE GUIDE |
Remove the bolt and oil level gauge guide.
Remove the O-ring.
| 23. DISCONNECT HEATER HOSE |
| 24. SEPARATE ENGINE WIRE |
Remove the front door scuff plate RH (Click here).
Remove the cowl side trim board RH .
Remove the glove compartment door .
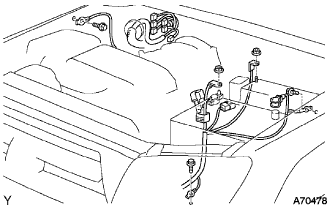 |
Disconnect each connector for the ECM, four-wheel- drive-control ECU (4WD only) and instrument panel wire before pulling out the engine wire into the engine room.
Disconnect the 3 ground cables from the body.
Disconnect the No. 2 engine wire from the battery terminals (positive and negative) and engine room relay block.
| 25. REMOVE ENGINE ASSEMBLY |
Attach the engine chain hoist to the engine hangers.
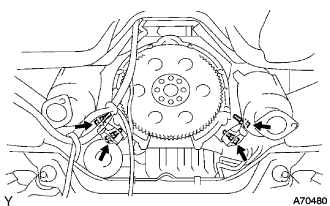 |
Remove the 4 nuts and 4 bolts.
Lift the engine out of the vehicle slowly and carefully.
| 26. REMOVE ENGINE WIRE |
Disconnect the VSV connector.
Disconnect the solenoid connector.
| 27. REMOVE INTAKE MANIFOLD ASSEMBLY |
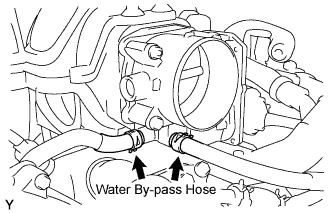 |
Disconnect the 2 water by-pass hoses from the throttle body.
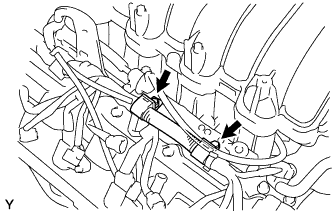 |
Disconnect the 2 wire clamps from the wire clamp bracket on the RH delivery pipe.
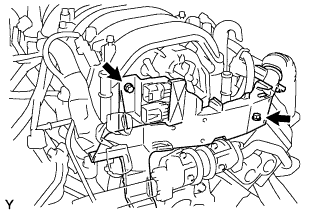 |
Remove the bolt and nut holding the engine wire protector from the intake manifold and cylinder head.
Remove the 2 bolts and ground cables from the RH and LH cylinder heads.
Remove the bolt and V-bank cover bracket from the intake manifold.
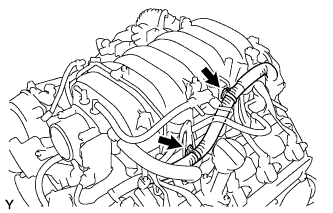 |
Disconnect the engine wire from the engine hanger and wire bracket.
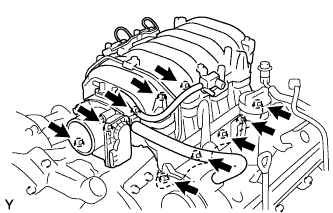 |
Remove the bolt and wire bracket from the intake manifold.
Remove the 6 bolts, 4 nuts, intake manifold assembly and 2 gaskets.
| 28. REMOVE NO. 2 WIRING HARNESS HEAT INSULATOR |
Remove the 2 bolts and No. 2 wiring harness heat insulator.
| 29. REMOVE NO. 2 ENGINE WIRE |
Remove the bolt and separate the ground cable wire.
Remove the nut, 2 bolts and No. 2 engine wire.
| 30. REMOVE NO. 1 ENGINE MOUNTING BRACKET FRONT RH |
Remove the 4 bolts and the engine-mounting bracket together with the engine-mounting insulator front.
| 31. REMOVE NO. 1 ENGINE MOUNTING BRACKET FRONT LH |
Remove the 4 bolts and the engine-mounting bracket together with the engine-mounting insulator front.
| 32. REMOVE GENERATOR ASSEMBLY |
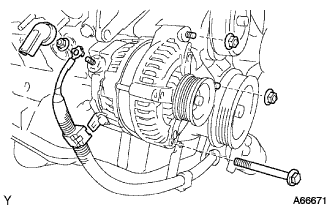 |
Disconnect the generator connector.
Remove the terminal cap and nut, and disconnect the generator wire.
Disconnect the alternator wire clamp from the cord clip on the generator.
Remove the bolt, 2 nuts and generator.
| 33. REMOVE HEATER HOSE |
| 34. REMOVE DRIVE PLATE & RING GEAR SUB-ASSEMBLY |
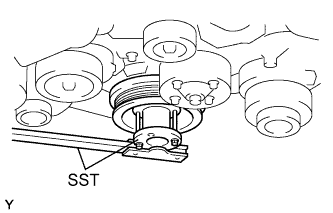 |
Using SST, hold the crankshaft.
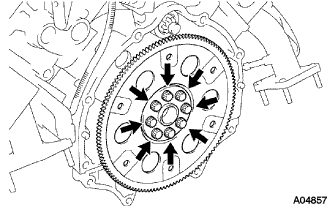 |
Remove the 8 bolts, front spacer, drive plate and rear spacer.
| 35. REMOVE OIL COOLER PIPE |
Disconnect the 3 hoses.
Remove the bolt, nut and oil cooler pipe.
| 36. REMOVE PUMP BRACKET |
Remove the 4 bolts and pump bracket.
| 37. REMOVE NO. 3 TIMING BELT COVER SUB-ASSEMBLY LH |
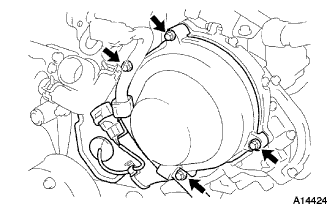 |
Remove the grommet and separate the cam position sensor connector from the No. 3 timing belt cover sub-assembly LH.
Remove the 4 bolts and No. 3 timing belt cover sub-assembly LH.
| 38. REMOVE NO. 2 TIMING CHAIN OR BELT COVER |
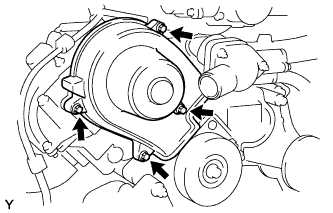 |
Remove the nut, 3 bolts and No. 2 timing belt cover.
| 39. REMOVE NO. 2 TIMING BELT COVER SUB-ASSEMBLY |
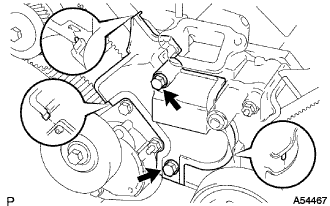 |
Remove the 2 bolts and No. 2 timing belt cover sub-assembly.
| 40. REMOVE V-RIBBED BELT TENSIONER ASSEMBLY |
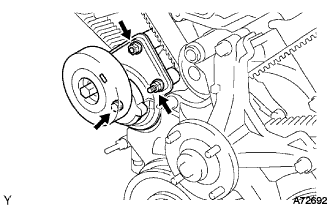 |
Remove the bolt, 2 nuts and V-ribbed belt tensioner.
| 41. REMOVE FAN BRACKET SUB-ASSEMBLY |
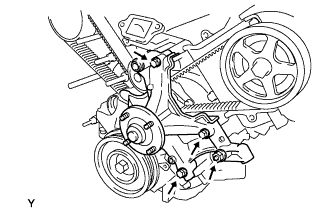 |
Remove the 2 nuts, 2 bolts and fan bracket sub-assembly.
| 42. REMOVE IGNITION COIL ASSEMBLY |
Remove the 8 bolts and 8 ignition coils.
| 43. REMOVE CAMSHAFT POSITION SENSOR |
Remove the bolt, stud bolt and camshaft position sensor.
| 44. REMOVE CRANKSHAFT POSITION SENSOR |
Remove the bolt and crankshaft position sensor.
| 45. REMOVE VVT SENSOR |
Remove the 2 bolts and VVT sensors.
| 46. REMOVE WATER BY-PASS PIPE SUB-ASSEMBLY |
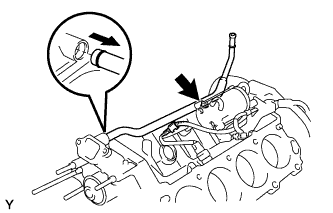 |
Remove the wire clamp.
Remove the bolt and water by-pass.
Remove the O-ring from the water by-pass pipe sub-assembly.
| 47. REMOVE NO. 2 AIR SWITCHING VALVE |
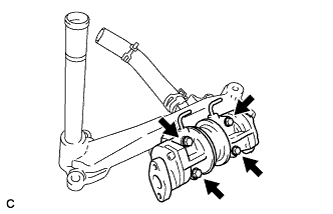 |
Remove the 2 vacuum hoses from the No. 2 air switching valves.
Remove the 4 bolts, 2 gaskets and the 2 No. 2 air switching valves from the water by-pass joint rear.
| 48. REMOVE WATER BY-PASS JOINT RR |
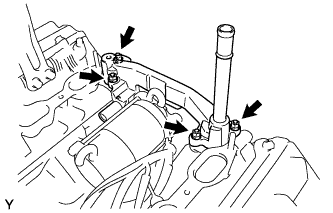 |
Remove the 4 nuts and water by-pass joint.
Remove the 2 gaskets from the water by-pass joint.
| 49. REMOVE AIR PUMP ASSEMBLY WITH BRACKET |
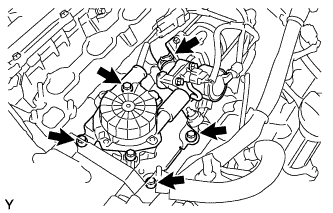 |
Disconnect the No.2 air hose from the air switching valve.
Disconnect the air switching valve connector.
Disconnect the pressure sensor connector for the air injection system.
Remove the 4 bolts and air pump with bracket assembly.
| 50. REMOVE STARTER ASSEMBLY |
Disconnect the No. 2 engine wire.
Remove the 2 bolts and starter assembly.
| 51. REMOVE KNOCK SENSOR |
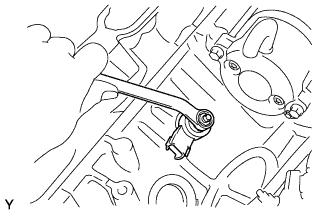 |
Disconnect the 2 knock sensor connectors.
Remove the 2 nuts and 2 knock sensors.
| 52. REMOVE WATER INLET HOUSING |
Remove the 2 bolts.
Remove the water inlet housing and O-ring from the engine.
| 53. REMOVE WATER BY-PASS JOINT FR |
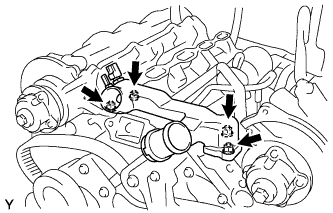 |
Remove the 4 nuts, water by-pass joint and 2 gaskets.
| 54. REMOVE EXHAUST MANIFOLD SUB-ASSEMBLY RH |
Remove the 4 bolts and No. 1 exhaust manifold heat insulator.
Disconnect the oxygen sensor connector.
Remove the 8 nuts and exhaust manifold sub-assembly.
| 55. REMOVE EXHAUST MANIFOLD SUB-ASSEMBLY LH |
Remove the 4 bolts and No. 2 exhaust manifold heat insulator.
Disconnect the oxygen sensor connector.
Remove the 8 nuts and exhaust manifold sub-assembly.
| 56. REMOVE OIL COOLER ASSEMBLY |
Remove the 2 bolts and nut.
Remove the oil cooler assembly with bracket and gasket.
| 57. REMOVE VENTILATION VALVE SUB-ASSEMBLY |
Remove the ventilation valve cover.
Remove the ventilation valve sub-assembly.
| 58. REPLACE PARTIAL ENGINE ASSEMBLY |