 |
Apply MP grease to the lip of a new oil seal.
REAR CRANKSHAFT OIL SEAL > INSTALLATION |
| 1. INSTALL REAR CRANKSHAFT OIL SEAL |
|
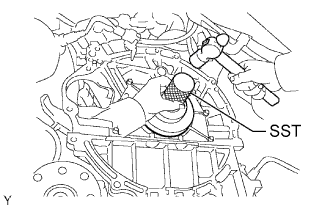
Apply MP grease to the lip of a new oil seal.
Using SST and a hammer, tap in the oil seal until its surface is flush with the rear oil seal retainer edge.
| 2. INSTALL DRIVE PLATE AND RING GEAR SUB-ASSEMBLY |
Using SST, hold the crankshaft.
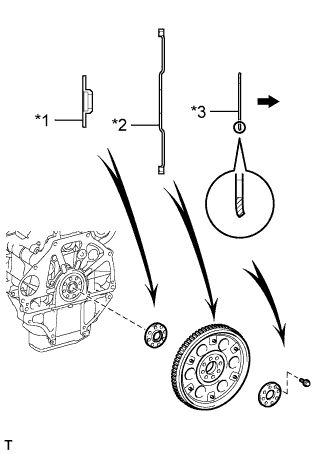 |
Install the front spacer, drive plate and ring gear sub-assembly and rear spacer to the crankshaft.
| *1 | Front Spacer |
| *2 | Drive Plate and Ring Gear Sub-assembly |
| *3 | Rear Spacer |
 | Automatic Transmission Side |
Apply adhesive to 2 or 3 threads at the end of the 8 bolts.
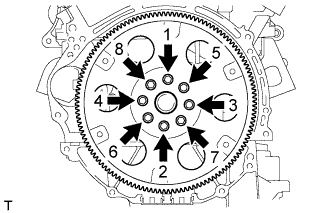 |
Uniformly install and tighten the 8 bolts in several steps in the sequence shown in the illustration.
Tighten the 8 bolts an additional 90°.
| 3. INSTALL AUTOMATIC TRANSMISSION ASSEMBLY |
for 4WD:
Install the automatic transmission (Click here).
for 2WD:
Install the automatic transmission (Click here).