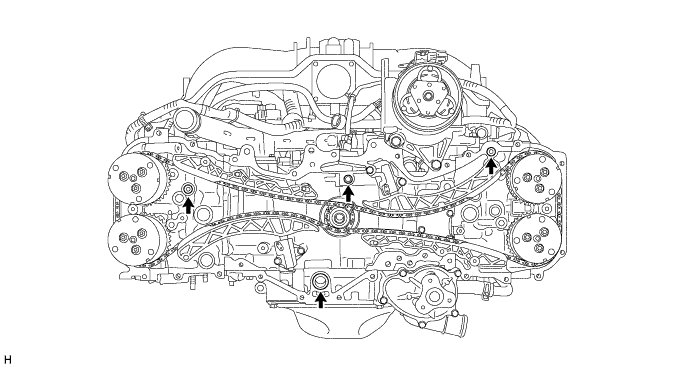
 |
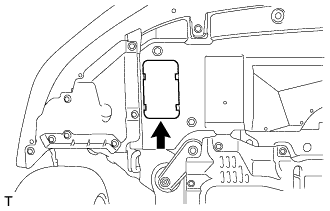
Remove the service hole cover from the front bumper under cover.
OIL PUMP > REMOVAL |
| 1. DISCONNECT CABLE FROM NEGATIVE BATTERY TERMINAL |
| 2. DRAIN ENGINE COOLANT |
|
Remove the service hole cover from the front bumper under cover.
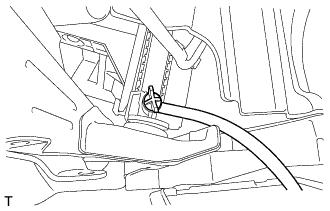
Connect a hose with an inside diameter of 8 mm (0.315 in.) to the drain plug.
 |
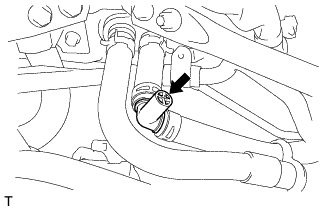
Loosen the radiator drain cock plug.
 |
Open the air bleed plug on the heater hose side. (for LHD)
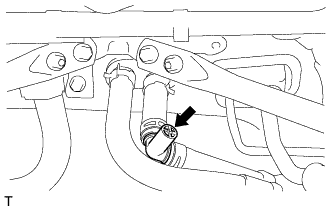 |
Open the air bleed plug on the heater hose side. (for RHD)
Remove the radiator cap and drain the coolant.
| 3. REMOVE GENERATOR ASSEMBLY |
| 4. REMOVE INJECTOR DRIVER |
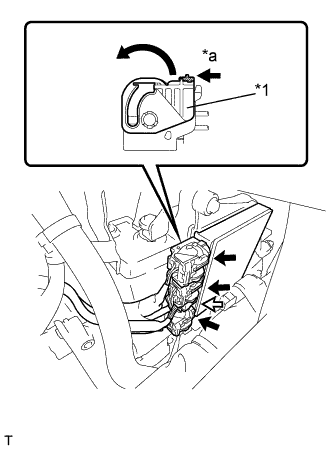 |
Move the lock levers in the direction indicated by the arrow to release the 3 connector locks. Disconnect the 4 connectors from the injector driver.
| *1 | Lock Lever |
| *a | Release |
 | Lock with Connector |
 | Normal Connector |
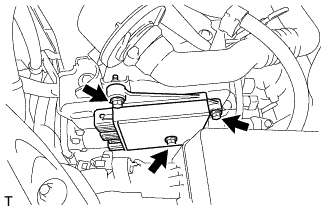 |
Remove the 3 bolts and injector driver.
| 5. REMOVE RADIATOR RESERVE TANK ASSEMBLY |
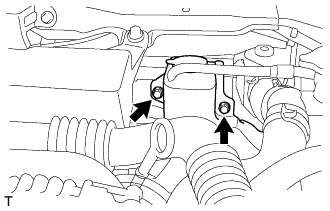 |
Remove the 2 bolts and radiator reserve tank assembly.
| 6. REMOVE WATER FILLER SUB-ASSEMBLY |
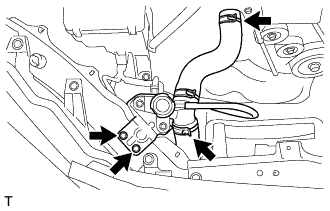 |
Remove the 2 bolts and disconnect the water filler sub-assembly.
Remove the 2 clamps and water filler sub-assembly.
| 7. REMOVE EXHAUST MANIFOLD |
| 8. DISCONNECT RADIATOR OUTLET HOSE |
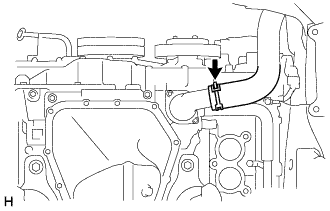 |
Loosen the clip and disconnect the radiator outlet hose.
| 9. DRAIN ENGINE OIL |
Remove the oil filler cap.
Remove the oil pan drain plug and drain the oil into a container.
Clean and install the oil pan drain plug with a new oil pan drain plug gasket.
| 10. REMOVE WATER PUMP PULLEY |
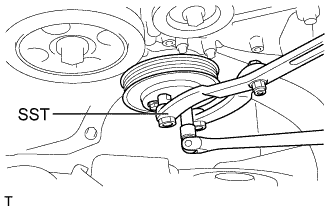 |
Using SST, hold the water pump pulley.
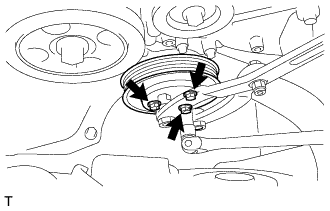 |
Remove the 3 bolts and water pump pulley.
| 11. REMOVE CRANKSHAFT PULLEY |
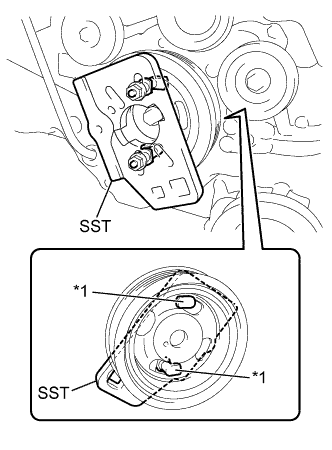 |
Install SST to the crankshaft pulley.
| *1 | Claw |
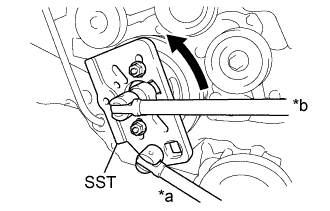 |
Using SST, hold the crankshaft pulley and loosen the crankshaft pulley set bolt.
| *a | Hold |
| *b | Turn |
Remove the crankshaft pulley.
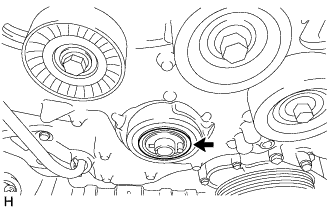 |
Remove the O-ring and crankshaft pulley spacer.
| 12. REMOVE INJECTOR COVER (for Bank 1) |
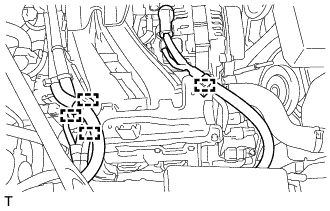 |
Disengage the 4 clamps and separate the wire harness from the injector cover (for bank 1).
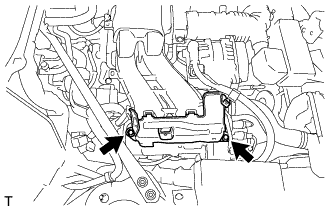 |
Remove the 2 bolts and injector cover (for bank 1).
| 13. DISCONNECT ENGINE WIRE |
Remove the 2 bolts and disconnect the 2 wire harness clamp brackets from the engine assembly.
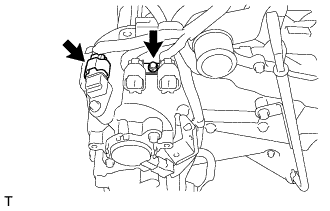 |
Remove the bolts and disconnect the wire harness clamp bracket from the engine assembly.
Disconnect the camshaft position sensor connector.
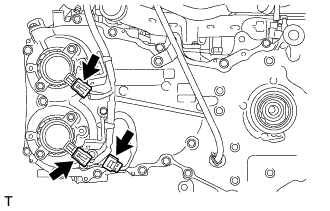 |
Disconnect the camshaft position sensor connector and 2 camshaft timing oil control valve connectors.
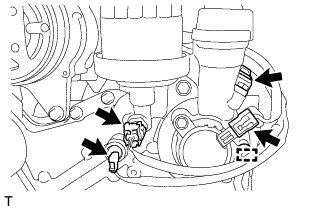 |
Disconnect the camshaft position sensor connector and camshaft timing oil control valve connector.
Disconnect the engine oil pressure switch connector and engine oil temperature connector.
Disengage the clamp.
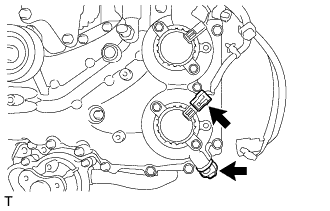 |
Disconnect the camshaft position sensor connector and camshaft timing oil control valve connector.
| 14. REMOVE OIL LEVEL DIPSTICK GUIDE |
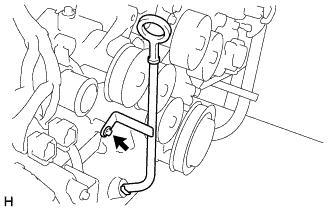 |
Remove the oil level dipstick sub-assembly.
Remove the bolt and oil level dipstick guide.
Remove the O-ring from the oil level dipstick guide.
| 15. REMOVE NO. 2 IDLER PULLEY SUB-ASSEMBLY |
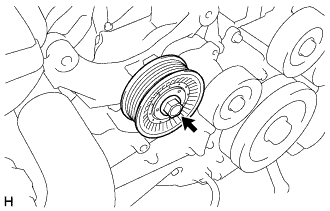 |
Remove the bolt, washer plate and No. 2 idler pulley sub-assembly.
| 16. REMOVE V-RIBBED BELT TENSIONER ASSEMBLY |
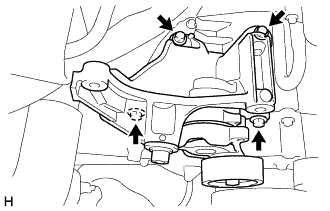 |
Remove the 4 bolts and V-ribbed belt tensioner assembly.
| 17. REMOVE NO. 1 IDLER PULLEY SUB-ASSEMBLY |
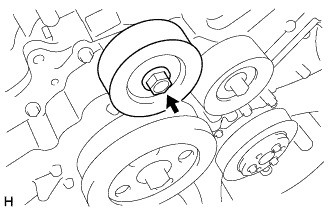 |
Remove the bolt, washer plate and No. 1 idler pulley sub-assembly.
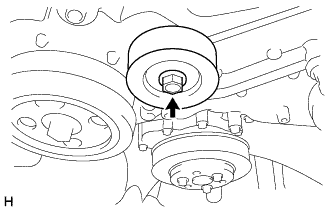 |
Remove the bolt, washer plate and No. 1 idler pulley sub-assembly.
| 18. REMOVE TIMING CHAIN OR BELT COVER OIL SEAL |
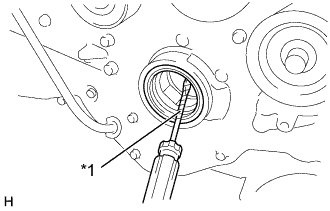 |
Using a screwdriver with its tip wrapped in protective tape, pry out the timing chain or belt cover oil seal.
| *1 | Protective Tape |
| 19. REMOVE TIMING CHAIN OR BELT COVER SUB-ASSEMBLY |
Remove the 32 bolts.
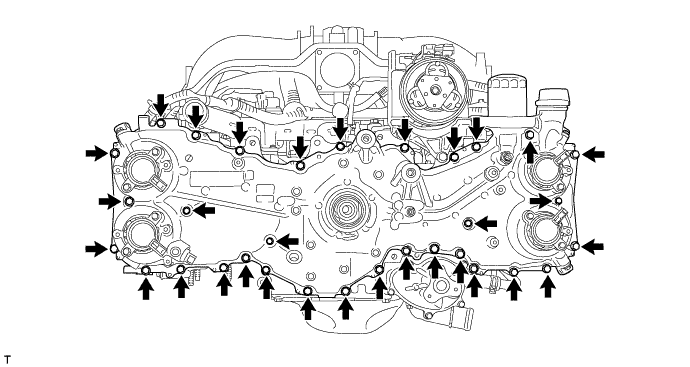
Using a screwdriver with its tip wrapped with protective tape, remove the timing chain or belt cover sub-assembly by prying between the timing chain or belt cover sub-assembly and cylinder head or cylinder block.
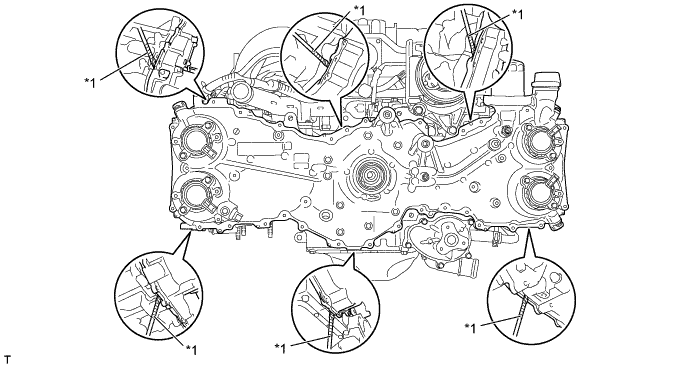
| *1 | Protective Tape | - | - |
Remove the 4 O-rings.