AXLE AND DIFFERENTIAL REAR AXLE CARRIER REMOVAL
CAUTION / NOTICE / HINT
- HINT:
- ·
Use the same procedure for the RH and LH sides.
·The procedure listed below is for the LH side.
PROCEDURE

 42450B
1.REMOVE REAR AXLE HUB AND BEARING ASSEMBLY LH
2.DISASSEMBLY PARKING BRAKE ASSEMBLY
89408C
3.SEPARATE REAR HEIGHT CONTROL SENSOR SUB-ASSEMBLY LH (w/ HID Headlight System)
48802
4.SEPARATE STABILIZER LINK SUB-ASSEMBLY (for LH Side)
46430
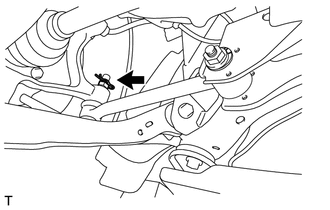
5.SEPARATE NO. 3 PARKING BRAKE CABLE ASSEMBLY
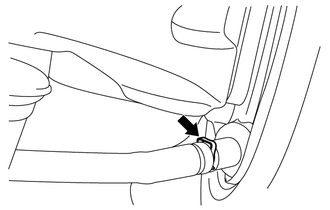
Remove the clip and separate the No. 3 parking brake cable assembly from the parking brake plate sub-assembly.
48790
6.SEPARATE REAR UPPER CONTROL ARM ASSEMBLY LH
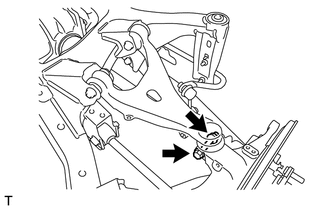
Remove the bolt and the nut, and separate the rear upper control arm assembly LH from rear axle carrier.
48720A
7.SEPARATE REAR NO. 1 SUSPENSION ARM ASSEMBLY LH
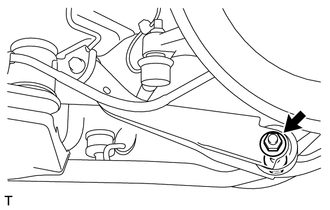
Remove the bolt and the nut, and separate the rear No. 1 suspension arm assembly LH from the rear axle carrier.
48740F
8.SEPARATE REAR NO. 2 SUSPENSION ARM ASSEMBLY LH
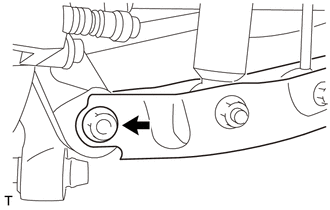
Remove the bolt and the nut, and separate the rear No. 2 suspension arm assembly LH from the rear axle carrier.
48706B
9.DISCONNECT TOE CONTROL LINK SUB-ASSEMBLY LH
Remove the cotter pin.
Remove the nut.
Install the SST (spacer B) as shown in the illustration.
- NOTICE:
-
As SST may get damaged, make sure the space between the toe control link sub-assembly LH and the spacers is not less than 1 mm (0.0394 in.).
Using SST, disconnect the toe control link sub-assembly LH from the rear axle carrier as shown in the illustration.
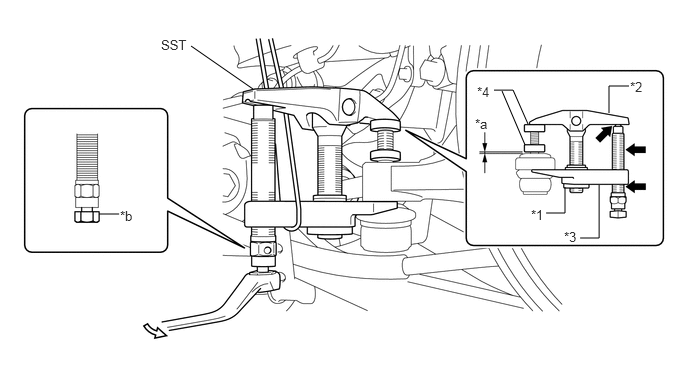
| *1 | Nut | *2 | Body |
| *3 | Claw | *4 | SST (Spacer B) |
| *a | 1 mm (0.0394 in.) | *b | Place a Wrench Here |

|
Molybdenum Grease | 
|
Turn |
- SST
- 09960-20010 (09961-02010, 09961-02060)
- CAUTION:
-
Before working, apply molybdenum grease to the bolt threads and bolt tip of the SST.
- NOTICE:
- ·
Install SST so that the claw and body are parallel.
·Make sure to tie the string of SST to the vehicle to prevent SST from dropping.
·Do not damage the toe-control link ball joint dust cover.
·Do not damage the toe-control link sub-assembly.
·Do not damage the parking brake plate subassembly.
·Do not damage the rear axle carrier.
46504
10.REMOVE PARKING BRAKE PLATE SUB-ASSEMBLY
42305
11.REMOVE REAR AXLE CARRIER SUB-ASSEMBLY LH
Hold the drive shaft and remove the rear axle carrier sub-assembly LH.