DOOR / HATCH FUEL LID LOCK CONTROL CABLE ASSEMBLY(for RHD) REMOVAL
PROCEDURE

 67913
1.REMOVE FRONT DOOR SCUFF PLATE RH
- HINT:
-
Use the same procedure as for the LH side (See page Vehicle Interior>INTERIOR PANELS / TRIM>ROOF HEADLINING>REMOVAL).
62311B
2.DISCONNECT FRONT DOOR OPENING TRIM WEATHERSTRIP RH
- HINT:
-
Disconnect the front door opening trim weatherstrip to the extent that allows the removal of the luggage compartment trim cover RH.
3.REMOVE FRONT SEAT ASSEMBLY
71460S
4.REMOVE SEPARATE TYPE REAR SEAT CUSHION ASSEMBLY RH
- HINT:
-
Use the same procedure as for the LH side (See page Vehicle Interior>SEAT>REAR SEAT ASSEMBLY>REMOVAL).
64711
5.REMOVE LUGGAGE COMPARTMENT FLOOR MAT
58387
6.REMOVE REAR FLOOR FINISH PLATE
64721
7.REMOVE LUGGAGE COMPARTMENT INNER TRIM COVER RH
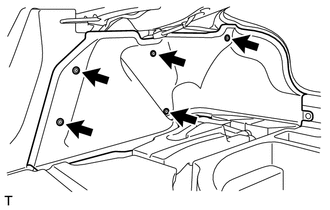
Disengage the 5 clips and remove the luggage compartment inner trim cover RH.
64714D
8.REMOVE LUGGAGE COMPARTMENT TRIM COVER RH
- HINT:
-
Use the same procedure as for the LH side (See page Vehicle Interior>INTERIOR PANELS / TRIM>ROOF HEADLINING>REMOVAL).
64376A
9.REMOVE NO. 2 PACKAGE TRAY TRIM SPACER
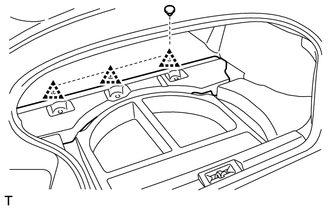
Using a clip remover, remove the 3 clips and the No. 2 package tray trim spacer.
77306C
10.REMOVE HANDLE COVER
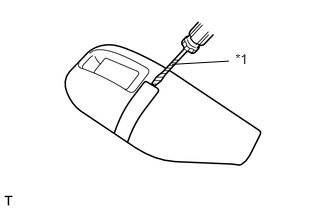
Using a screwdriver with its tip wrapped in protective tape, disengage the claw.
| *1 | Protective Tape |
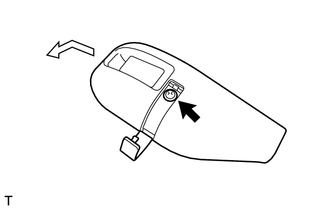
Remove the screw.
Remove the handle cover as shown in the illustration.
77306
11.REMOVE FUEL LID LOCK OPEN LEVER SUB-ASSEMBLY
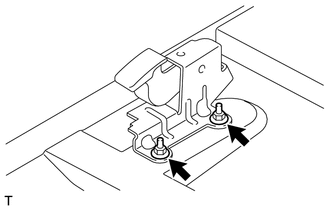
Peel back the floor carpet.
Remove the 2 nuts and the fuel lid lock open lever sub-assembly.
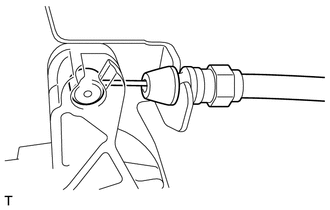
Disconnect the fuel lid lock control cable sub-assembly.
77035
12.REMOVE FUEL LID LOCK CONTROL CABLE SUB-ASSEMBLY
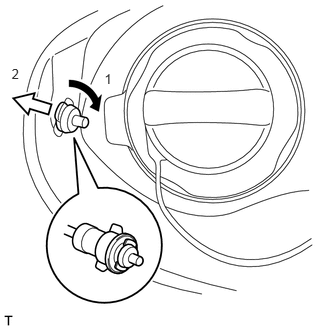
Remove the fuel filler opening lid lock retainer as indicated by the arrows in the order shown in the illustration.
Using a screwdriver with its tip wrapped in protective tape, disengage the 7 clamps and remove the fuel lid lock control cable sub-assembly.
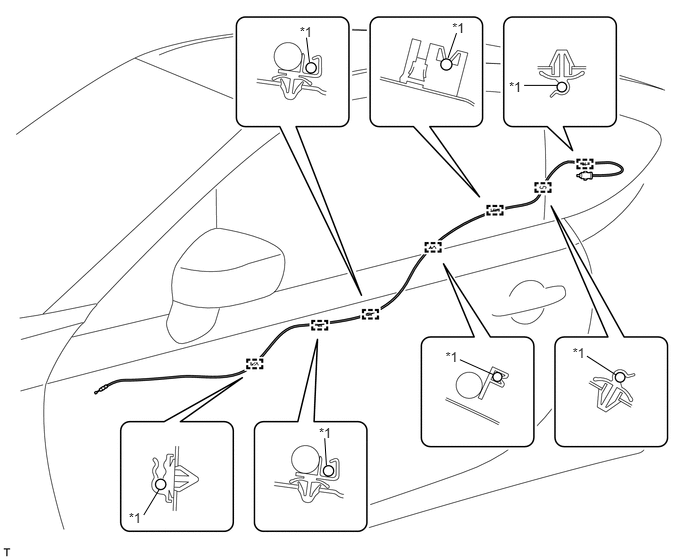
| *1 | Fuel Lid Lock Control Cable Sub-Assembly | - | - |