3SZ-VE ENGINE MECHANICAL CAMSHAFT REMOVAL
PROCEDURE

 51441D
1.REMOVE ENGINE UNDER COVER (for Half Cover Type)
51441
2.REMOVE NO. 1 ENGINE UNDER COVER (for Full Cover Type)
51443
3.REMOVE REAR ENGINE UNDER COVER (for Full Cover Type)
17881
4.REMOVE NO. 1 AIR CLEANER HOSE
17700
5.REMOVE AIR CLEANER ASSEMBLY
19500
6.REMOVE IGNITION COIL ASSEMBLY
12261
7.DISCONNECT VENTILATION HOSE
12262
8.DISCONNECT NO. 2 VENTILATION HOSE
22268
9.REMOVE NO. 2 THROTTLE BODY BRACKET
10.REMOVE ENGINE WIRE
16507
11.SEPARATE RADIATOR PIPE SUB-ASSEMBLY
11201
12.REMOVE CYLINDER HEAD COVER SUB-ASSEMBLY
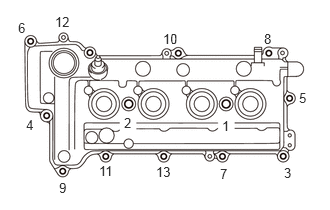
Remove the 11 bolts and 2 nuts in the sequence shown in the illustration, then remove the cylinder head cover sub-assembly.
11213
13.REMOVE CYLINDER HEAD COVER GASKET
11304
14.REMOVE NO. 2 TIMING CHAIN OR BELT COVER
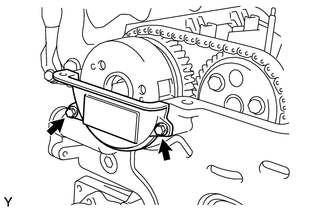
Remove the 2 bolts and No. 2 timing chain or belt cover.
13511
15.REMOVE CAMSHAFT
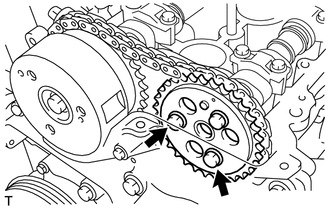
Turn the crankshaft pulley clockwise and remove the 2 bolts.
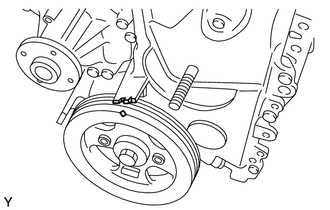
Turn the crankshaft clockwise to align the timing mark of the crankshaft pulley with the indicator of the timing chain cover.
- NOTICE:
-
In order to prevent interference of the valve with the piston when removing the camshaft, turn the crankshaft in the engine cranking direction by approximately 90° from the TDC/compression of the No. 1 cylinder.
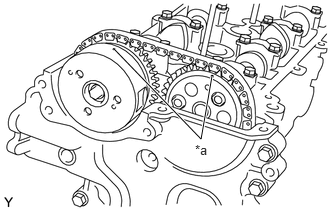
| *a | Matchmark |
Check that the matchmarks of the camshaft timing sprocket are facing upward. If not, turn the crankshaft 1 revolution so they face upward (No. 1 cylinder at TDC/compression).
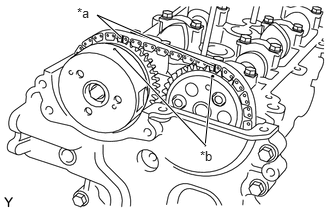
| *a | Paint Mark |
| *b | Matchmark |
Put the 2 paint marks on the timing chain plates which align the matchmark of the camshaft timing sprocket with the matchmark of the camshaft timing gear.
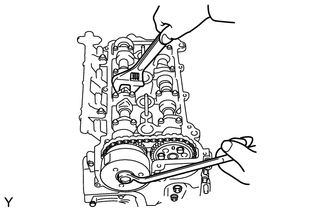
While holding the hexagonal lobe of the camshaft, loosen the bolt which holds the camshaft timing sprocket.
- NOTICE:
-
The bolt should be only loosened. Do not remove the bolt and sprocket.
- HINT:
-
Loosen the bolt in advance. If the bolt is loosened after the chain is removed, the chain may interfere with the sprocket.
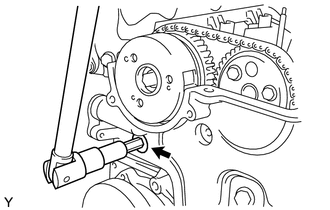
Using an 10 mm socket hexagon wrench, remove the plug.
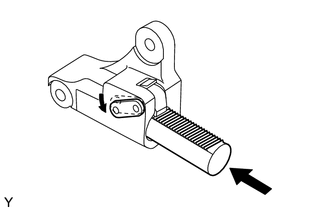
Insert a screwdriver into the chain cover service hole, then move the stopper plate of the tensioner downward and keep it unlocked.
- HINT:
- ·
This operation unlocks the plunger of the tensioner.
·If the stopper plate is not unlocked easily, turn the camshaft right and left using the hexagonal lobe of the camshaft.
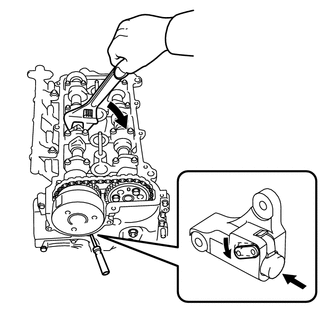
Using the hexagonal lobe of the camshaft, slightly turn the camshaft to the right so the plunger of the tensioner is pushed by the chain.
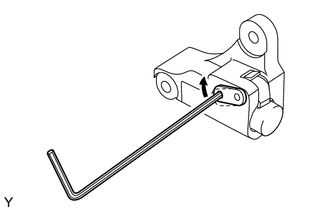
Remove the screwdriver from the chain cover service hole. Align the holes of the stopper plate and tensioner, and insert a 2.5 mm (0.098 in.) diameter hexagon wrench.
- NOTICE:
- ·
Hold the camshaft using the hexagonal lobe of the camshaft.
·Hold the 2.5 mm (0.098 in.) diameter hexagon wrench with tape so it is not pulled out.
- HINT:
-
This operation keeps the plunger of the tensioner in place.
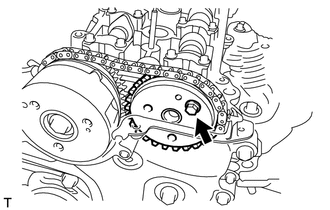
Remove the fixing bolt of the camshaft timing gear or sprocket and remove the sprocket from the No. 2 camshaft.
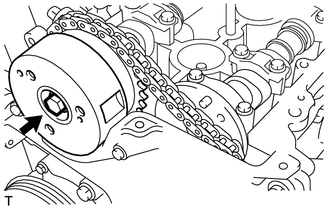
Remove the bolt and camshaft timing sprocket assembly.
Remove the 20 bolts.
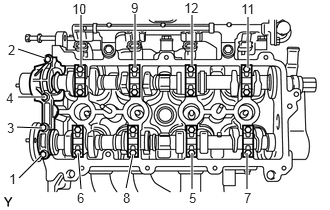
Remove the No. 1 bearing cap and 8 No. 2 bearing caps in the sequence shown in the illustration.
Hold the timing chain by hand, then remove the camshaft.
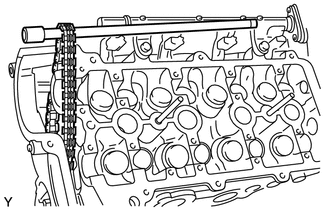
After removing the camshaft, hold the chain by inserting a bar to prevent it from coming off.