HYBRID / BATTERY CONTROL HV BATTERY THERMISTOR REMOVAL
CAUTION / NOTICE / HINT
The necessary procedures (adjustment, calibration, initialization, or registration) that must be performed after parts are removed and installed, or replaced during hybrid battery thermistor removal/installation are shown below.
| Replaced Part or Performed Procedure | Necessary Procedures | Effect/Inoperative Function when Necessary Procedure not Performed | Link |
|---|---|---|---|
|
*1: When performing learning using the GTS. Click here( |
|||
| Disconnect cable from negative auxiliary battery terminal | Memorize steering angle neutral point | Lane departure alert system (w/ Steering Control) | ( ) |
| Simple intelligent parking assist system*1 | |||
| Toyota parking assist-sensor system*1 | |||
| Pre-collision system | |||
| Initialize back door lock | Power door lock control system | ()
|
|
- CAUTION:
- ·
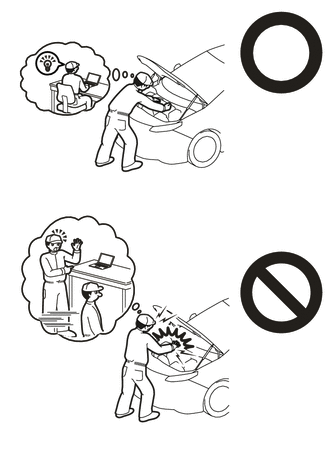
This vehicle has contains high voltage circuits standardized with orange colored wiring and connectors, so follow the instructions in this manual to perform the procedures correctly.
Click hereEngine / Hybrid System>HYBRID / BATTERY CONTROL>HYBRID CONTROL SYSTEM>PRECAUTION
·If the correct procedures are not followed according to the instructions in this manual, there is a danger of electric shock from the high voltage circuits.
·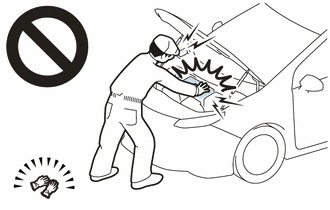
Be sure to wear insulating gloves when working on high voltage wiring or components.
·If work is performed without wearing insulating gloves, there is a danger of electric shock.
PROCEDURE

 1. PRECAUTION
- NOTICE:
-
After turning the power switch off, waiting time may be required before disconnecting the cable from the negative (-) auxiliary battery terminal. Therefore, make sure to read the disconnecting the cable from the negative (-) auxiliary battery terminal notices before proceeding with work.
-
Click hereGeneral>INTRODUCTION>REPAIR INSTRUCTION>PRECAUTION
2.REMOVE HV BATTERY JUNCTION BLOCK ASSEMBLY
G920Q
3.REMOVE NO. 1 HYBRID BATTERY SHIELD SUB-ASSEMBLY
- CAUTION:
-
Be sure to wear insulated gloves and protective goggles.
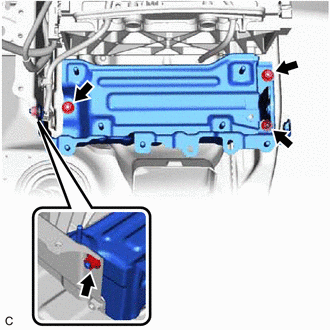
Remove the 4 nuts.
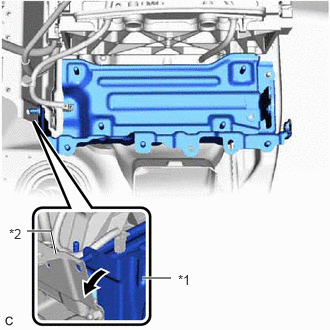
| *1 | No. 1 Hybrid Battery Shield Sub-assembly |
| *2 | No. 2 Hybrid Battery Shield Sub-assembly |

|
Pull Back |
Pull back the No. 2 hybrid battery shield sub-assembly and remove the No. 1 hybrid battery shield sub-assembly from the HV battery.
- HINT:
-
Pull back the No. 2 hybrid battery shield sub-assembly until it is separated from the stud bolt of the No. 1 hybrid battery shield sub-assembly.
G92D1
4.REMOVE NO. 1 HYBRID BATTERY INTAKE DUCT
- CAUTION:
-
Be sure to wear insulated gloves and protective goggles.
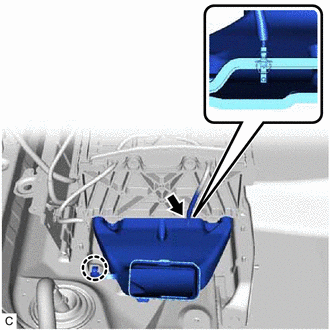
Disengage the claw of hybrid battery thermistor (sensor portion) and disconnect the hybrid battery thermistor from the No. 1 hybrid battery intake duct.
Disengage the claw to remove the No. 1 hybrid battery intake duct from the HV battery.
G9282
5.REMOVE HYBRID BATTERY THERMISTOR
- CAUTION:
-
Be sure to wear insulated gloves and protective goggles.
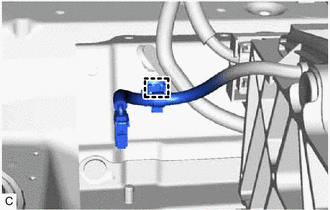
Disengage the clamp.
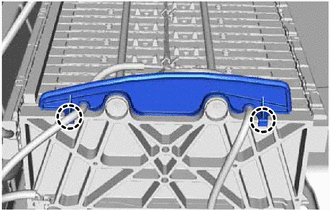
Disengage the 2 claws and remove the No. 1 hybrid battery packing from the HV battery.
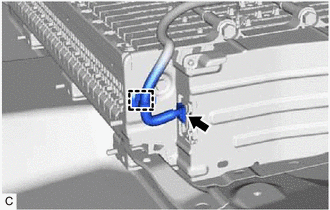
Disengage the clamp.
Disconnect the battery voltage sensor connector.
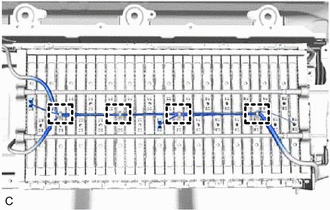
Disengage the 4 clamps.
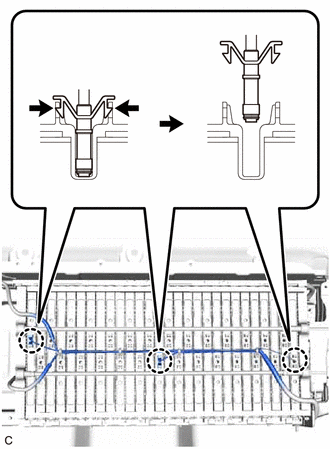
Disengage the 3 claws of the hybrid battery thermistor (sensor portions) and remove the hybrid battery thermistor from the HV battery.