DOOR / HATCH BACK DOOR DISASSEMBLY
CAUTION / NOTICE / HINT
The necessary procedures (adjustment, calibration, initialization, or registration) that must be performed after parts are removed and installed, or replaced during back door disassembly/reassembly are shown below.
| Replaced Part or Performed Procedure | Necessary Procedure | Effect/Inoperative Function when Necessary Procedure not Performed | Link |
|---|---|---|---|
| Rear television camera assembly | Rear television camera view adjustment | Panoramic view monitor system | ( ) |
PROCEDURE

 64330D
1.REMOVE PACKAGE TRAY TRIM PANEL ASSEMBLY (w/ Package Tray Trim)
64910J
2.REMOVE TONNEAU COVER ASSEMBLY (w/ Tonneau Cover)
64790B
3.REMOVE BACK DOOR TRIM UPPER PANEL ASSEMBLY
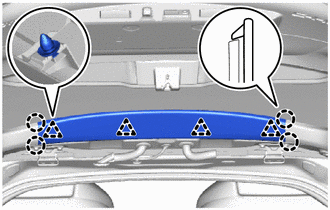
Disengage the claws and clips to remove the back door trim upper panel assembly.
67938A
4.REMOVE BACK DOOR SIDE GARNISH LH
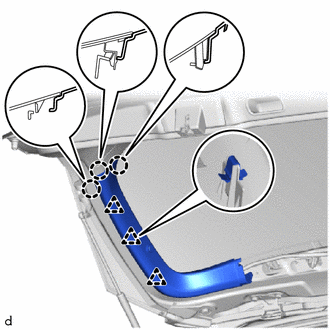
Disengage the claws and clips to remove the back door side garnish LH.
67937B
5.REMOVE BACK DOOR SIDE GARNISH RH
- HINT:
-
Use the same procedure as for the LH side.
64338D
6.REMOVE PACKAGE TRAY TRIM GARNISH HOOK
- HINT:
-
Use the same procedure for the RH side and LH side.
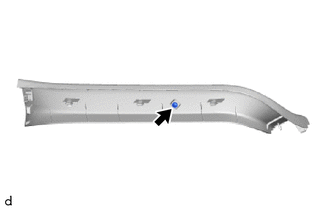
Remove the screw.
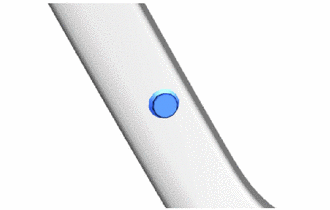
Remove the package tray trim garnish hook.
64780A
7.REMOVE BACK DOOR TRIM PANEL ASSEMBLY
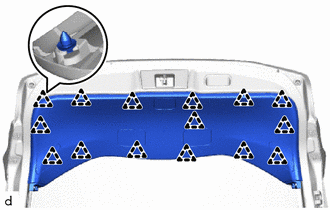
Disengage the clips to remove the back door trim panel assembly.
74811B
8.REMOVE DOOR PULL HANDLE
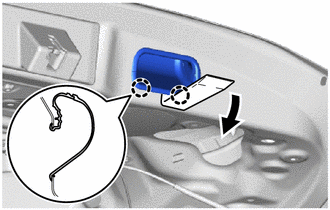
Using a moulding remover D, disengage the claws to remove the door pull handle.
67765A
9.REMOVE NO. 1 BACK DOOR SERVICE HOLE COVER
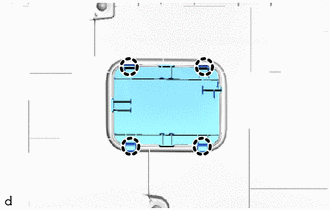
Disengage the claws to remove the No. 1 back door service hole cover.
67765A
10.REMOVE NO. 2 BACK DOOR SERVICE HOLE COVER
- HINT:
-
Use the same procedure as for the No. 1 back door service hole cover.
67765A
11.REMOVE NO. 3 BACK DOOR SERVICE HOLE COVER
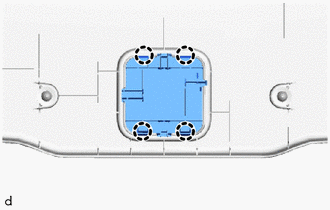
Disengage the claws to remove the No. 3 back door service hole cover.
67765A
12.REMOVE BACK DOOR SERVICE HOLE COVER LH
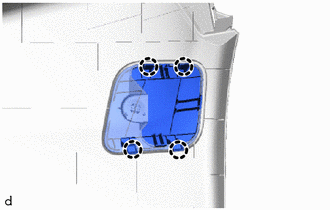
Disengage the claws to remove the back door service hole cover LH.
67765A
13.REMOVE BACK DOOR SERVICE HOLE COVER RH
- HINT:
-
Use the same procedure as for the LH side.
69321
14.REMOVE BACK DOOR LOCK COVER
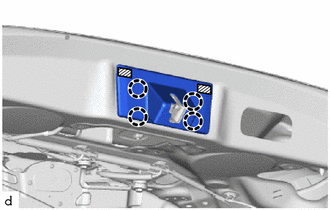

|
Double-sided Tape |
Disengage the claws.
Remove the double-sided tape and back door lock cover.
- NOTICE:
-
Remove any remaining double-sided tape from the back door.
69350P
15.REMOVE BACK DOOR LOCK ASSEMBLY
16.REMOVE REAR WIPER ARM AND BLADE ASSEMBLY
85110R
17.REMOVE REAR WIPER MOTOR ASSEMBLY
85143R
18.REMOVE REAR WIPER MOTOR GROMMET
67282F
19.REMOVE BACK DOOR LOWER STOPPER
- HINT:
-
Use the same procedure for the RH side and LH side.
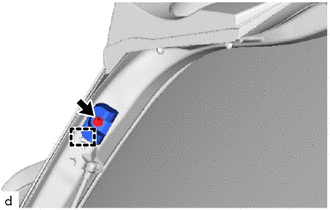
Remove the bolt.
Disengage the guide to remove the back door lower stopper.
20.REMOVE REAR SPOILER ASSEMBLY
85345R
21.REMOVE REAR WASHER NOZZLE
81962
22.REMOVE REAR LIGHT COVER LH (w/ Cover)
81952A
23.REMOVE REAR LIGHT COVER RH (w/ Cover)
- HINT:
-
Use the same procedure as for the LH side.
24.REMOVE BACK DOOR OUTSIDE GARNISH SUB-ASSEMBLY
w/o Cover:
Click hereVehicle Exterior>EXTERIOR PANELS / TRIM>BACK DOOR OUTSIDE GARNISH>REMOVAL
w/ Cover:
Click hereVehicle Exterior>EXTERIOR PANELS / TRIM>BACK DOOR OUTSIDE GARNISH>REMOVAL
84840G
25.REMOVE BACK DOOR OPENER SWITCH ASSEMBLY
81270B
26.REMOVE LICENSE PLATE LIGHT ASSEMBLY
86790D
27.REMOVE REAR TELEVISION CAMERA ASSEMBLY (w/ Rear View Monitor System)
76827A
28.REMOVE NO. 2 BACK DOOR GARNISH RETAINER (w/o Rear View Monitor System)
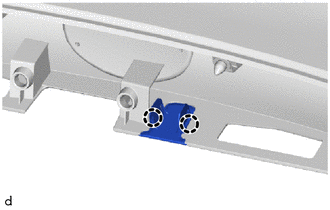
Disengage the claws to remove the No. 2 back door garnish retainer.
67005B
29.REMOVE BACK DOOR PANEL CUSHION
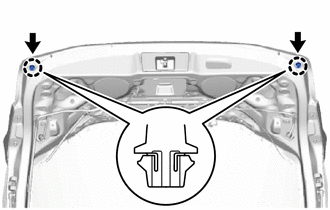
Disengage the claws to remove the 2 back door panel cushions.
67894B
30.REMOVE NO. 2 BACK DOOR PANEL PROTECTOR
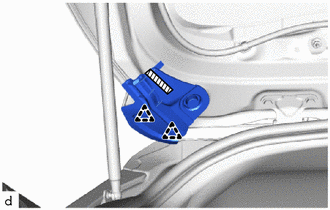
|
|
Double-sided Tape |
Using a clip remover, disengage the clips.
Remove the double-sided tape and No. 2 back door panel protector.
- NOTICE:
-
Remove any remaining double-sided tape from the back door.
67893A
31.REMOVE NO. 1 BACK DOOR PANEL PROTECTOR
- HINT:
-
Use the same procedure for the No. 2 back door panel protector.
81590A
32.REMOVE REAR LIGHT ASSEMBLY LH
81580D
33.REMOVE REAR LIGHT ASSEMBLY RH
- HINT:
-
Use the same procedure as for the LH side.
81584
34.REMOVE REAR LIGHT PACKING
35.REMOVE HOLE PLUG
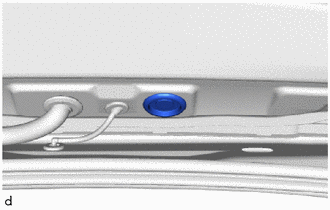
Remove the hole plug.
75441E
36.REMOVE NO. 1 BACK DOOR NAME PLATE (w/ Brand Mark)
75442A
37.REMOVE NO. 2 BACK DOOR NAME PLATE
75443
38.REMOVE NO. 3 BACK DOOR NAME PLATE
75431A
39.REMOVE NO. 1 BACK DOOR EMBLEM