DRIVE SHAFT / PROPELLER SHAFT FRONT DRIVE SHAFT ASSEMBLY(for 2ZR-FXE) REMOVAL
CAUTION / NOTICE / HINT
The necessary procedures (adjustment, calibration, initialization, or registration) that must be performed after parts are removed and installed, or replaced during front drive shaft assembly removal/installation are shown below.
| Replaced Part or Performed Procedure | Necessary Procedure | Effect/Inoperative Function when Necessary Procedure not Performed | Link |
|---|---|---|---|
| Front wheel alignment adjustment | 1.
Clear zero point calibration data. 2.
Perform yaw rate and acceleration sensor zero point calibration. |
·
DTCs are stored ·
ABS warning light illuminates ·
Brake warning light / yellow (minor malfunction) illuminates ·
Slip indicator light illuminates ·
VSC disabled or malfunctions |
( ) |
- HINT:
- ·
Use the same procedure for the RH side and LH side.
·The following procedure is for the LH side.
PROCEDURE

 1.REMOVE FRONT WHEELS
51441
2.REMOVE NO. 1 ENGINE UNDER COVER
51444A
3.REMOVE REAR ENGINE UNDER COVER LH
51443C
4.REMOVE REAR ENGINE UNDER COVER RH
5.DRAIN HYBRID TRANSAXLE FLUID
43502H
6.REMOVE FRONT AXLE SHAFT NUT
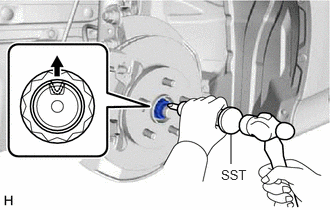
Using SST and a hammer, release the staked part of the front axle shaft nut.
- SST
- 09930-00010
- NOTICE:
-
Loosen the staked part of the front axle shaft nut completely, otherwise the threads of the drive shaft may be damaged.
While applying the brakes, remove the front axle shaft nut.
89543
7.SEPARATE FRONT SPEED SENSOR
43215
8.REMOVE STEERING KNUCKLE SEAL (w/ Seal)
45047
9.SEPARATE TIE ROD END SUB-ASSEMBLY
48810
10.SEPARATE FRONT STABILIZER LINK ASSEMBLY
48069
11.SEPARATE FRONT LOWER NO. 1 SUSPENSION ARM SUB-ASSEMBLY
12.SEPARATE FRONT DRIVE SHAFT ASSEMBLY
43420
13.REMOVE FRONT DRIVE SHAFT ASSEMBLY LH
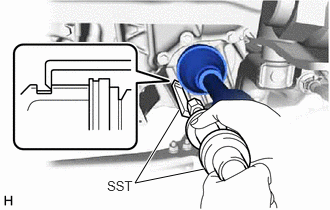
Using SST, remove the front drive shaft assembly LH.
- SST
- 09520-01010
09520-24010 (09520-32040)
- NOTICE:
- ·
Do not damage the front drive shaft oil seal LH.
·Do not damage the front axle inboard joint boot.
·Do not drop the front drive shaft assembly LH.
43410
14.REMOVE FRONT DRIVE SHAFT ASSEMBLY RH
- HINT:
-
Perform the same procedure as for the LH side.
43040B
15.REMOVE FRONT DRIVE INBOARD JOINT HOLE SNAP RING
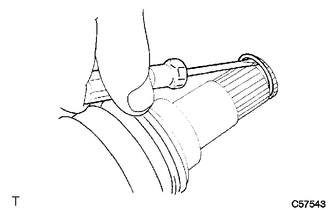
Using a screwdriver, remove the front drive inboard joint hole snap ring.