SUPPLEMENTAL RESTRAINT SYSTEMS CURTAIN SHIELD AIRBAG ASSEMBLY REMOVAL
CAUTION / NOTICE / HINT
The necessary procedures (adjustment, calibration, initialization, or registration) that must be performed after parts are removed, installed, or replaced during the curtain shield airbag assembly removal/installation are shown below.
| Replacement Part or Procedure | Necessary Procedures | Effects/Inoperative when not performed | Link |
|---|---|---|---|
| Disconnect cable from negative battery terminal | Memorize steering angle neutral point | Lane departure alert system (w/ Steering Control) | ( ) |
| Simple intelligent parking assist system*1 | |||
| Toyota parking assist-sensor system (w/ Simple Intelligent Parking Assist System)*1 | |||
| Pre-collision system | |||
| Initialize back door lock | Power door lock control system | ()
|
|
| Drive the vehicle until stop and start control is permitted (approximately 5 to 60 minutes)*2 | Stop and start system | ()
|
*1: When performing learning using the GTS.
*2: w/ Stop and start system
- HINT:
- ·
Use the same procedure for RHD and LHD vehicles.
·The following procedure is for LHD vehicles.
·Use the same procedure for the RH side and LH side.
·The following procedure is for the LH side.
PROCEDURE

 1. PRECAUTION
- CAUTION:
-
-
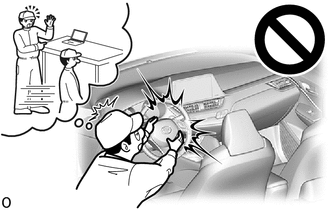
Be sure to read Precaution thoroughly before servicing.
-
Click hereVehicle Interior>SUPPLEMENTAL RESTRAINT SYSTEMS>AIRBAG SYSTEM>PRECAUTION
- NOTICE:
-
After turning the ignition switch off, waiting time may be required before disconnecting the cable from the negative (-) battery terminal. Therefore, make sure to read the disconnecting the cable from the negative (-) battery terminal notices before proceeding with work.
-
Click hereGeneral>INTRODUCTION>REPAIR INSTRUCTION>PRECAUTION
2.DISCONNECT CABLE FROM NEGATIVE BATTERY TERMINAL
for 8NR-FTS:
for 3ZR-FAE:
- CAUTION:
- ·
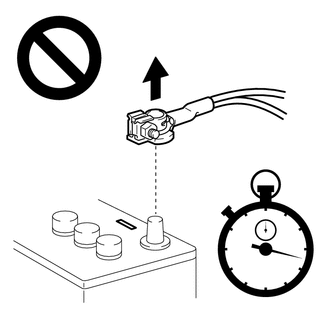
Wait at least 90 seconds after disconnecting the cable from the negative (-) battery terminal to disable the SRS system.
·If an SRS part is accidentally deployed, it may cause a serious injury.
- NOTICE:
-
When disconnecting the cable, some systems need to be initialized after the cable is reconnected.
-
Click hereGeneral>INTRODUCTION>REPAIR INSTRUCTION>INITIALIZATION
3.REMOVE ROOF HEADLINING ASSEMBLY
62180A
4.REMOVE CURTAIN SHIELD AIRBAG ASSEMBLY
- CAUTION:
-
 0,0 0,0 false

Deployment Side
-
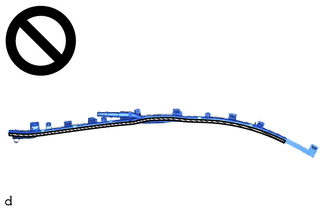
When storing the curtain shield airbag assembly, keep the airbag deployment side facing upward.
- NOTICE:
-
When removing the curtain shield airbag assembly, have assistants hold it to prevent it from bending.
Check that the ignition switch off.
Check that the cable is disconnected from the negative (-) battery terminal.
- CAUTION:
-
-
Wait at least 90 seconds after disconnecting the cable from the negative (-) battery terminal to disable the SRS system.
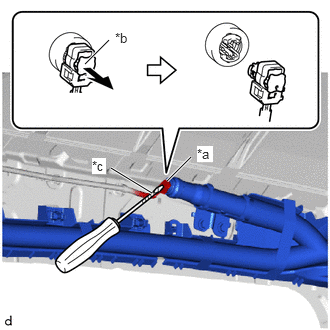
| *a | Airbag Connector |
| *b | Airbag Connector Lock |
| *c | Protective Tape |
Using a screwdriver with its tip wrapped in protective tape, release the airbag connector lock and disconnect the airbag connector.
- NOTICE:
-
When disconnecting any airbag connector, take care not to damage the airbag wire harness.
Using needle nose pliers, remove the pins from the clips.
- NOTICE:
-
Do not damage the pins.
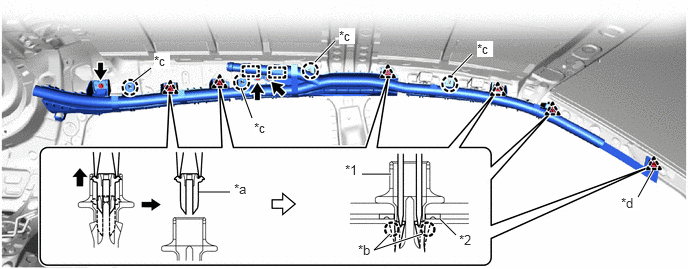
| *1 | Clip | *2 | Curtain Shield Airbag Clip Spacer |
| *a | Pin | *b | Claw (A) |
| *c | Claw (B) | *d | Spacer Location |
Using 2 screwdrivers, disengage the claws (A) of clips to separate the clips from the vehicle body as shown in the illustration.
- HINT:
-
Separate the clips and curtain shield airbag assembly from the vehicle body as a unit.
Disengage the claws (B).
While holding the curtain shield airbag assembly, remove the 3 bolts and disengage the hooks to remove the curtain shield airbag assembly.
Remove the clips and curtain shield airbag clip spacer from the curtain shield airbag assembly.