INSTALLATION
Removal / installation · Vehicles built from Jun 2009
Versions by build date: Jun 2006 – Sep 2006 Oct 2006 – May 2009 from Jun 2009
| 1.
INSTALL NO. 3 PARKING BRAKE CABLE ASSEMBLY |
 |
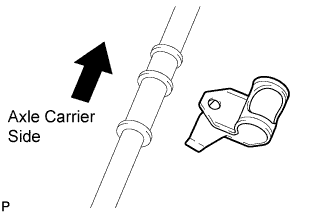
- Install the parking brake cable clamp to the No. 3 parking brake cable assembly.
Install the No. 3 parking brake cable assembly with 3 bolts (A), bolt (B) and nut (C), and engage each claw.
-
Torque:
- Bolt (A):
- 8.5 N*m{
87 kgf*cm
, 75 in.*lbf
}
- Bolt (B) and Nut (C):
- 6.0 N*m{
61 kgf*cm
, 53 in.*lbf
}
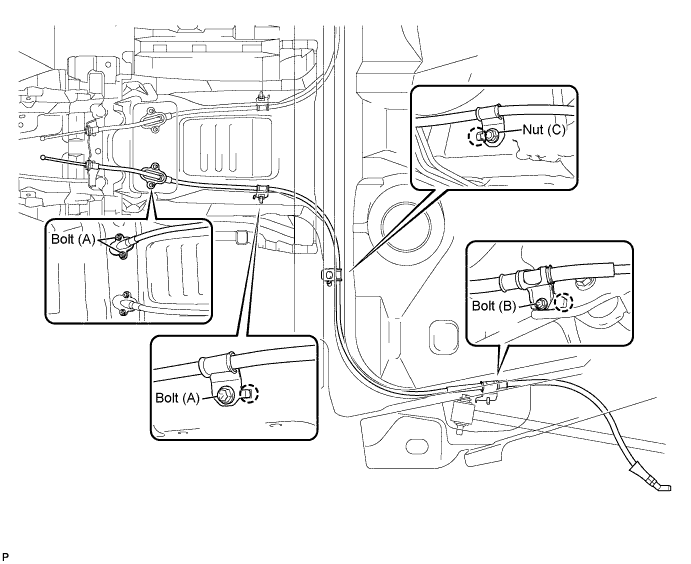

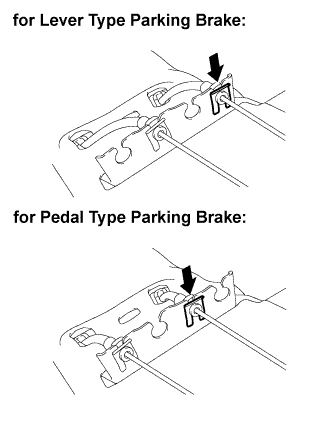
- Using a brass bar and a hammer, install the clip to the No. 3 parking brake cable assembly.
| 2.
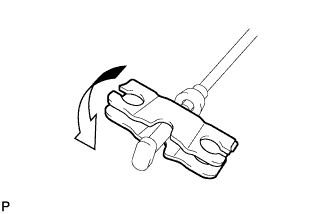
CONNECT NO. 3 PARKING BRAKE CABLE ASSEMBLY
|
|
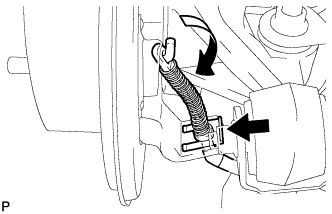
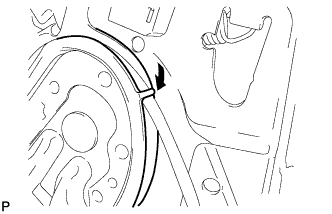
- Turn and connect the No. 3 parking brake cable assembly.
Using a brass bar and a hammer, install the clip to the No. 3 parking brake cable assembly.
| 3.
INSTALL NO. 2 FRONT FLOOR HEAT LOWER INSULATOR (for 2AZ-FE) |
|
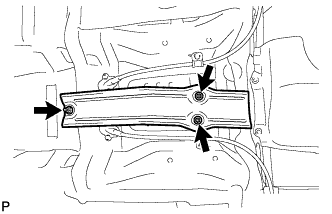
- Install the No. 2 front floor heat lower insulator with the 3 nuts.
-
Torque:
- 4.9 N*m{
50 kgf*cm
, 43 in.*lbf
}
| 4.
INSTALL CENTER EXHAUST PIPE ASSEMBLY (for 2AZ-FE)
|
|
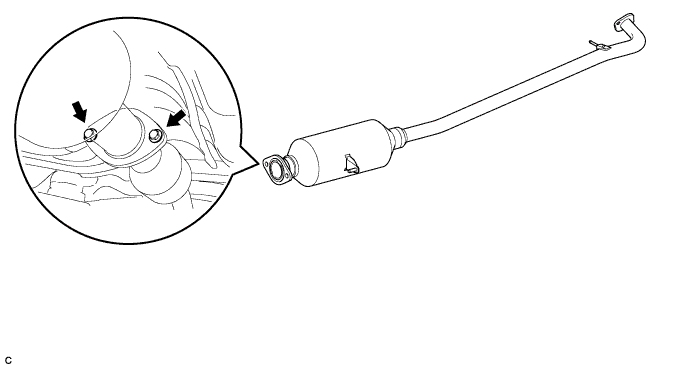
Install a new gasket onto the front exhaust pipe.
Install the center exhaust pipe assembly with the 2 bolts and 2 nuts.
-
Torque:
- 56 N*m{
571 kgf*cm
, 41 ft.*lbf
}
| 5.
INSTALL EXHAUST CENTER PIPE ASSEMBLY (for 2GR-FE)
|
|
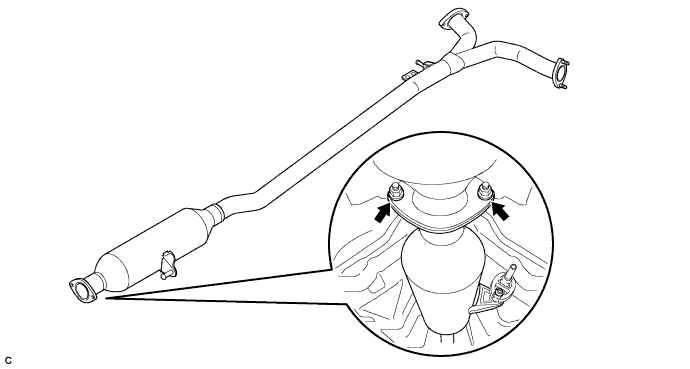
Install a new gasket to the center exhaust pipe assembly.
Install the center exhaust pipe to the exhaust front pipe with the 2 nuts and 2 bolts.
-
Torque:
- 56 N*m{
571 kgf*cm
, 41 ft.*lbf
}
| 6.
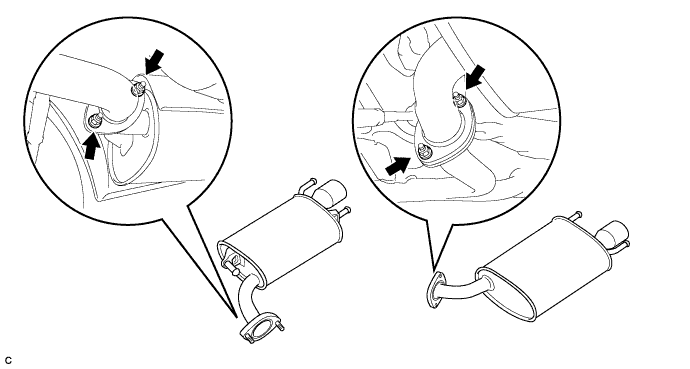
INSTALL EXHAUST TAIL PIPE ASSEMBLY (for 2GR-FE)
|
|
Install 2 new gaskets to the exhaust tail pipes.
Install the 2 exhaust tail pipes with the 4 nuts.
-
Torque:
- 43 N*m{
438 kgf*cm
, 32 ft.*lbf
}
| 7.
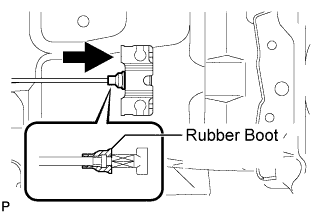
INSTALL NO. 4 PARKING BRAKE CABLE ASSEMBLY (for Pedal Type Parking Brake) |
|
- Install the No. 4 parking brake cable assembly to the parking brake equalizer.
- Slide the rubber boot back as shown in the illustration.
| 8.
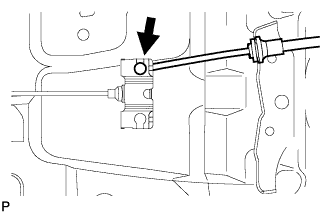
CONNECT NO. 2 PARKING BRAKE CABLE ASSEMBLY (for Pedal Type Parking Brake) |
|
- Connect the No. 2 parking brake cable assembly to the parking brake equalizer.
| 9.
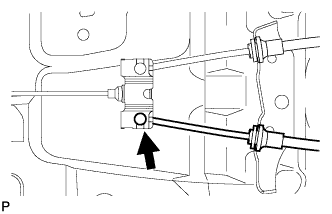
CONNECT NO. 3 PARKING BRAKE CABLE ASSEMBLY (for Pedal Type Parking Brake) |
|
- Connect the No. 3 parking brake cable assembly to the parking brake equalizer.
| 10.
INSTALL NO. 1 PARKING BRAKE CABLE ASSEMBLY (for Lever Type Parking Brake)
|
|
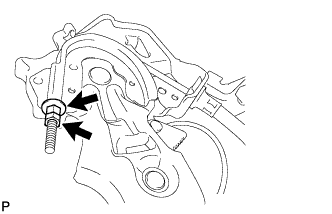
Pass the No. 1 parking brake cable assembly through the parking brake lever sub-assembly.
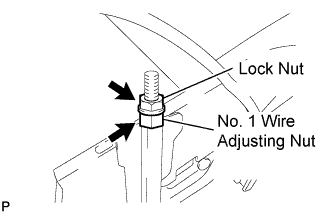
- Temporarily tighten the lock nut and the No. 1 wire adjusting nut.
- NOTICE:
- Fully tighten the lock nut when adjusting the parking brake lever travel.
-
Torque:
- 5.0 N*m{
51 kgf*cm
, 44 in.*lbf
}
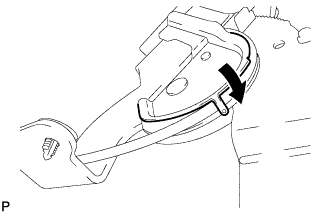
- Bend the parking brake lever claw.
| 11.
INSTALL NO. 1 PARKING BRAKE CABLE ASSEMBLY (for Pedal Type Parking Brake)
|
|
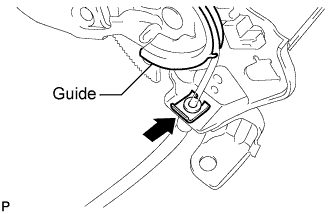
- Pass the No. 1 parking brake cable assembly through the pedal guide.
Using a brass bar and a hammer, install the clip to the No. 1 parking brake cable assembly.
- Temporarily tighten the lock nut and the No. 1 wire adjusting nut.
- NOTICE:
- Fully tighten the lock nut and the No. 1 wire adjusting nut when adjusting the parking brake pedal travel.
-
Torque:
- 5.4 N*m{
55 kgf*cm
, 48 in.*lbf
}
- Bend the parking brake pedal claw.
| 12.
INSTALL PARKING BRAKE LEVER SUB-ASSEMBLY |
|
- HINT:
- Refer to the procedures from "INSTALL PARKING BRAKE LEVER SUB-ASSEMBLY". (Click here)
| 13.
INSTALL PARKING BRAKE PEDAL ASSEMBLY (for LHD) |
|
- HINT:
- Refer to the procedures from "INSTALL PARKING BRAKE PEDAL ASSEMBLY (for LHD)". (Click here)
| 14.
INSTALL PARKING BRAKE PEDAL ASSEMBLY (for RHD) |
|
- HINT:
- Refer to the procedures from "INSTALL PARKING BRAKE PEDAL ASSEMBLY (for RHD)". (Click here)
| 15.
INSPECT FOR EXHAUST GAS LEAK
|
|
If gas is leaking, tighten the areas necessary to stop the leak. Replace the damaged parts as necessary.