Remove the radiator cap sub-assembly.
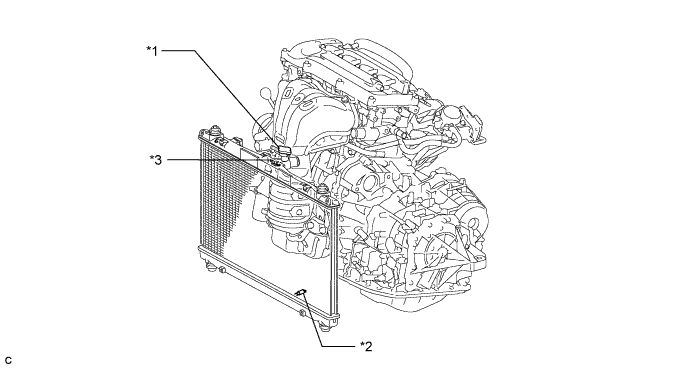
| *1 | Radiator Cap Sub-assembly | *2 | Radiator Drain Cock Plug |
| *3 | Cylinder Block Drain Cock Plug | - |
- HINT:
- Collect the engine coolant in a container and dispose of it according to the regulations in your area.
RADIATOR > REMOVAL |
| 1. PRECAUTION |
| 2. DRAIN ENGINE COOLANT |
Loosen the radiator drain cock plug.
Loosen the cylinder block drain cock plug.
Remove the radiator cap sub-assembly.
| *1 | Radiator Cap Sub-assembly | *2 | Radiator Drain Cock Plug |
| *3 | Cylinder Block Drain Cock Plug | - |
| 3. REMOVE FRONT WHEEL OPENING EXTENSION PAD RH |
| 4. REMOVE FRONT WHEEL OPENING EXTENSION PAD LH |
| 5. REMOVE ENGINE UNDER COVER RH |
| 6. REMOVE ENGINE UNDER COVER LH |
| 7. DISCONNECT CABLE FROM NEGATIVE BATTERY TERMINAL |
| 8. REMOVE FRONT BUMPER ASSEMBLY |
| 9. REMOVE INLET AIR CLEANER ASSEMBLY |
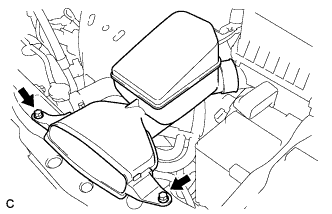 |
Remove the 2 bolts and inlet air cleaner assembly.
| 10. REMOVE RADIATOR RESERVE TANK ASSEMBLY |
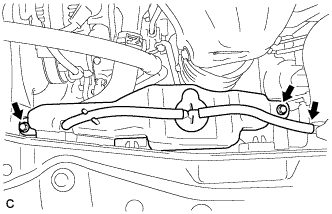 |
Disconnect the radiator reserve tank hose.
Remove the 2 bolts and radiator reserve tank assembly.
| 11. DISCONNECT NO. 1 RADIATOR HOSE |
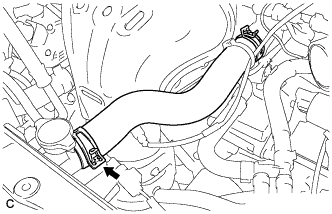 |
Disconnect the No. 1 radiator hose.
| 12. DISCONNECT NO. 2 RADIATOR HOSE |
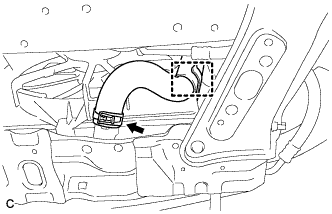 |
Disconnect the No. 2 radiator hose and clamp.
| 13. DISCONNECT INLET NO. 1 OIL COOLER HOSE |
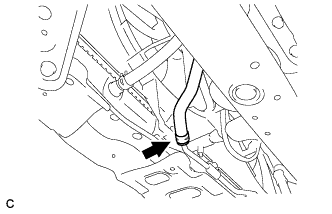 |
Disconnect the inlet No. 1 oil cooler hose.
| 14. DISCONNECT OUTLET NO. 1 OIL COOLER HOSE |
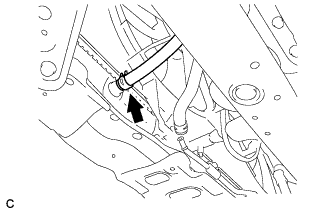 |
Disconnect the outlet No. 1 oil cooler hose.
| 15. REMOVE HOOD LOCK ASSEMBLY |
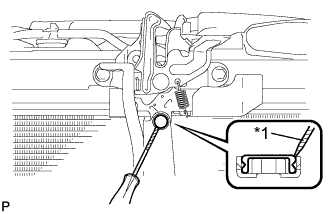 |
Using a screwdriver, remove the hood lock nut cap.
| *1 | Protective Tape |
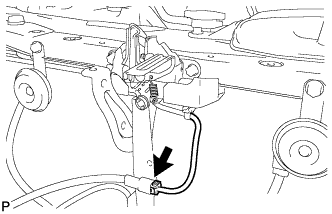 |
Disconnect the connector.
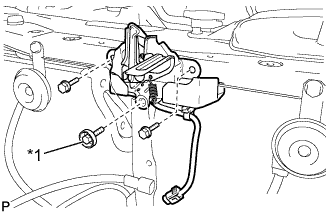 |
Remove the 2 bolts and hood lock bolt.
| *1 | Hood Lock Bolt |
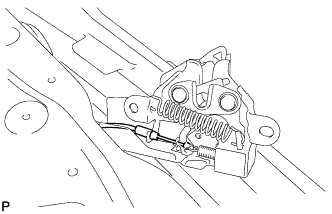 |
Disconnect the hood lock control cable assembly and remove the hood lock assembly.
| 16. REMOVE UPPER RADIATOR SUPPORT |
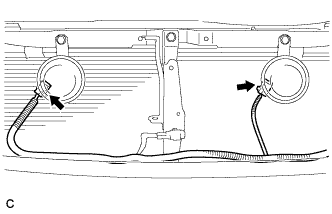 |
Disconnect the 2 connectors.
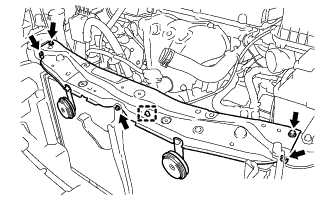 |
Disconnect the hood lock control cable clamp and remove the 5 bolts and upper radiator support.
Remove the 2 radiator support cushions.
| 17. REMOVE RADIATOR ASSEMBLY |
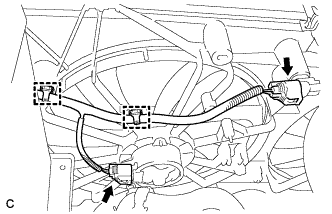 |
Disconnect the 2 clamps and 2 connectors.
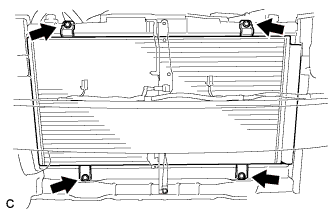 |
Remove the 4 bolts and separate the condenser assembly from the radiator assembly.
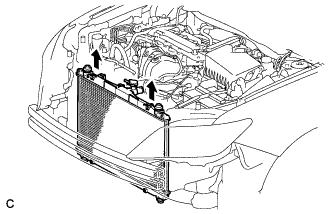 |
Remove the radiator assembly with fan assembly.
Remove the 2 lower radiator supports.
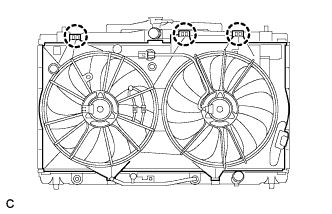 |
Release the 3 claws and lift the fan assembly from the radiator assembly.