Home › Vehicle Exterior › WINDOW / GLASS › POWER WINDOW REGULATOR MOTOR (for Rear Door)

POWER WINDOW REGULATOR MOTOR (for Rear Door) > INSTALLATION

for Preparation Click here


HINT:
  1. Use the same procedure for both the RH and LH sides.
  2. The procedure described below is for the LH side.


1. INSTALL REAR POWER WINDOW REGULATOR MOTOR ASSEMBLY

NOTICE:
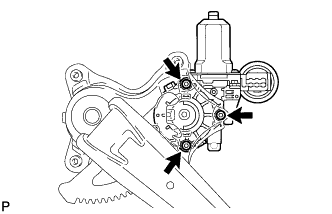
The regulator arm must be below the intermediate position when installing the rear power window regulator motor assembly.


    B280419
  1. Using a T25 "TORX" socket wrench, install the rear power window regulator motor assembly with the 3 screws.

    Torque:
    5.4 N*m{ 55 kgf*cm , 48 in.*lbf }

    HINT:
    When replacing the rear window regulator, a new rear window regulator uses self-tapping screws to thread new installation holes when the self-tapping screws are inserted.
2. INSTALL REAR DOOR WINDOW REGULATOR ASSEMBLY
  1. Apply MP grease to the sliding parts of the rear door window regulator assembly.

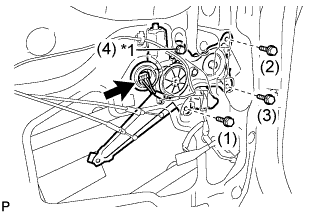
  1. Install the temporary bolt to the rear door window regulator assembly.


    B280418E02
  1. Temporarily install the rear door window regulator assembly.
    Text in Illustration 
    *1
    Temporary Bolt

  1. Tighten the temporary bolt and 3 bolts to install the rear door window regulator assembly.

    HINT:
    Tighten the bolts in the order shown in the illustration.

    Torque:
    8.0 N*m{ 82 kgf*cm , 71 in.*lbf }


3. INSTALL REAR DOOR GLASS SUB-ASSEMBLY


    B280412
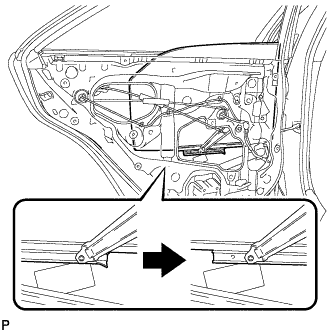
  1. Slide the rear door glass sub-assembly to install it as shown in the illustration.


4. INSTALL REAR DOOR QUARTER WINDOW GLASS


    B280411
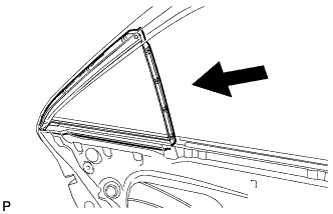
  1. Install the rear door quarter window glass together with the rear door quarter window weatherstrip in the direction indicated by the arrow in the illustration.


5. INSTALL REAR DOOR LOWER WINDOW FRAME SUB-ASSEMBLY


    B280409
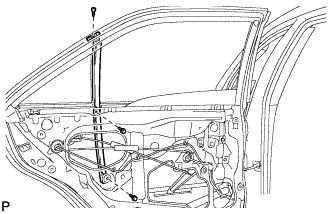
  1. Install the rear door lower window frame sub-assembly with the screw and 2 bolts.


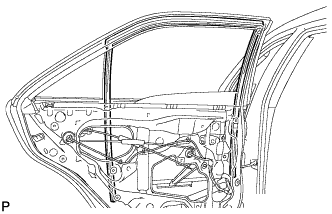
6. INSTALL REAR DOOR GLASS RUN


    B280408
  1. Install the rear door glass run.


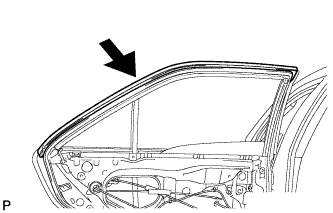
7. INSTALL REAR DOOR WEATHERSTRIP


    B288952
  1. Install the upper part of rear door weatherstrip as shown in the illustration.


8. INSTALL REAR DOOR SERVICE HOLE COVER
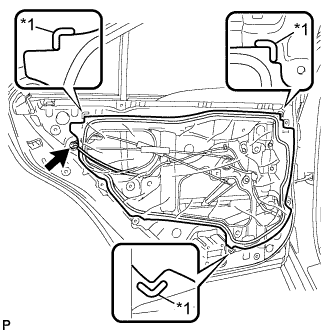
  1. Apply new butyl tape to the rear door panel.


    B280405E01
  1. Pass the rear door lock remote control cable assembly, rear door inside locking cable assembly and each connector through a new rear door service hole cover.
    Text in Illustration 
    *1
    Reference Point

  1. Attach the rear door service hole cover according to the reference points on the rear door panel.

    NOTICE:
    Securely install the rear door service hole cover preventing wrinkles and air bubbles.

  1. Connect the connector.


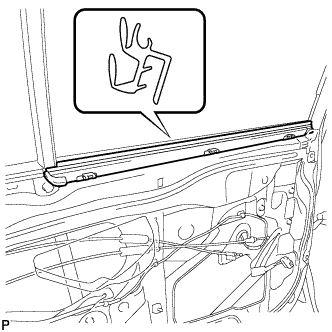
9. INSTALL REAR DOOR INNER GLASS WEATHERSTRIP


    B280401
  1. Install the rear door inner glass weatherstrip.


10. INSTALL REAR DOOR TRIM BOARD SUB-ASSEMBLY


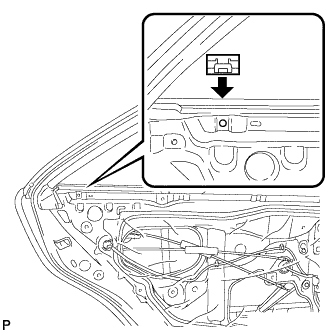
    B280402
  1. Install the No. 1 door scuff plate clamp as shown in the illustration.


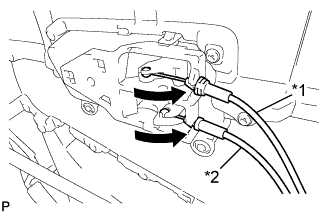
    B280397E01
  1. Connect the rear door lock remote control cable assembly and rear door inside locking cable assembly.
    Text in Illustration 
    *1
    Rear Door Inside Locking Cable Assembly
    *2
    Rear Door Lock Remote Control Cable Assembly


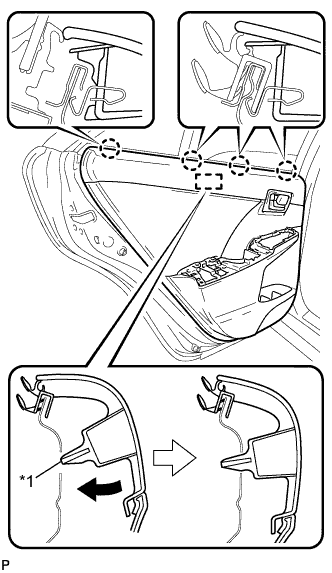
    B280395E01
  1. Engage the rear door trim board sub-assembly with the 4 claws and reference boss as shown in the illustration.
    Text in Illustration 
    *1
    Reference Boss


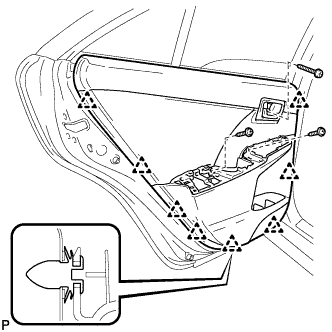
    B280393
  1. Engage the 8 clips and install the rear door trim board sub-assembly.

  1. Install the 3 screws.

  1. If protective tape has been applied, remove it.


11. INSTALL REAR ARMREST ASSEMBLY


    B280392
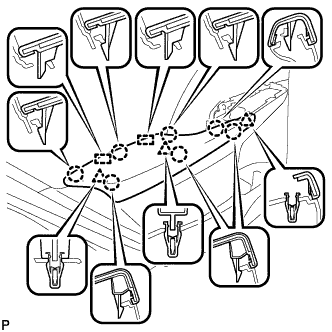
  1. Engage the 2 guides, 3 clips and 7 claws to install the rear armrest assembly.


12. INSTALL REAR POWER WINDOW REGULATOR SWITCH ASSEMBLY WITH REAR DOOR ARMREST BASE PANEL
  1. Connect the connector.


    B280390
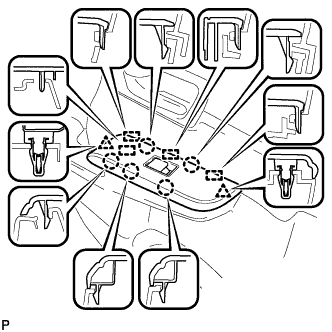
  1. Engage the 4 guides, 2 clips and 5 claws to install the rear power window regulator switch assembly with rear door armrest base panel.


13. INSTALL REAR DOOR INSIDE HANDLE BEZEL PLUG


    B280388
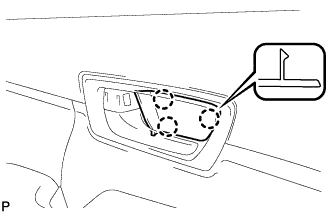
  1. Engage the 3 claws to install the rear door inside handle bezel plug.


14. CONNECT CABLE TO NEGATIVE BATTERY TERMINAL

NOTICE:
When disconnecting the cable, some systems need to be initialized after the cable is reconnected. (Click here)


15. INITIALIZE POWER WINDOW CONTROL SYSTEM
(Click here)


16. INSPECT POWER WINDOW OPERATION
(Click here)