 |
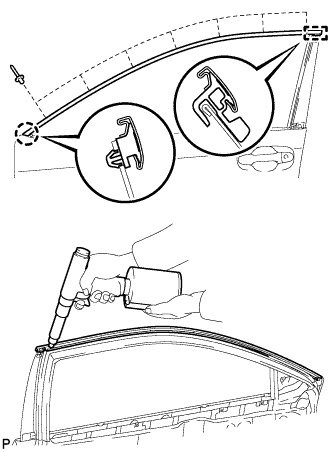
Engage the claw and guide of the front door upper window frame moulding to the door frame.
FRONT DOOR WINDOW FRAME MOULDING > INSTALLATION |
| 1. PRECAUTION |
| 2. INSTALL FRONT DOOR UPPER WINDOW FRAME MOULDING |
|
Engage the claw and guide of the front door upper window frame moulding to the door frame.
Using an air riveter or hand riveter with a nose piece, install the front door upper window frame moulding with 7 new rivets.
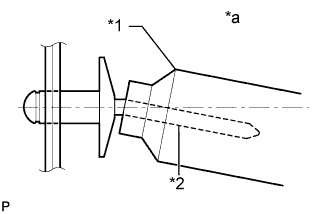 |
| *1 | Riveter |
| *2 | Mandrel |
| *a | Incorrect |
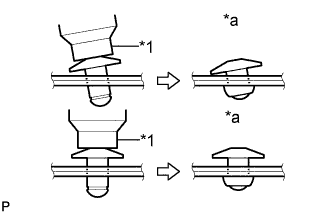 |
| *1 | Riveter |
| *a | Incorrect |
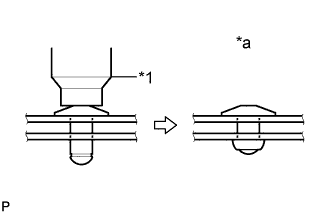 |
| *1 | Riveter |
| *a | Incorrect |
| 3. INSTALL FRONT DOOR REAR WINDOW FRAME MOULDING |
| Item | Temperature |
| Vehicle Body | 40 to 60°C (104 to 140°F) |
| Moulding | 20 to 30°C (68 to 86°F) |
Clean the vehicle body surface.
Using a heat light, heat the vehicle body surface.
Remove the double-sided tape from the vehicle body.
Wipe off any tape adhesive residue with cleaner.
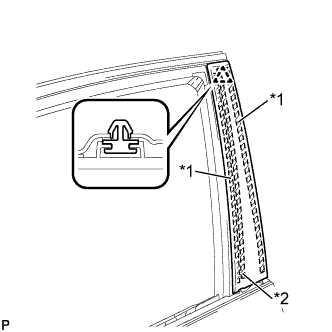 |
Install a new front door rear window frame moulding.
| *1 | Double-sided Tape |
| *2 | Caulking Sponge |
Using a heat light, heat the vehicle body and front door rear window frame moulding.
Remove the release paper from the face of the front door rear window frame moulding.
Install the front door rear window frame moulding with the clip.
| 4. INSTALL FRONT DOOR WEATHERSTRIP |
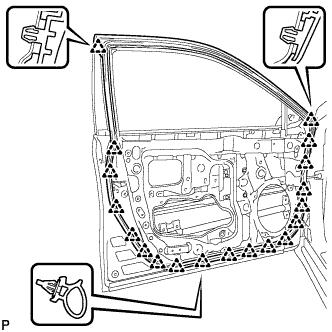 |
Engage the 19 clips and install the front door weatherstrip.
| 5. INSTALL FRONT DOOR CHECK ASSEMBLY |
Apply MP grease to the sliding areas of the front door check assembly.
Apply adhesive to the threads of the bolt.
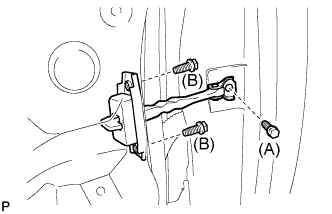 |
Install the front door check assembly with the 3 bolts.
| 6. INSTALL FRONT DOOR BELT MOULDING ASSEMBLY |
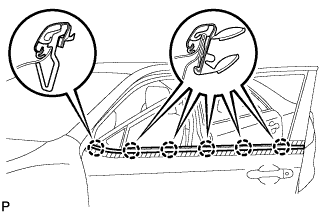 |
Engage the 6 claws to install the front door belt moulding assembly.
| 7. INSTALL FRONT DOOR GLASS RUN |
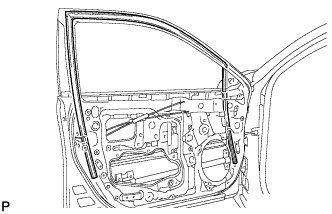 |
Install the front door glass run.
| 8. INSTALL FRONT DOOR GLASS SUB-ASSEMBLY |
Connect the cable to the negative (-) battery terminal.
Connect the power window regulator master switch assembly and move the front door glass sub-assembly so that the door glass bolts can be seen.
Disconnect the cable from the negative (-) battery terminal.
Disconnect the power window regulator master switch assembly.
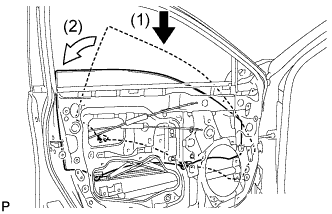 |
Insert the front door glass sub-assembly into the front door panel along the front door glass run as indicated by the arrows, in the order shown in the illustration.
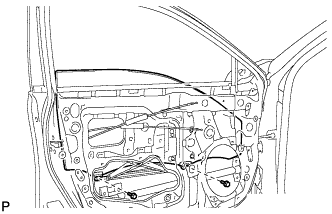 |
Install the front door glass sub-assembly with the 2 bolts.
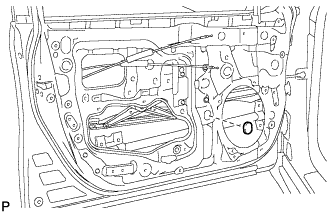 |
Install the grommet.
| 9. INSTALL FRONT DOOR SERVICE HOLE COVER |
Apply new butyl tape to the front door panel.
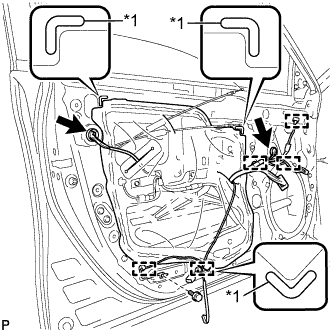 |
Pass the front door lock remote control cable assembly and front door inside locking cable assembly through a new front door service hole cover.
| *1 | Reference Point |
Attach the front door service hole cover according to the reference points on the front door panel.
Engage the 5 clamps.
Install the bolt.
Connect each connector.
| 10. INSTALL DOOR SIDE AIRBAG SENSOR |
Check that the ignition switch is off.
Check that the cable is disconnected from the negative (-) battery terminal.
Before connecting the connector, check that the position of the white housing lock is correct as shown in the illustration.
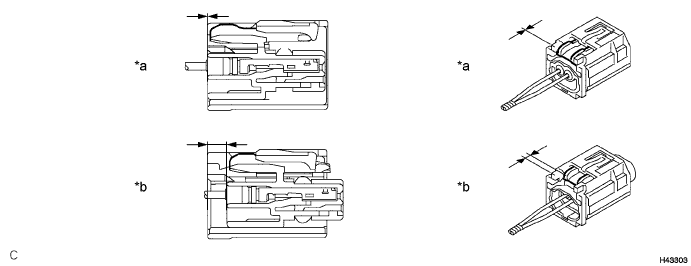
| *a | Incorrect | *b | Correct |
Insert the pin (stopper) into the door hole and install the door side airbag sensor to the front door panel with the bolt.
Connect the connector to the door side airbag sensor.
Be sure to engage the connectors until they are locked (when locking, make sure that a click sound can be heard).
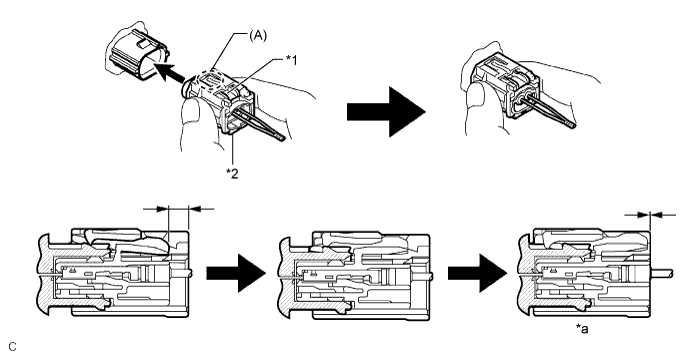
| *1 | White Housing Lock | *2 | Yellow CPA |
| *a | Connection is Completed | - | - |
Check that there is no looseness in the installation parts of the door side airbag sensor.
| 11. INSTALL OUTER REAR VIEW MIRROR ASSEMBLY |
| 12. CONNECT CABLE TO NEGATIVE BATTERY TERMINAL |
| 13. INITIALIZE POWER WINDOW CONTROL SYSTEM (for Driver Side) |
| 14. INSPECT POWER WINDOW OPERATION |
| 15. INSPECT SRS WARNING LIGHT |