HV BATTERY > CHARGING |
| 1. INSPECT AUXILIARY BATTERY VOLTAGE |
Measure the voltage between the terminals of the auxiliary battery.
Check the charge level of the HV battery.
![]() |
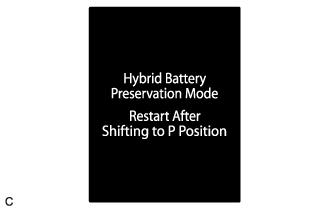
Check whether the HV battery warning message is shown in the multi-information display.
Confirm if the engine starts. If the engine starts, leave it idling with park (P) selected until the engine stops (self charge has completed).
If the engine cannot start, follow the procedure and charge the HV battery.
| 2. PREPARATION FOR HV BATTERY CHARGING |
Remove the service plug grip (Click here).
Remove the cool air intake duct seal .
Remove the inlet air cleaner assembly .
Remove the air cleaner cap sub-assembly .
Remove the air cleaner filter element sub-assembly.
Remove the air cleaner case sub-assembly .
![]() |
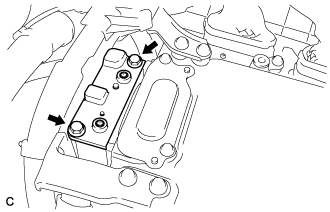
Remove the 2 bolts and connector cover assembly.
Check terminal voltage .
![]() |
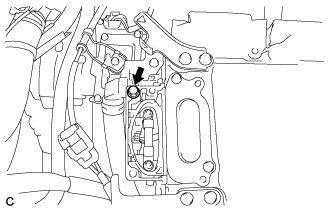
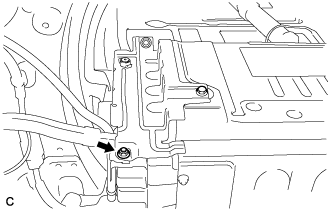
Remove the bolt.
![]() |
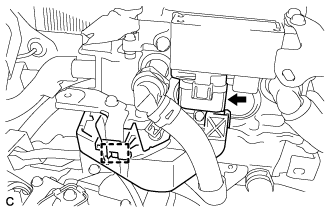
Disconnect the wire harness clamp and connector.
![]() |
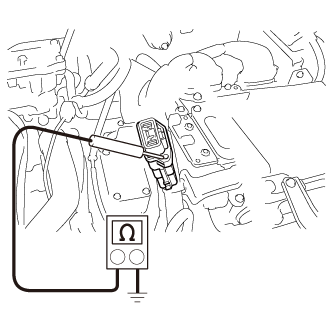
Measure the resistance according to the value(s) in the table below.
| Tester Connection | Condition | Specified Condition |
| No. 4 floor wire connector housing - Body ground | Always | Below 1 Ω |
![]() |
If the result is not as specified, inspect the connection shown in the illustration for proper installation (Click here).
![]() |
Temporarily install the connector cover assembly with the 2 bolts to prevent any foreign objects or water from entering the inverter with converter assembly.
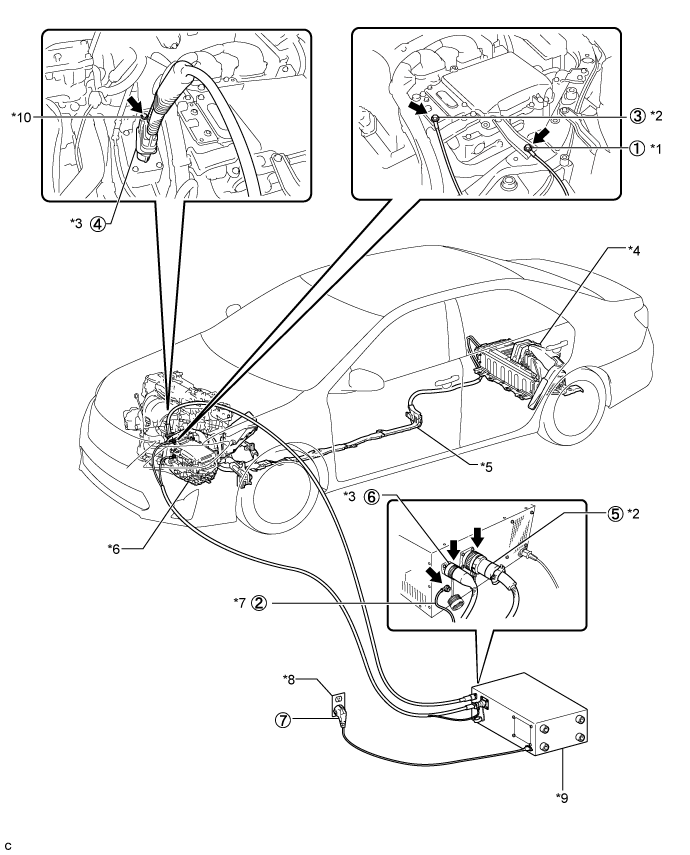
Connect the THS charger in the order shown by the circled numbers in the illustration.

| *1 | EV Bonding Cable (Green Cable) | *2 | Low Voltage Cable |
| *3 | High Voltage Cable | *4 | HV Battery |
| *5 | No. 4 floor wire | *6 | Inverter with Converter Assembly |
| *7 | EV Bonding Cable | *8 | Grounded AC 100 to 240 V Receptacle |
| *9 | THS Charger | *10 | Bolt (91553-80665) |
![]() |
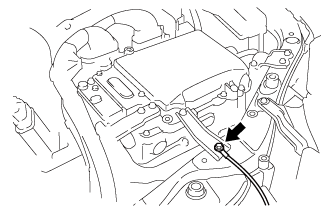
Connect the EV bonding cable to the installation bolt of the No. 5 inverter bracket.
![]() |
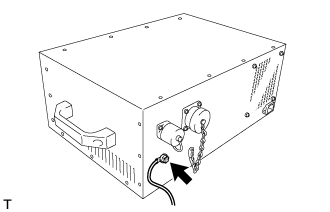
Connect the EV bonding cable to the THS charger.
![]() |
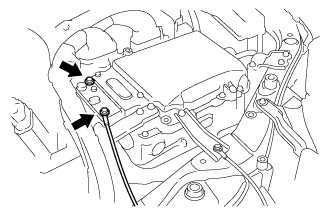
Connect the low voltage cable to the positions shown in the illustration, and then tighten the 2 bolts.
![]() |
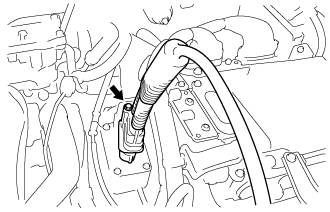
Connect the No. 4 floor wire to the high voltage cable with the bolt (91553-80665).
![]() |
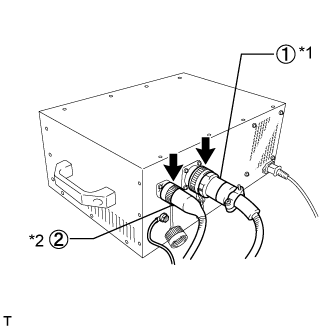
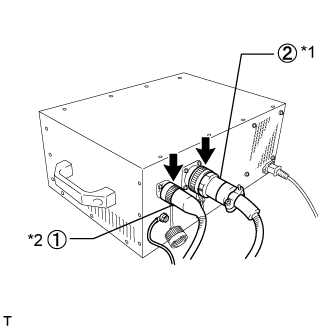
Connect the low voltage cable and high voltage cable to the THS charger in the order shown in the illustration.
| *1 | Low Voltage Cable |
| *2 | High Voltage Cable |
Install the service plug grip (Click here).
Connect the negative auxiliary battery terminal.
Connect the power input plug of the charger to a grounded AC 100 to 240 V receptacle.
| 3. HV BATTERY CHARGING |
Turn the power switch of the vehicle on (IG).
Connect the intelligent tester to the DLC3.
Enter the following menus: Powertrain / Hybrid Control / Active Test / Battery Charge.
| Step | Active Test Battery Charge | THS charger START switch | Data List System Main Relay Status - SMRB | Data List System Main Relay Status - SMRG |
| 1 | OFF | OFF | OFF | OFF |
| 2 | OFF → ON | OFF | OFF → ON | OFF → ON |
| 3 | ON | OFF → ON | ON | ON |
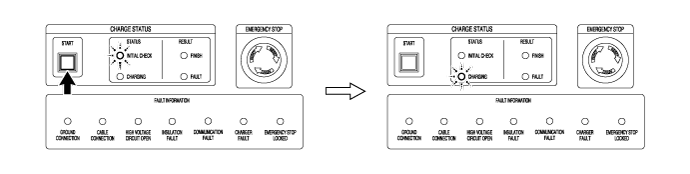
Make sure that the EMERGENCY STOP switch is in the reset condition (the switch is turned clockwise and released).
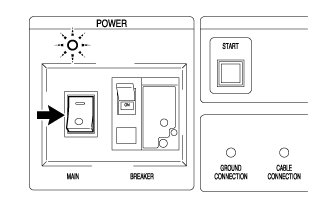
Make sure that the BREAKER is in the ON position.
![]() |
Turn the THS charger MAIN switch on.
Press the START switch.

Repeat the charge cycle 3 times. When the last cycle has finished, turn the THS charger MAIN switch off.
Turn the power switch off.
Remove the THS charger and install the No. 4 floor wire.
Disconnect the power inlet plug of the charger from the receptacle.
Disconnect the negative terminal of the auxiliary battery.
Remove the service plug grip (Click here).
![]() |
Disconnect the high voltage cable and low voltage cable from the THS charger in the order shown in the illustration.
| *1 | Low Voltage Cable |
| *2 | High Voltage Cable |
![]() |
Remove the bolt (91553-80665) and disconnect the high voltage cable from the No. 4 floor wire.
![]() |
Remove the 2 bolts and disconnect the low voltage cable.
![]() |
Disconnect the EV bonding cable from the THS charger.
![]() |
Disconnect the EV bonding cable from the installation bolt of the No. 5 inverter bracket.
Tighten the bolt.
Remove the connector cover assembly.
![]() |
Connect the wire harness clamp and connector.
![]() |
Connect the No. 4 floor wire with the bolt.
Install the connector cover assembly with the 2 bolts.
Install the air cleaner case sub-assembly .
Install the air cleaner filter element sub-assembly.
Install the air cleaner cap sub-assembly .
Install the inlet air cleaner assembly .
Install the cool air intake duct seal .
Install the service plug grip (Click here).
Check if the engine starts.
| 4. CHECK HV BATTERY AFTER HV BATTERY CHARGE |
Check for DTCs.
Perform the self-charging operation.
Start the engine and leave park (P) selected until the engine stops idling.