AIR CONDITIONING PRESSURE SENSOR > INSTALLATION |
| 1. INSTALL AIR CONDITIONER PRESSURE SENSOR |
Sufficiently apply compressor oil to a new air conditioner pressure sensor.
Install the air conditioner pressure sensor.
Connect the connector.
| 2. CHARGE AIR CONDITIONING SYSTEM WITH REFRIGERANT (for TMC, TMMR Made) |
Perform vacuum purging using a vacuum pump or appropriate equipment.
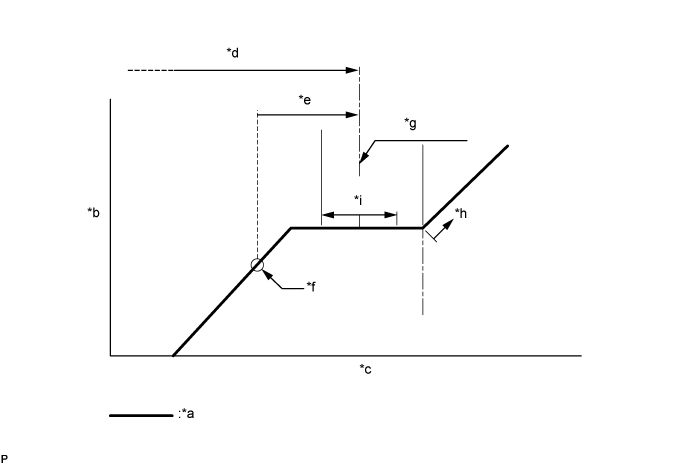
Charge the air conditioning system with refrigerant.

| *a | Sub-cool System | *b | High Pressure |
| *c | Refrigerant Amount | *d | Standard charge amount |
| *e | Charge additional 100 g (3.5 oz) | *f | Point where bubbles disappear |
| *g | Mean value in proper range | *h | Overcharged |
| *i | +/-50 g (+/-1.76 oz) | - | - |
| 3. CHARGE AIR CONDITIONING SYSTEM WITH REFRIGERANT (for TMMK Made) |
Perform vacuum purging using a vacuum pump or appropriate equipment.
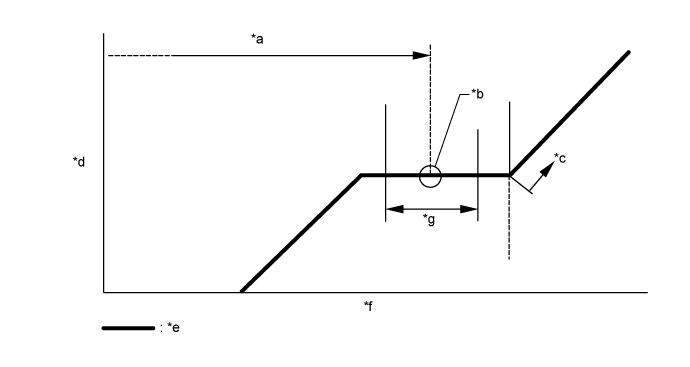
Charge the air conditioning system with refrigerant.

| *a | Standard Charge Amount | *b | Mean Value in Proper Range |
| *c | Overcharged | *d | High Pressure |
| *e | Sub-cool System | *f | Refrigerant Amount |
| *g | +/-50 g (+/-1.76 oz) | - | - |
| 4. WARM UP ENGINE (for TMC, TMMR Made) |
Keep the A/C switch on for at least 2 minutes to warm up the compressor.
| 5. WARM UP ENGINE (for TMMK Made) |
Keep the A/C switch on for at least 2 minutes to warm up the compressor.
| 6. INSPECT FOR REFRIGERANT LEAK (for TMC, TMMR Made) |
After recharging the air conditioning system with refrigerant, check for refrigerant leaks using a halogen leak detector.
Carry out the test under the following conditions:
Remove the front outer cowl top panel sub-assembly .
Remove the radiator side deflector RH .
![]() |
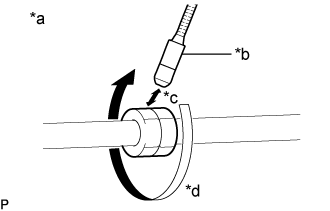
How to check for refrigerant leaks in pipe joints:
| *a | Check for leaks |
| *b | Halogen Leak Detector Sensor |
| *c | Distance between Sensor and Joint to be Checked: 10 mm or less |
| *d | Halogen Leak Detector Sensor Moving Speed: 25 to 50 mm/sec. |
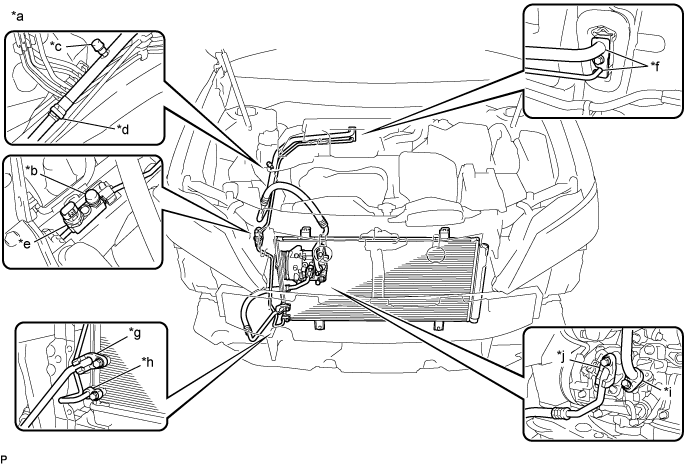
Using a halogen leak detector, check for refrigerant leaks at the pipe joints shown in the illustration.

| *a | Area to be Checked | *b | Service Valve (High) |
| *c | Service Valve (Low) | *d | Pipe Joint |
| *e | Air Conditioner Pressure Sensor Joint | *f | Cooler Expansion Valve Joint |
| *g | Condenser Joint (Inlet) | *h | Condenser Joint (Outlet) |
| *i | Compressor Joint (Inlet) | *j | Compressor Joint (Outlet) |
![]() |
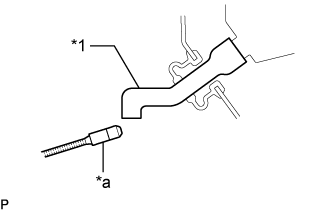
Bring the halogen leak detector sensor close to the drain cooler hose with the detector turned off, and then turn the detector on.
| *1 | Drain Cooler Hose |
| *a | Halogen Leak Detector |
Remove the blower motor with fan sub-assembly (Click here).
![]() |
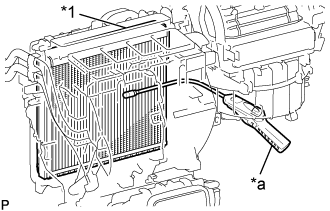
Insert the halogen leak detector sensor into the air conditioning unit assembly, bring the sensor close to the No. 1 cooler evaporator sub-assembly and check for refrigerant leaks.
| *1 | No. 1 Cooler Evaporator Sub-assembly |
| *a | Halogen Leak Detector |
Install the blower motor with fan sub-assembly (Click here).
Install the radiator side deflector RH .
Install the front bumper assembly (Click here).
Install the front outer cowl top panel sub-assembly (Click here for LHD or Click here for RHD).
| 7. INSPECT FOR REFRIGERANT LEAK (for TMMK Made) |
After recharging the air conditioning system with refrigerant, inspect for refrigerant leaks using a halogen leak detector.
Carry out the test under the following conditions:
![]() |
Using a halogen leak detector, inspect for refrigerant leaks from the air conditioning system.
| *a | Inspect for Leak |
| *b | Halogen Leak Detector |
![]() |
Bring the halogen leak detector close to the drain cooler hose with the detector power off, and then turn the detector on.
| *1 | Drain Cooler Hose |
| *a | Halogen Leak Detector |
If a refrigerant leak is not detected from the drain cooler hose, remove the blower motor control from the cooling unit. Insert the halogen leak detector sensor into the unit and check for a leak.
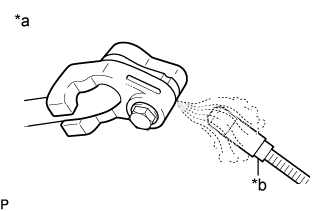
Disconnect the pressure sensor connector and leave it for approximately 20 minutes. Bring the halogen leak detector close to the pressure sensor and check for a leak.