 |
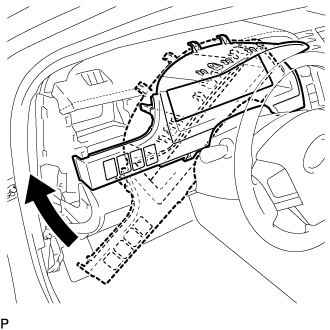
Temporarily install the instrument cluster finish panel assembly as shown in the illustration.
COMBINATION METER > INSTALLATION |
| 1. INSTALL COMBINATION METER ASSEMBLY |
Connect the 2 connectors.
Engage the wire harness clamp.
Install the combination meter assembly with the 4 screws.
| 2. INSTALL INSTRUMENT CLUSTER FINISH PANEL ASSEMBLY (for TMMK Made) |
|
Temporarily install the instrument cluster finish panel assembly as shown in the illustration.
Connect each connector.
Engage the 5 claws, 5 clips and 2 guides, and install the instrument cluster finish panel assembly.
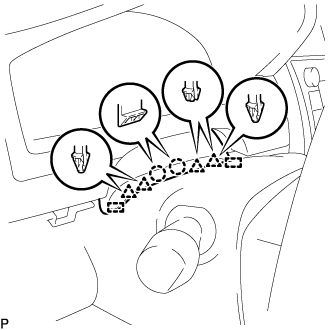 |
Engage the 2 claws, 4 clips and 2 guides.
| 3. INSTALL INSTRUMENT CLUSTER FINISH PANEL ASSEMBLY (for TMC, TMMR Made) |
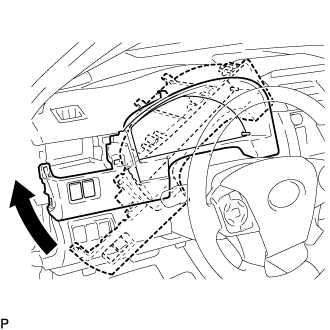 |
Temporarily install the instrument cluster finish panel assembly as shown in the illustration.
Connect each connector.
for LHD:
Engage the 3 claws, 7 clips and 4 guides.
for RHD:
Engage the 4 claws, 5 clips and 4 guides.
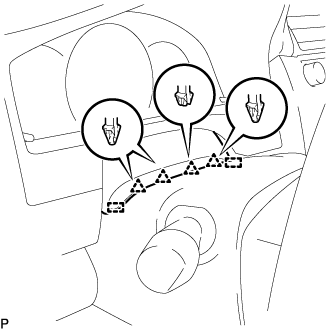 |
Engage the 4 clips and 2 guides to install the instrument cluster finish panel assembly.
| 4. INSTALL NO. 1 INSTRUMENT PANEL REGISTER ASSEMBLY (for TMMK Made) |
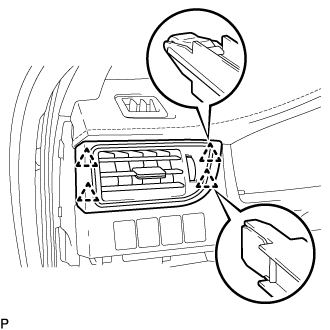 |
Engage the 4 clips to install the No. 1 instrument panel register assembly.
| 5. INSTALL NO. 1 INSTRUMENT PANEL REGISTER ASSEMBLY (for TMC, TMMR Made) |
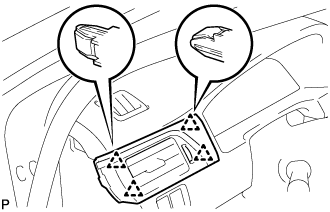 |
Engage the 4 clips to install the No. 1 instrument panel register assembly.
| 6. INSTALL UPPER INSTRUMENT PANEL FINISH PANEL (for RHD) |
w/ Smart Entry and Start System:
Connect the connector.
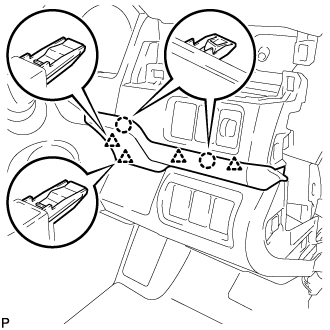 |
Engage the 2 claws and 4 clips to install the upper instrument panel finish panel.
| 7. INSTALL NO. 1 INSTRUMENT CLUSTER FINISH PANEL GARNISH (for TMMK Made) |
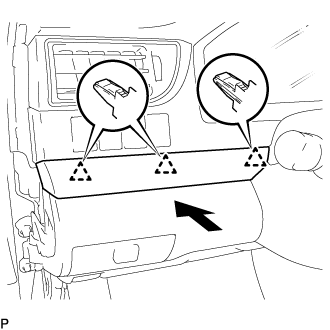 |
Engage the 3 clips to install the No. 1 instrument cluster finish panel garnish as shown in the illustration.
| 8. INSTALL INSTRUMENT SIDE PANEL LH (for TMMK Made) |
Engage the 3 guides.
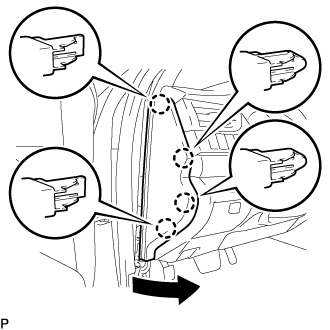 |
Engage the 4 claws to install the instrument side panel LH as shown in the illustration.
| 9. INSTALL INSTRUMENT SIDE PANEL (for TMC, TMMR Made) |
Engage the 3 guides.
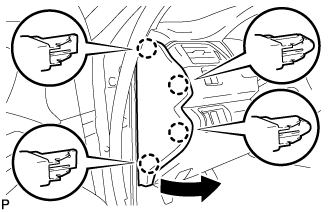 |
Engage the 4 claws to install the instrument side panel LH as shown in the illustration.
| 10. CONNECT FRONT DOOR OPENING TRIM WEATHERSTRIP LH (for TMMK Made) |
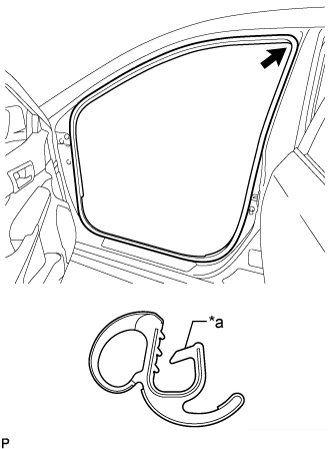 |
Align the alignment mark (Yellow) on the weatherstrip with the protruding portion on the vehicle body indicated by the arrow in the illustration, and install the front door opening trim weatherstrip LH.
| *a | Alignment Mark (Yellow) |
| 11. CONNECT FRONT DOOR OPENING TRIM WEATHERSTRIP (for TMC, TMMR Made) |
| 12. CONNECT CABLE TO NEGATIVE BATTERY TERMINAL (for Manual Tilt and Manual Telescopic Steering Column) |
| 13. CONNECT CABLE TO NEGATIVE BATTERY TERMINAL (for Power Tilt and Power Telescopic Steering Column) |