CENTER AIRBAG SENSOR ASSEMBLY (for TMC, TMMR Made) > INSTALLATION |
| 1. INSTALL AIRBAG SENSOR ASSEMBLY |
Check that the ignition switch is off.
Check that the cable is disconnected from the negative (-) battery terminal.
Using SST, install the airbag sensor assembly with the 3 bolts.
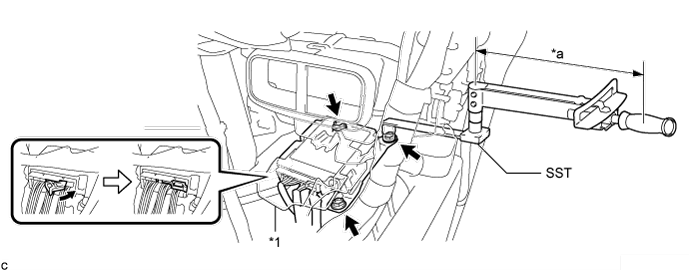
| *1 | Waterproof Sheet | - | - |
| *a | Torque Wrench Fulcrum Length | - | - |
Connect the connectors to the airbag sensor assembly as shown in the illustration.
Check that the waterproof sheet is properly set.
Check that there is no looseness in the installation parts of the airbag sensor assembly.
| 2. INSTALL NO. 1 CONSOLE BOX DUCT |
Install the No. 1 console box duct with the clip.
| 3. INSTALL FLOOR CARPET BRACKET LH |
Engage the 2 guides.
Install the floor carpet bracket LH with the 2 clips.
| 4. INSTALL FLOOR CARPET BRACKET RH |
Engage the 2 guides.
Install the floor carpet bracket RH with the 2 clips.
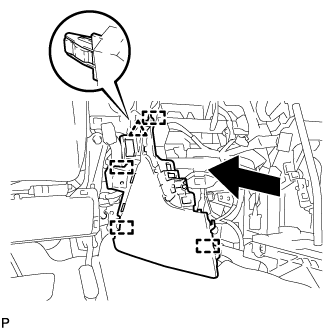
| 5. INSTALL FRONT NO. 2 CONSOLE BOX INSERT |
![]() |
Engage the clip and 4 guides as shown in the illustration.
Install the front No. 2 console box insert with the 2 screws <C>.
for LHD:
Engage the 2 claws to connect the room temperature sensor.
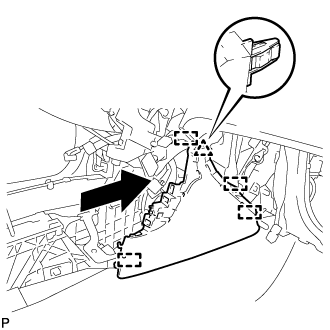
| 6. INSTALL CONSOLE BOX INSERT |
![]() |
Engage the clip and 4 guides as shown in the illustration.
Install the console box insert with the 2 screws <C>.
for RHD:
Engage the 2 claws to connect the room temperature sensor.
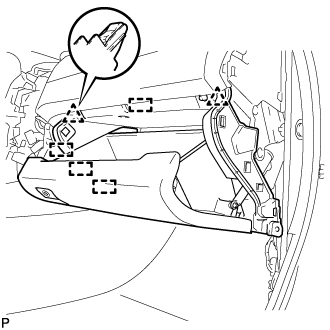
| 7. INSTALL LOWER INSTRUMENT PANEL SUB-ASSEMBLY |
![]() |
Engage the 2 clips and 4 guides.
Install the 3 screws <C>.
Close the lower instrument panel door.
Install the lower instrument panel sub-assembly with the bolt <B> and screws <C>.
| 8. INSTALL NO. 2 INSTRUMENT PANEL UNDER COVER SUB-ASSEMBLY |
Connect the connector.
Engage the 2 guides and 4 claws to install the No. 2 instrument panel under cover sub-assembly.
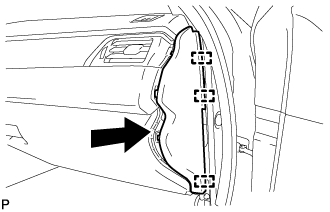
| 9. INSTALL INSTRUMENT SIDE PANEL RH |
![]() |
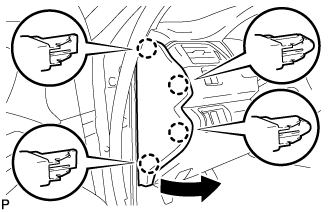
Engage the 3 guides as shown in the illustration.
![]() |
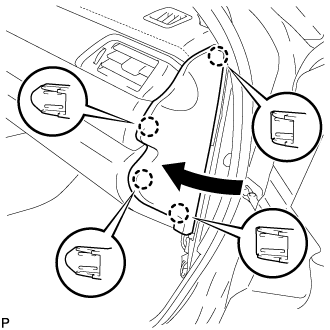
Engage the 4 claws to install the instrument side panel RH as shown in the illustration.
| 10. INSTALL FRONT DOOR OPENING TRIM WEATHERSTRIP RH |
| 11. INSTALL COWL SIDE TRIM SUB-ASSEMBLY RH |
| 12. INSTALL FRONT DOOR SCUFF PLATE RH |
| 13. INSTALL FRONT ASH RECEPTACLE ASSEMBLY |
Connect each connector.
![]() |
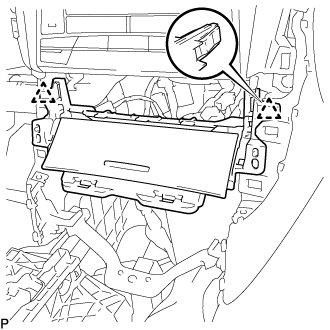
Engage the 2 clips.
Install the front ash receptacle assembly with the 2 screws <C>.
| 14. INSTALL FRONT CONSOLE UPPER PANEL GARNISH |
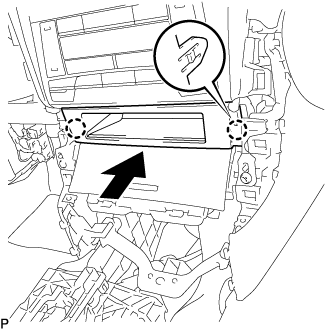
for Blank Type:
![]() |
Engage the 2 claws to install the front console upper panel garnish as shown in the illustration.
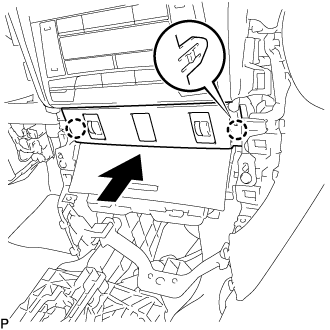
for 3 Switch Hole Type:
Connect each connector.
![]() |
Engage the 2 claws to install the front console upper panel garnish as shown in the illustration.
| 15. INSTALL INSTRUMENT PANEL SUB-ASSEMBLY |
w/o Driver Side Knee Airbag:
Engage the 5 clips and 3 guides.
w/ Driver Side Knee Airbag:
Engage the 4 claws, 7 clips and 3 guides.
Install the instrument panel sub-assembly with the 2 bolts <B>.
| 16. CONNECT HOOD LOCK CONTROL LEVER SUB-ASSEMBLY |
Engage the claw and 2 guides to connect the hood lock control lever sub-assembly.
| 17. INSTALL INSTRUMENT SIDE PANEL LH |
Engage the 3 guides.
![]() |
Engage the 4 claws to install the instrument side panel LH as shown in the illustration.
| 18. INSTALL FRONT DOOR OPENING TRIM WEATHERSTRIP LH |
| 19. INSTALL COWL SIDE TRIM SUB-ASSEMBLY LH |
Engage the 2 clips.
Install the cowl side trim sub-assembly LH with the clip.
| 20. INSTALL FRONT DOOR SCUFF PLATE LH |
Engage the 10 claws to install the front door scuff plate LH.
| 21. INSTALL CONSOLE BOX ASSEMBLY |
| 22. CONNECT CABLE TO NEGATIVE BATTERY TERMINAL |
| 23. PERFORM DIAGNOSTIC SYSTEM CHECK |
| 24. INSPECT SRS WARNING LIGHT |