SUPPLEMENTAL RESTRAINT SYSTEMS KNEE AIRBAG ASSEMBLY(for Front Passenger Side) INSTALLATION
PROCEDURE

 73990
1.INSTALL LOWER NO. 2 INSTRUMENT PANEL AIRBAG ASSEMBLY
Check that the ignition switch is off.
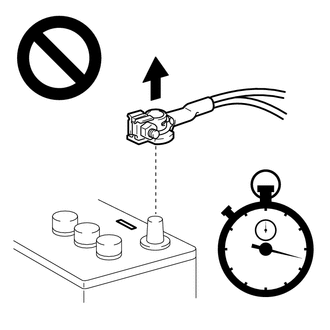
Check that the cable is disconnected from the negative (-) battery terminal.
- CAUTION:
-
-
Wait at least 90 seconds after disconnecting the cable from the negative (-) battery terminal to disable the SRS system.
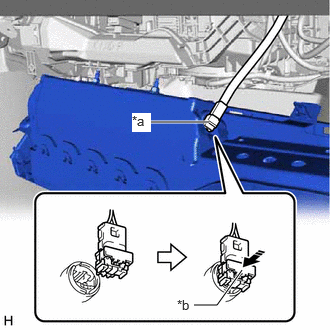
| *a | Airbag Connector |
| *b | Airbag Connector Locking Button |

|
Push in this Direction |
Connect the airbag connector to the lower No. 2 instrument panel airbag assembly.
- NOTICE:
-
When connecting any airbag connector, take care not to damage the airbag wire harness.
Push in the airbag connector locking button to install the airbag connector.
Engage the 3 claws to temporarily install the lower No. 2 instrument panel airbag assembly.
Install the lower No. 2 instrument panel airbag assembly with the 3 bolts.
- Torque:
- 10 N*m (102 kgf*cm, 7 ft.*lbf)
- NOTICE:
-
Confirm that the lower No. 2 instrument panel airbag assembly is installed securely without any excessive gaps and is not protruding outward.
55476C
2.INSTALL INSTRUMENT PANEL FINISH PLATE GARNISH
55012A
3.INSTALL NO. 2 INSTRUMENT PANEL GARNISH SUB-ASSEMBLY
55435B
4.INSTALL NO. 1 METER HOOD CLUSTER
55607
5.INSTALL NO. 2 INSTRUMENT PANEL UNDER COVER SUB-ASSEMBLY
55317A
6.INSTALL INSTRUMENT SIDE PANEL RH
62311B
7.CONNECT FRONT DOOR OPENING TRIM WEATHERSTRIP RH
62111A
8.INSTALL COWL SIDE TRIM SUB-ASSEMBLY RH
- HINT:
-
Use the same procedure as for the LH side.
-
Click hereVehicle Interior>INTERIOR PANELS / TRIM>ROOF HEADLINING>INSTALLATION
67913
9.INSTALL FRONT DOOR SCUFF PLATE RH
- HINT:
-
Use the same procedure as for the LH side.
-
Click hereVehicle Interior>INTERIOR PANELS / TRIM>ROOF HEADLINING>INSTALLATION
10.CONNECT CABLE TO NEGATIVE BATTERY TERMINAL
Click hereGeneral>MAINTENANCE>A25A-FKS BATTERY>INSTALLATION
- NOTICE:
-
When disconnecting the cable, some systems need to be initialized after the cable is reconnected.
-
Click hereGeneral>INTRODUCTION>REPAIR INSTRUCTION>INITIALIZATION
11. PERFORM DIAGNOSTIC SYSTEM CHECK
12.INSPECT SRS WARNING LIGHT