UB80E AUTOMATIC TRANSMISSION / TRANSAXLE TRANSMISSION CONTROL CABLE REMOVAL
CAUTION / NOTICE / HINT
The necessary procedures (adjustment, calibration, initialization or registration) that must be performed after parts are removed and installed, or replaced during transmission control cable assembly removal/installation are shown below.
| Replaced Part or Performed Procedure | Necessary Procedure | Effect/Inoperative Function when Necessary Procedure not Performed | Link |
|---|---|---|---|
|
*1: When the ECM is replaced with a new one, reset memory is unnecessary. |
|||
| Battery terminal is disconnected/reconnected | Perform steering sensor zero point calibration | Lane departure alert system (w/ Steering Control) | ( ) |
| Pre-collision system | |||
| Memorize steering angle neutral point | Parking assist monitor system | ()
|
|
| Replacement of ECM | Perform Vehicle Identification Number (VIN) or frame number registration | MIL comes on | ()w/ Canister Pump Module
( )w/o Canister Pump Module
|
| Perform code registration (Immobiliser system) | Engine start function | See Service Bulletin for the registration method. | |
| Replacement of ECM
(If possible, read the transaxle compensation code from the previous ECM) |
1.
Reset memory*1 2.
Transfer transaxle compensation code 3.
Perform road test to allow ECM to learn |
·
Large shift shock ·
Deterioration of fuel efficiency |
()for UB80E Initialization
( )for UB80E Registration
|
| Replacement of ECM
(If impossible, read the transaxle compensation code from the previous ECM) |
1.
Reset memory*1 2.
Reset transaxle compensation code 3.
Perform road test to allow ECM to learn |
||
| Replacement of ECM | Perform code registration (Immobiliser function) | ·
Wireless door lock control system ·
Smart Entry and Start System (for Entry Function) ·
Smart Entry and Start System (for Start Function) ·
Steering lock function |
See Service Bulletin for the registration method. |
PROCEDURE

 28800
1.REMOVE BATTERY
89661
2.REMOVE ECM
74404A
3.REMOVE BATTERY CLAMP SUB-ASSEMBLY
17410
4.REMOVE FRONT EXHAUST PIPE ASSEMBLY (TWC: Rear Catalyst)
58152A
5.REMOVE FRONT LOWER NO. 1 FLOOR HEAT INSULATOR
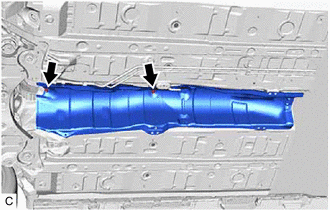
Remove the 2 nuts and front lower No. 1 floor heat insulator from the vehicle body.
6.REMOVE TRANSMISSION FLOOR SHIFT ASSEMBLY
58861B
7.REMOVE NO. 1 CONSOLE BOX DUCT
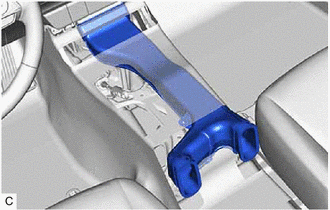
Remove the No. 1 console box duct.
33820B
8.REMOVE TRANSMISSION CONTROL CABLE ASSEMBLY
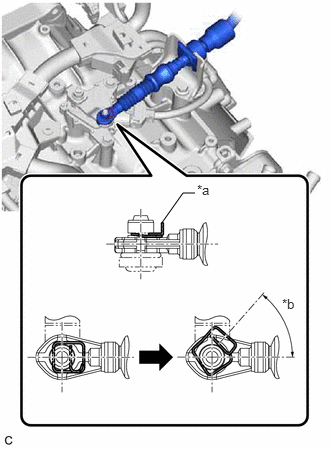
| *a | Clip |
| *b | 45° to 60° |
While disengaging the clip as shown in the illustration, disconnect the transmission control cable assembly from the transmission control shaft lever together with the clip.
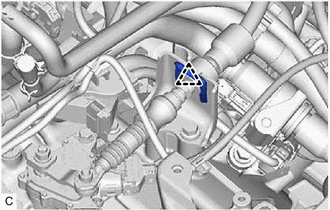
Remove the clip and disconnect the transmission control cable assembly from the No. 1 transmission control cable bracket.
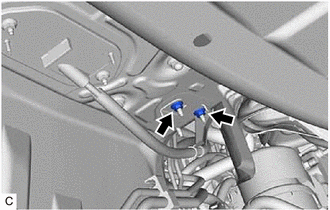
Remove the 2 nuts and disconnect the transmission control cable assembly from the vehicle body.
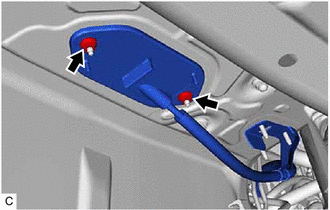
Remove the 2 nuts and then remove the transmission control cable assembly from the vehicle body.