TELEMATICS TELEMATICS TRANSCEIVER INSTALLATION
PROCEDURE

 86740
1.INSTALL TELEMATICS TRANSCEIVER
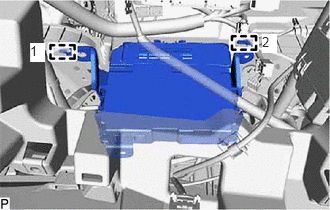
Engage the 2 guides in the order shown in the illustration to temporarily install the telematics transceiver.
Install the telematics transceiver with the 2 bolts.
Engage the clamp.
Connect each connector.
2.INSTALL RADIO RECEIVER ASSEMBLY WITH BRACKET (for Radio Receiver Type)
3.INSTALL RADIO AND DISPLAY RECEIVER ASSEMBLY WITH BRACKET (for Radio and Display Type with 7 Inch Display)
4.INSTALL RADIO AND DISPLAY RECEIVER ASSEMBLY WITH BRACKET (for Radio and Display Type with 8 Inch Display)
55900
5.INSTALL AIR CONDITIONING CONTROL ASSEMBLY (except Radio and Display Type with 8 Inch Display)
55670
6.INSTALL NO. 3 INSTRUMENT PANEL REGISTER ASSEMBLY
55480D
7.INSTALL LOWER INSTRUMENT PANEL FINISH PANEL ASSEMBLY
55012A
8.INSTALL NO. 2 INSTRUMENT PANEL GARNISH SUB-ASSEMBLY
55435B
9.INSTALL NO. 1 METER HOOD CLUSTER
10. CUSTOMIZE POWER TILT AND POWER TELESCOPIC STEERING COLUMN SYSTEM (for Power Tilt and Power Telescopic Steering Column)
11.PERFORM REGISTRATION