INTERIOR PANELS / TRIM FRONT CONSOLE BOX INSTALLATION
PROCEDURE

 58810J
1.INSTALL CONSOLE BOX ASSEMBLY
Install the console box assembly with the 4 bolts and 2 screws.
58815C
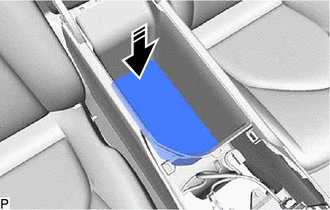
2.INSTALL CONSOLE BOX CARPET

|
Install in this Direction |
Install the console box carpet as shown in the illustration.
58903A
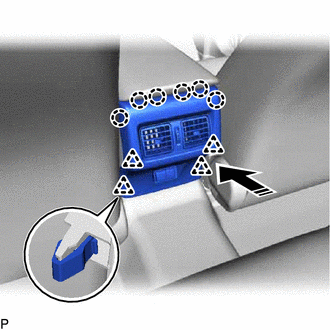
3.INSTALL CONSOLE REAR END PANEL SUB-ASSEMBLY
w/ Power Outlet Socket:
Connect the connector.
|
|
Install in this Direction |
Engage the 6 claws and 4 clips to install the console rear end panel sub-assembly as shown in the illustration.
55620B
4.INSTALL INSTRUMENT PANEL CUP HOLDER
Engage the 2 claws.
Install the instrument panel cup holder with the 3 screws.
58804C
5.INSTALL FRONT CONSOLE BOX INSERT SUB-ASSEMBLY
Install the front console box insert sub-assembly with the 5 screws.
35978
6.INSTALL SHIFT POSITION INDICATOR
58805C
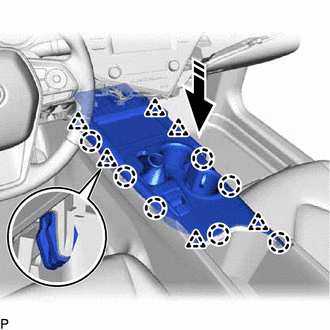
7.INSTALL REAR UPPER CONSOLE PANEL SUB-ASSEMBLY
Connect each connector.
Engage the clamp.
|
|
Install in this Direction |
Engage the 6 clips and 7 claws to install the rear upper console panel sub-assembly as shown in the illustration.
Move the shift lever to P.
33504F
8.INSTALL SHIFT LEVER KNOB SUB-ASSEMBLY
33554C
9.INSTALL SHIFT LOCK RELEASE BUTTON COVER
55434B
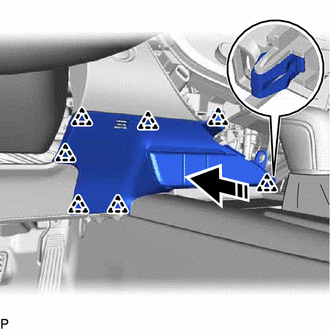
10.INSTALL LOWER CENTER INSTRUMENT PANEL FINISH PANEL
Connect each connector.
Engage the clamp.
|
|
Install in this Direction |
Engage the 7 clips to install the lower center instrument panel finish panel as shown in the illustration.
55476C
11.INSTALL INSTRUMENT PANEL FINISH PLATE GARNISH
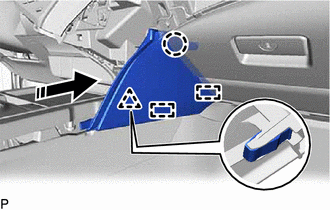
|
|
Install in this Direction |
Engage the 2 guides, claw and clip to install the instrument panel finish plate garnish as shown in the illustration.
55012A
12.INSTALL NO. 2 INSTRUMENT PANEL GARNISH SUB-ASSEMBLY
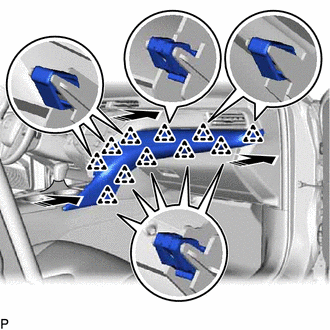
|
|
Install in this Direction |
Engage the 11 clips to install the No. 2 instrument panel garnish sub-assembly as shown in the illustration.
55435B
13.INSTALL NO. 1 METER HOOD CLUSTER
Connect the connector.
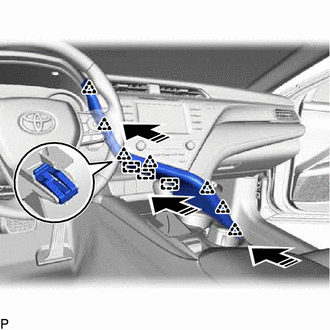
|
|
Install in this Direction |
Engage the 3 guides and 7 clips to install the No. 1 meter hood cluster as shown in the illustration.