HEATING / AIR CONDITIONING COMPRESSOR REMOVAL
CAUTION / NOTICE / HINT
The necessary procedures (adjustment, calibration, initialization, or registration) that must be performed after parts are removed and installed, or replaced during compressor with motor assembly removal/installation are shown below.
| Replaced Part or Performed Procedure | Necessary Procedure | Effect/Inoperative Function When Necessary Procedures are not Performed | Link |
|---|---|---|---|
| Disconnect cable from negative (-) auxiliary battery terminal | Perform steering sensor zero point calibration | Lane Tracing Assist System | ( ) |
| Pre-collision System | |||
| Memorize steering angle neutral point | Parking Assist Monitor System | ()
|
|
| Panoramic View Monitor System | ()
|
- CAUTION:
- ·
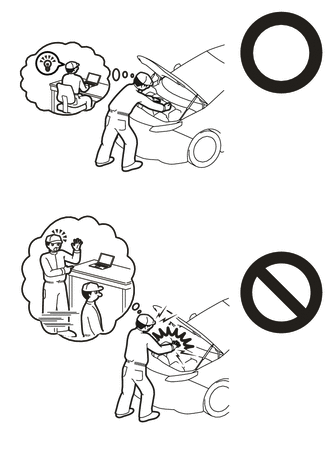
Orange wire harnesses and connectors indicate high-voltage circuits. To prevent electric shock, always follow the procedure described in the repair manual.
for NICKEL METAL HYDRIDE BATTERY:
for LITHIUM-ION BATTERY:
·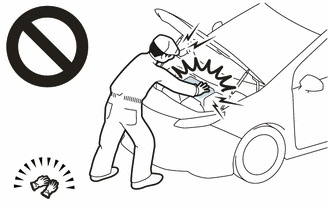
To prevent electric shock, wear insulated gloves when working on wire harnesses and components of the high voltage system.
- NOTICE:
-
After the power switch is turned off, the radio and display receiver assembly records various types of memory and settings. As a result, after turning the power switch off, make sure to wait at least 85 seconds before disconnecting the cable from the negative (-) auxiliary battery terminal.
PROCEDURE

 1.RECOVER REFRIGERANT FROM REFRIGERATION SYSTEM
for HFC-134a (R134a):
Click hereVehicle Interior>HEATING / AIR CONDITIONING>REFRIGERANT>REPLACEMENT
for HFO-1234yf (R1234yf):
Click hereVehicle Interior>HEATING / AIR CONDITIONING>REFRIGERANT (for HFO-1234yf(R1234yf))>REPLACEMENT
G3834
2.REMOVE SERVICE PLUG GRIP
3.CHECK TERMINAL VOLTAGE
Disconnect the engine room main wire.
Click hereEngine / Hybrid System>HYBRID / BATTERY CONTROL>FRAME WIRE>REMOVAL
Remove the connector cover assembly.
Click hereEngine / Hybrid System>HYBRID / BATTERY CONTROL>INVERTER WITH CONVERTER>REMOVAL
Check the terminal voltage.
Click hereEngine / Hybrid System>HYBRID / BATTERY CONTROL>INVERTER WITH CONVERTER>REMOVAL
Install the connector cover assembly.
for NICKEL METAL HYDRIDE BATTERY:
for LITHIUM-ION BATTERY:
Click hereEngine / Hybrid System>HYBRID / BATTERY CONTROL>HV BATTERY (for LITHIUM-ION BATTERY)>REMOVAL
Connect the engine room main wire.
Click hereEngine / Hybrid System>HYBRID / BATTERY CONTROL>FRAME WIRE>INSTALLATION
53295E
4.REMOVE COOL AIR INTAKE DUCT SEAL
17750A
5.REMOVE INLET AIR CLEANER ASSEMBLY
88704
6.DISCONNECT SUCTION HOSE SUB-ASSEMBLY
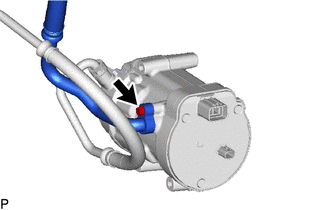
Remove the bolt and disconnect the suction hose sub-assembly from the compressor with motor assembly.
Remove the O-ring from the suction hose sub-assembly.
- NOTICE:
-
Seal the openings of the disconnected parts using vinyl tape to prevent moisture and foreign matter from entering them.
88711
7.DISCONNECT NO. 1 COOLER REFRIGERANT DISCHARGE HOSE SUB-ASSEMBLY
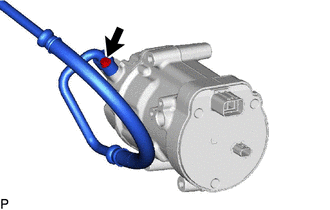
Remove the bolt and disconnect the No. 1 cooler refrigerant discharge hose sub-assembly from the compressor with motor assembly.
Remove the O-ring from the No. 1 cooler refrigerant discharge hose sub-assembly.
- NOTICE:
-
Seal the openings of the disconnected parts using vinyl tape to prevent moisture and foreign matter from entering them.
88370
8.REMOVE COMPRESSOR WITH MOTOR ASSEMBLY
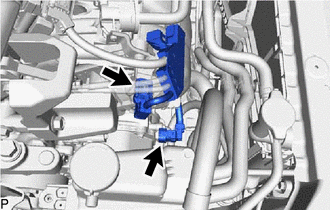
Disconnect the 2 connectors.
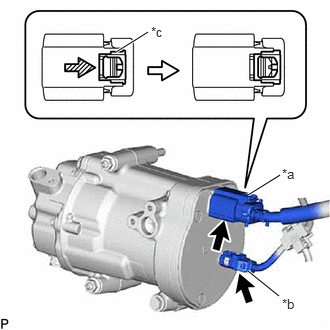
| *a | Connector (A) |
| *b | Connector (B) |
| *c | Green-colored Lock |

|
Slide |
Using a screwdriver, slide the green-colored lock of the connector (A) as shown in the illustration to release it and disconnect the connector.
- CAUTION:
-
Make sure to wear insulated gloves.
- NOTICE:
-
Insulate the disconnected terminals and connector with insulating tape.
Disconnect the connector (B).
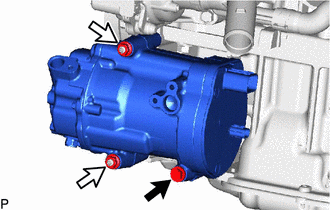

|
Bolt |

|
Nut |
Remove the bolt and 2 nuts.
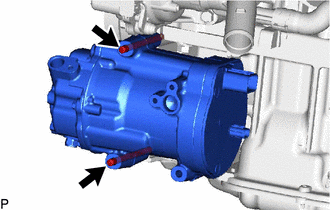
Using an E8 "TORX" socket wrench, remove the 2 stud bolts and compressor with motor assembly.