1HZ ENGINE MECHANICAL CYLINDER HEAD INSPECTION
PROCEDURE

 1.CLEAN TOP OF PISTONS AND TOP OF BLOCK
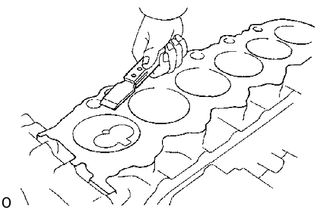
Turn the crankshaft and bring each piston to top dead center (TDC). Using a gasket scraper, remove all the carbon from the piston top.
Remove all the gasket material from the top of the cylinder block.
- NOTICE:
-
Be careful not to scratch the surfaces.
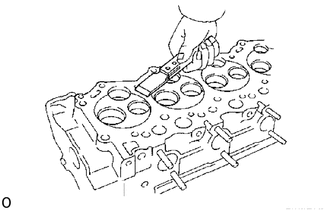
Using compressed air, blow carbon and oil from the bolt holes.
- CAUTION:
-
Protect your eyes when using high pressure air.
2.REMOVE GASKET MATERIAL
Using a gasket scraper, remove all the gasket material from the manifold and cylinder head surface.
- NOTICE:
-
Be careful not to scratch the surfaces.
3.CLEAN COMBUSTION CHAMBERS
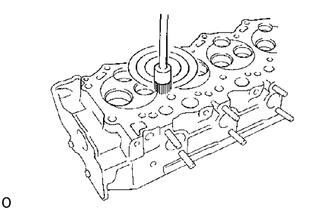
Using a wire brush, remove all the carbon from the combustion chambers.
- NOTICE:
-
Be careful not to scratch the head gasket contact surface.
4.CLEAN VALVE GUIDE BUSHINGS
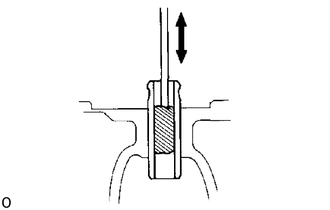
Using a valve guide bushing brush and solvent, clean all the guide bushings.
11101
5.CLEAN CYLINDER HEAD
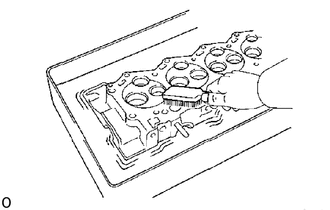
Using a soft brush and solvent, thoroughly clean cylinder heads.
6.INSPECT CYLINDER HEAD FOR FLATNESS
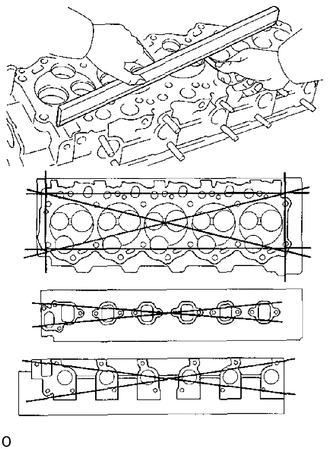
Using a precision straight edge and thickness gauge, measure the surfaces contacting the cylinder block manifolds for warpage.
- Maximum warpage:
0.20 mm (0.0079 in.)
If warpage is greater than maximum, replace the cylinder head.
7.INSPECT CYLINDER HEAD FOR CRACKS
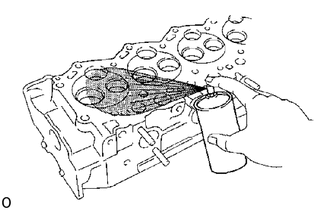
Using a dye penetrant, check the combustion chamber, vintake and exhaust ports, head surface and the top of the head for cracks.
If cracked, replace the cylinder head.
8.CLEAN VALVES
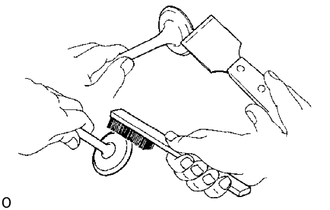
Using a gasket scraper, chip any carbon from the valve head.
Using a wire brush, thoroughly clean the valve.
9.INSPECT VALVE STEMS AND GUIDE BUSHINGS
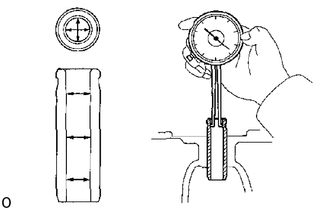
Using a caliper gauge, measure the inside diameter of the guide bushing.
- Bushing inside diameter:
8.010 - 8.030 mm (0.3154 - 0.3161 in.)
Using a micrometer, measure the diameter of the valve stem.
- Valve stem diameter:
- Intake:
7.975 - 7.990 mm (0.3140 - 0.3146 in.)
- Exhaust:
7.960 - 7.975 mm (0.3134 - 0.3140 in.)
Subtract the valve stem diameter measurement from the guide bushing inside diameter measurement.
- Standard oil clearance:
- Intake:
0.020 - 0.055 mm (0.0008 - 0.0022 in.)
- Exhaust:
0.035 - 0.070 mm (0.0014 - 0.0028 in.)
- Maximum oil clearance:
- Intake:
0.08 mm (0.0031 in.)
- Exhaust:
0.10 mm (0.0039 in.)
If the clearance is greater than maximum, replace the valve and guide bushing.
10.IF NECESSARY, REPLACE VALVE GUIDE BUSHINGS
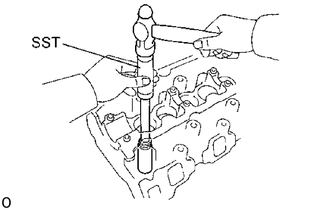
Using SST and a hammer, tap out the guide bushing.
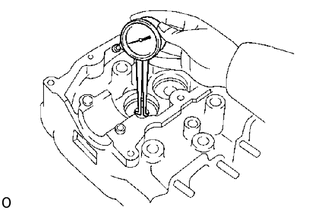
Using a caliper gauge, measure the bushing bore diameter of the cylinder head.
Select a new guide bushing (STD size or O/S 0.05).
If the bushing bore diameter of the cylinder head is greater than 13.025 mm (0.5128 in.), machine the bushing bore to the following dimension:
| Bushing bore diameter
mm (in.) |
Bushing size |
|---|---|
| 13.004 - 13.025 (0.5112 - 0.5128) | Use STD |
| 13.054 - 13.075 (0.5139 - 0.5148) | Use O/S 0.05 |
- Rebored cylinder head bushing bore dimension:
13.054 - 13.075 mm (0.5139 - 0.5148 in.)
If the bushing bore diameter of the cylinder head is greater than 13.075 mm (0.5148 in.), replace the cylinder head.
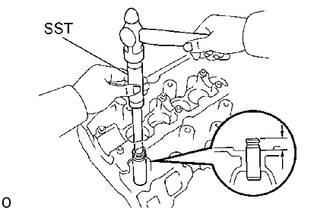
Using SST and a hammer, tap in a new guide bushing to where there is 11.8 - 12.2 mm (0.465 - 0.480 in.) protruding from the cylinder head.
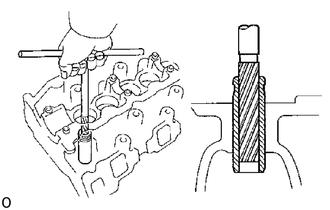
Using a sharp 8 mm reamer, ream the guide bushing to obtain the standard specified clearance between the guide bushing and valve stem.
Click hereEngine / Hybrid System>1HZ (ENGINE MECHANICAL)>CYLINDER HEAD>INSPECTION
11.INSPECT AND GRIND VALVES
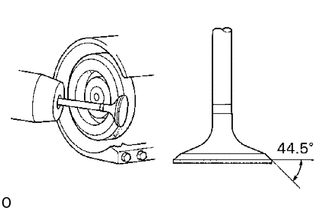
Grind the valve enough to remove pits and carbon.
Check that the valve is ground to the correct valve face angle.
- Valve face angle:
44.5
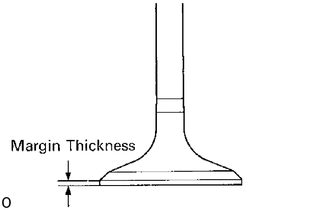
Check the valve head margin thickness.
- Standard margin thickness:
- Intake:
1.6 mm (0.063 in.)
- Exhaust:
1.7 mm (0.067 in.)
- Minimum margin thickness:
- Intake:
1.1 mm (0.043 in.)
- Exhaust:
1.2 mm (0.047 in.)
If the margin thickness is less than minimum, replace the valve.
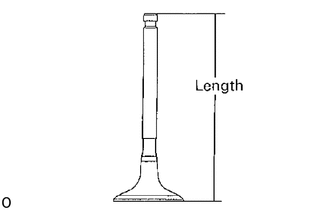
Check the valve overall length.
- Standard overall length:
- Intake:
103.29 - 103.69 mm (4.0665 - 4.0823 in.)
- Exhaust:
103.14 - 103.54 mm (4.0606 - 4.0764 in.)
If the overall length is less than minimum, replace the valve.
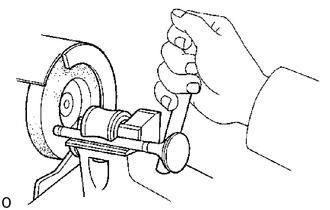
Check the surface of the valve stem tip for wear.
If the valve stem tip is worn, resurface the tip with a grinder or replace the valve.
- NOTICE:
-
Do not grind off more than the minimum overall length.
12.INSPECT AND CLEAN VALVE SEATS
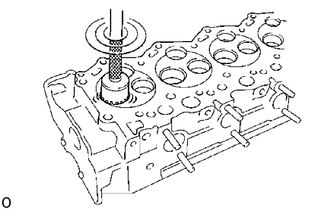
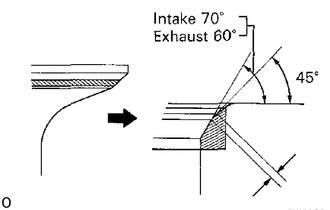
Using a 45° carbide cutter, resurface the valve seats.
Remove only enough metal to clean the seats.
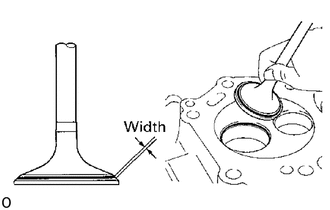
Check the valve seating position. Apply a thin coat of prussian blue (or white lead) to the valve face. Lightly press the valve against the seat. Do not rotate the valve.
Check the valve face and seat for the following:
If blue appears 360° around the face, the valve is concentric. If not, replace the valve.
If blue appears 360° around the valve seat, the guide and face are concentric. If not, resurface the seat.
Check that the seat contact is on the middle of the valve face with the following width:
- Intake:
1.5-1.9 mm (0.059-0.075 in.)
- Exhaust:
1.8-2.2 mm (0.071-0.087 in.)
If not, correct the valve seats as follows:
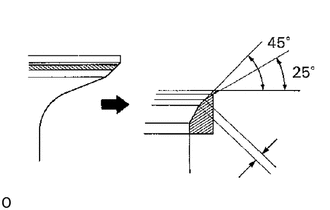
If the seating is too high on the valve face, use 25° and 45° cutters to correct the seat.
(Intake)
If the seating is too low on the valve face, use 70° and 45° cutters to correct the seat.
(Exhaust)
If the seating is too low on the valve face, use 60° and 45° cutters to correct the seat.
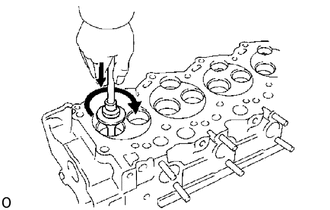
Hand-lap the valve and valve seat with an abrasive compound.
After hand-lapping, clean the valve and valve seat.
13.INSPECT VALVE SPRINGS
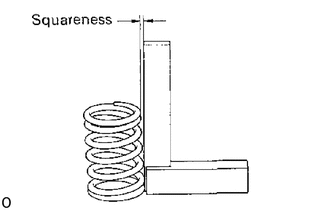
Using a steel square, measure the squareness of the valve spring.
- Maximum squareness:
2.0 mm (0.075 in.)
If squareness is greater than maximum, replace the valve spring.
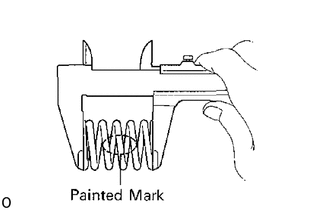
Using vernier calipers, measure the free length of the valve spring.
- Free length:
Yellow painted mark 46.20 mm (1.8189 in.)
Blue painted mark 49.14 mm (1.9346 in.)
If the free length is not as specified, replace the valve spring.
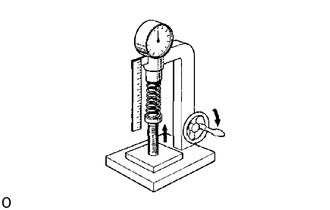
Using a spring tester, measure the tension of the valve spring at the specified installed length.
- Installed tension:
30.7 - 33.9 kg (67.7 - 74.7 lb, 301 - 332 N) at 37.0 mm (1.457 in.)
If the installed tension is not as specified, replace the valve spring.
14.INSPECT CAMSHAFTS AND BEARINGS
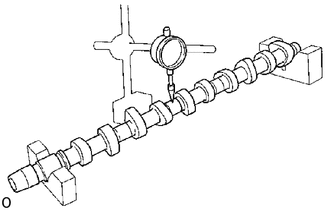
Inspect camshaft for runout
Place the camshaft on V-blocks.
Using a dial indicator, measure the circle runout at the center journal.
- Maximum circle runout:
0.10 mm (0.0039 in.)
If the circle runout is greater than maximum, replace the camshaft.
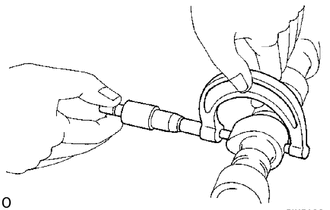
Inspect cam lobes
Using a micrometer, measure the cam lobe height.
- Standard cam lobe height:
- Intake:
1PZ and 1HZ 55.090 - 55.110 mm (2.1689 - 2.1697 in.)
1HD-T 54.440 - 54.460 mm (2.1433 - 2.1441 in.)
- Exhaust:
55.940 - 55.960 mm (2.2024 - 2.2031 in.)
- Minimum cam lobe height:
- Intake:
1PZ and 1HZ 54.59 mm (2.1492 in.)
1H-D 53.94 mm (2.1236 in.)
- Exhaust:
55.44 mm (2.1827 in.)
If the cam lobe height is less than minimum, replace the camshaft.
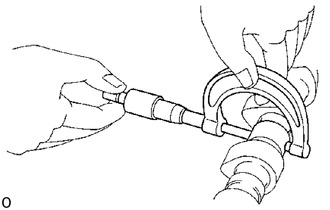
Inspect camshaft journals
Using a micrometer, measure the journal diameter.
- Journal diameter:
No.1 journal 34.969 - 34.985 mm (1.3767 - 1.3774 in.)
Others 27.986 - 27.988 mm (1.1018 - 1.1023 in.)
If the journal diameter is not as specified, check the oil clearance.
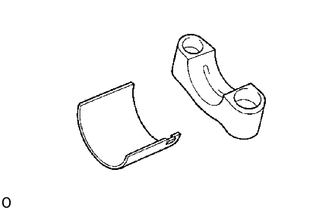
Inspect camshaft bearings
Check the bearings for flaking and scoring.
If the bearings are damaged, replace the bearings.
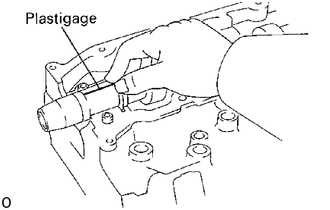
Inspect camshaft journal oil clearance
Install the camshaft bearings to the No.1 bearing cap and No.1 journal of the cylinder head.
Click hereEngine / Hybrid System>1HZ (ENGINE MECHANICAL)>CYLINDER HEAD>INSTALLATION
Clean the bearings and camshaft journals.
Place the camshaft on the cylinder head.
Lay a strip of Plastigage across each of the camshaft journals.
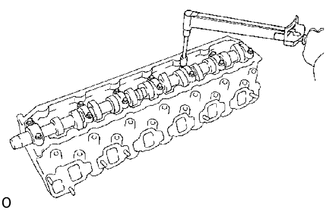
Install the bearing caps.
Click hereEngine / Hybrid System>1HZ (ENGINE MECHANICAL)>CYLINDER HEAD>INSTALLATION
- Torque:
250 kg-cm (18 ft-lb, 25 N*m)
- HINT:
-
Do not turn the camshaft.
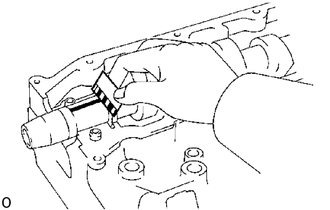
Remove the bearing caps.
Measure the Plastigage at its widest point.
- Standard oil clearance:
No.1 journal 0.022 - 0.074 mm (0.0009 - 0.0029 in.)
Others 0.030 - 0.066 mm (0.0012 - 0.0026 in.)
- Maximum oil clearance:
0.10 mm (0.0039 in.)
If the oil clearance is greater than maximum, replace the bearings or camshaft. If necessary, replace the bearing caps and cylinder head.
Completely remove the Plastigage.
Inspect camshaft thrust clearance
Install the camshaft.
Click hereEngine / Hybrid System>1HZ (ENGINE MECHANICAL)>CYLINDER HEAD>INSTALLATION
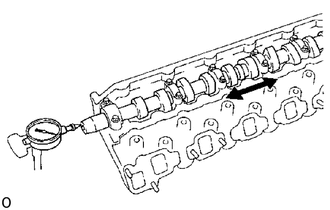
Using a dial indicator, measure the thrust clearance while moving the camshaft back and forth.
- Standard thrust clearance:
0.10 - 0.20 mm (0.0039 - 0.0079 in.)
- Maximum thrust clearance:
0.30 mm (0.0118 in.)
If the thrust clearance is greater than maximum, replace the thrust plate. If necessary, replace the camshaft.
15.INSPECT VALVE LIFTERS AND LIFTER BORES
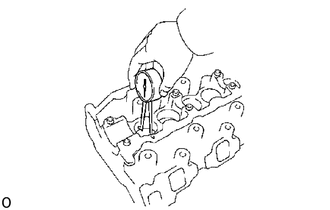
Using a caliper gauge, measure the lifter bore diameter of the cylinder head.
- Lifter bore diameter:
40.960 - 40.980 mm (1.6126 - 1.6134 in.)
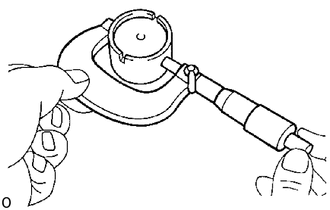
Using a micrometer, measure the lifter diameter.
- Lifter bore diameter:
40.892 - 40.902 mm (1.6099 - 1.6103 in.)
Subtract the lifter diameter measurement from the lifter bore diameter measurement.
- Standard oil clearance:
0.058 - 0.083 mm (0.0023 - 0.0033 in.)
- Maximum oil clearance:
0.10 mm (0,0039 in,)
If the oil clearance is greater than maximum, replace the lifter. If necessary, replace the cylinder head.
16.INSPECT INTAKE AND EXHAUST MANIFOLDS
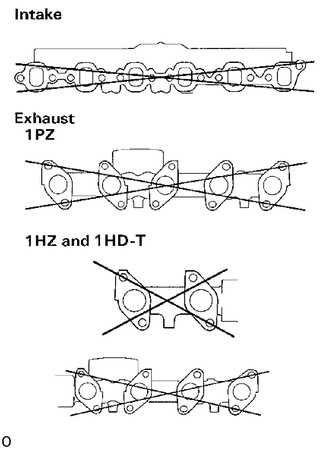
Using a precision straight edge and thickness gauge, measure the surface contacting the cylinder head for warpage.
- Maximum warpage:
0.40 mm (0.0157 in.)
If warpage is greater than maximum, replace the manifold.
17.INSPECT CYLINDER HEAD BOLTS
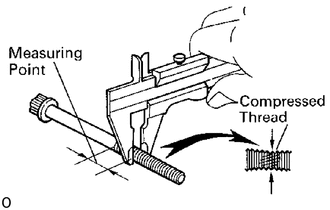
Using vernier calipers, measure the minimum outer diameter of the compressed thread at the measuring point.
- Standard outer diameter:
10.800 - 11.000 mm (0.4646 - 0.4724 in.)
- Minimum outer diameter:
10.55 mm (0.4154 in.)
If the outer diameter is less than minimum, replace the bolt.