N04C-WA EMISSION CONTROL UREA TUBE REMOVAL
PROCEDURE

 77100
1.REMOVE FUEL TANK ASSEMBLY
18040A
2.REMOVE NO. 2 EXHAUST PIPE CONVERTER ASSEMBLY
77851A
3.REMOVE UREA TANK PROTECTOR
77840A
4.REMOVE UREA TUBE WITH HEATER ASSEMBLY (REAR)
Disconnect the urea tube with heater assembly.
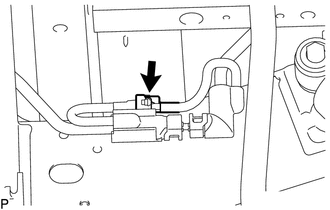
Disconnect the connector.
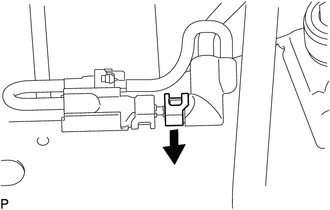

|
Lift Up |
Detach the lock claw by lifting up the cover.
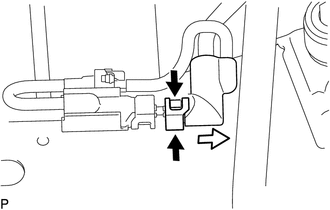
|
|
Pinch |

|
Pull |
Pinch the retainer of the urea tube connector, and then pull the urea tube connector off of the urea tube with heater assembly.
- NOTICE:
- ·
If there is any solidified urea solution (white solids) on the connection area, clean the solids off with a damp cloth, etc., before disconnecting the connector.
·Be sure to disconnect the urea tube connector by hand.
·Check for foreign matter in the urea pump and around the urea tube with heater connector. Clean if necessary. Foreign matter may damage the O-ring or cause leaks in the seal between the pipe and urea tube with heater connector.
·Put the urea pump and urea tube with heater connector ends in plastic bags to prevent damage and foreign matter contamination.
Remove the urea tube with heater assembly from the urea pump.
- NOTICE:
-
Check for dirt or mud on the urea pump and around the urea tube with heater connector before disconnection. Clean if necessary.
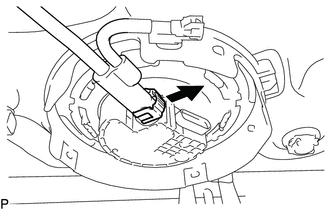
|
|
Lift Up |
Detach the lock claw by lifting up the cover.
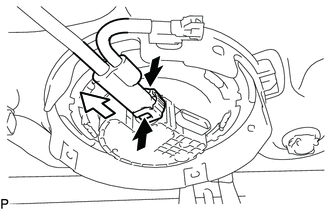
|
|
Pinch |
|
|
Pull |
Pinch the retainer of the urea tube connector, and then pull the urea tube connector off of the urea tube with heater assembly.
- NOTICE:
- ·
If there is any solidified urea solution (white solids) on the connection area, clean the solids off with a damp cloth, etc., before disconnecting the connector.
·Be sure to disconnect the urea tube connector by hand.
·Check for foreign matter in the urea pump and around the urea tube with heater connector. Clean if necessary. Foreign matter may damage the O-ring or cause leaks in the seal between the urea pump and urea tube with heater connector.
·Put the urea pump and urea tube with heater connector ends in plastic bags to prevent damage and foreign matter contamination.
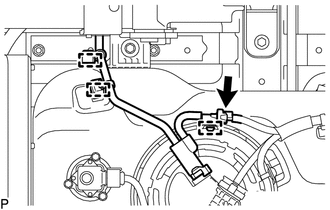
Disconnect the connector.
Detach the 3 clamps.
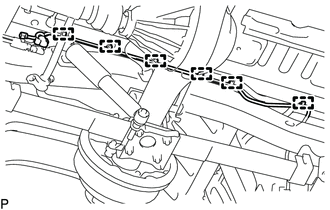
Detach the 6 clamps and remove the urea tube with heater assembly.
77840A
5.REMOVE UREA TUBE WITH HEATER ASSEMBLY (FRONT)
- NOTICE:
- ·
Check for dirt or mud on the urea injector assembly and around the urea tube with heater connector before disconnection. Clean if necessary.
·In order to prevent the urea injector assembly interior portion from drying, perform installation and removal work as quickly as possible.
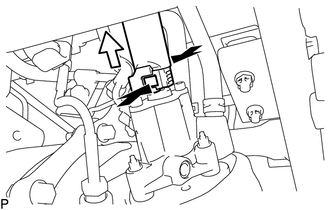
Disconnect the urea tube with heater assembly from the urea injector assembly.
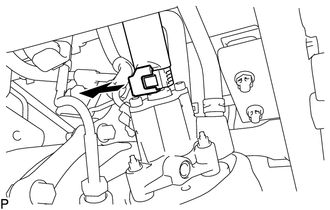
|
|
Lift Up |
Detach the lock claw by lifting up the cover.
|
|
Push |
|
|
Pull |
Pinch the retainer of the urea tube connector, and then pull the urea tube connector off of the urea tube with heater assembly.
- NOTICE:
- ·
If there is any solidified urea solution (white solids) on the connection area, clean the solids off with a damp cloth, etc., before disconnecting the connector.
·Be sure to disconnect the urea tube with heater connector by hand.
·Check for foreign matter in the urea injector assembly and around the urea tube with heater connector. Clean if necessary. Foreign matter may damage the O-ring or cause leaks in the seal between the urea injector assembly and urea tube with heater connector.
·Put the urea tube with heater connector ends in plastic bags to prevent damage and foreign matter contamination.
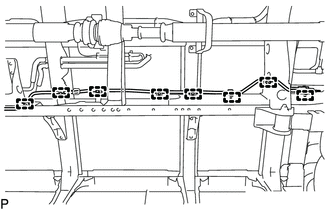
Detach the 8 clamps.
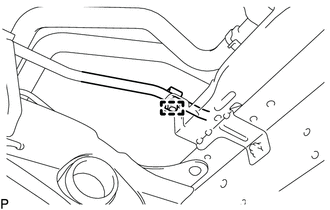
Detach the clamp.
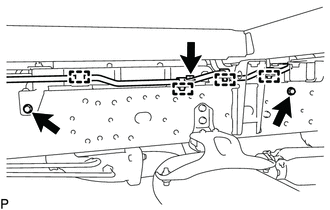
Detach the 4 clamps.
Remove the 3 bolts and No. 1 fuel tank heat insulator.
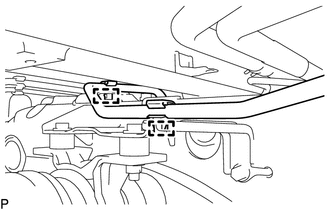
Detach the 2 clamps and remove the urea tube with heater assembly.