2AZ-FE FUEL FUEL PUMP REMOVAL
PROCEDURE

 1.DISCHARGE FUEL SYSTEM PRESSURE
28800
2.DISCONNECT CABLE FROM NEGATIVE BATTERY TERMINAL
- CAUTION:
-
Wait at least 90 seconds after disconnecting the cable from the negative (-) battery terminal to prevent airbag and seat belt pretensioner activation.
77310A
3.REMOVE FUEL TANK CAP
58325E
4.REMOVE REAR FLOOR SERVICE HOLE COVER
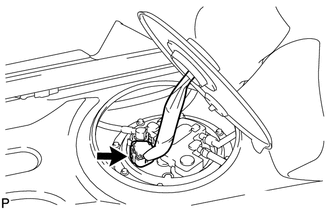
Remove the service hole cover and disconnect the fuel pump connector.
77707
5.DISCONNECT CHARCOAL CANISTER OUTLET TUBE SUB-ASSEMBLY
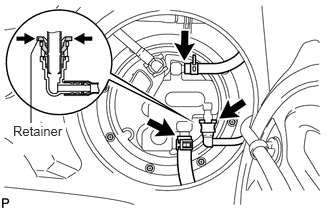
Disconnect the outlet tube from the fuel suction with pump and gauge.
77026A
6.DISCONNECT NO. 1 FUEL EVAPORATION TUBE SUB-ASSEMBLY
Disconnect the tube from the fuel suction with pump and gauge.
77027
7.DISCONNECT NO. 2 FUEL EVAPORATION TUBE SUB-ASSEMBLY
Disconnect the tube from the fuel suction with pump and gauge.
- NOTICE:
- ·
Remove any dirt and foreign matter on the tube joint before performing this work.
- ·
Do not allow any scratches or foreign matter on the parts when disconnecting them, as the fuel tube joint contains the O-rings that seal the plug.
- ·
Perform this work by hand. Do not use any tools.
- ·
Do not forcibly bend, twist or turn the nylon tube.
- ·
Protect the disconnected part by covering it with a plastic bag and tape after disconnecting the fuel tubes.
77209D
8.DISCONNECT FUEL TANK MAIN TUBE SUB-ASSEMBLY
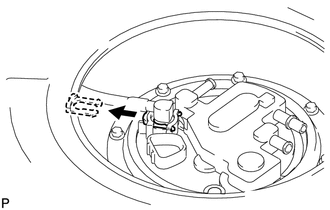
Remove the joint clip and fuel tank main tube.
- CAUTION:
- ·
Before removing the tube joint clip, check for foreign matter around the clip. Clean if necessary.
- ·
Keep the O-ring free of foreign matter, as it becomes contaminated easily.
- ·
Do not use any tools in this procedure.
- ·
Do not forcefully bend or twist the tube.
- ·
Put the tube in a plastic bag to prevent damage and contamination.
- ·
If the fuel suction plate and tube are stuck together, pinch the tube and turn it carefully to disconnect it.
- ·
Be careful not to damage the clip. If the clip is damaged, replace it.
77168A
9.REMOVE FUEL TANK VENT TUBE SET PLATE
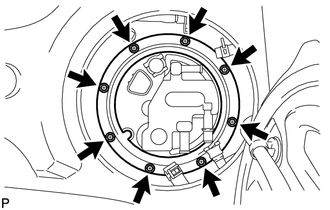
Remove the 8 bolts and set plate.
77020A
10.REMOVE FUEL SUCTION WITH PUMP AND GAUGE TUBE ASSEMBLY
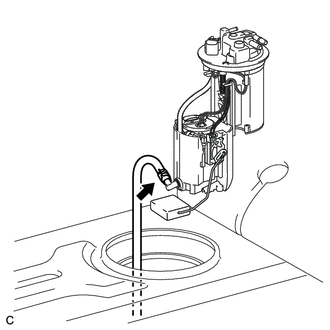
Disconnect the fuel hose and remove the fuel pump from the fuel tank.
- NOTICE:
- ·
Make sure that the sender gauge arm does not bend.
- ·
Do not damage the fuel suction with pump and gauge tube assembly.
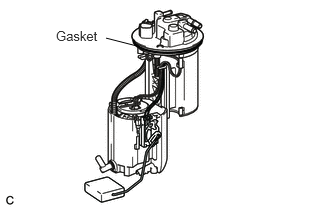
Remove the gasket from the fuel pump.
83320
11.REMOVE FUEL SENDER GAUGE ASSEMBLY
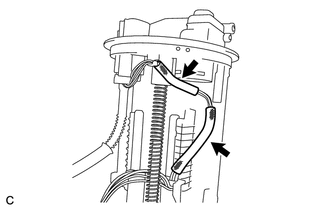
Remove the 2 harness protectors from the wire harness.
- NOTICE:
-
Do not damage the wire harness.
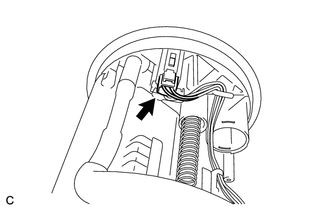
Disconnect the connector of the fuel sender gauge assembly.
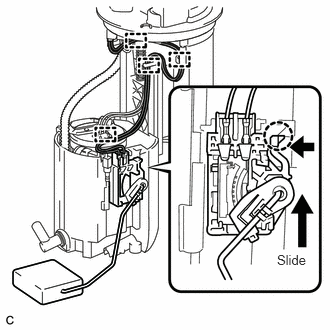
Disconnect the wire harness from the 4 harness clamps.
- NOTICE:
-
Do not damage the wire harness.
Release the lock as shown in the illustration and slide the fuel sender gauge assembly to remove it.
12.REMOVE FUEL SUB-TANK ASSEMBLY
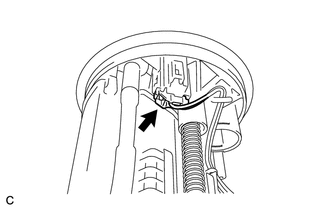
Disconnect the wire harness connector.
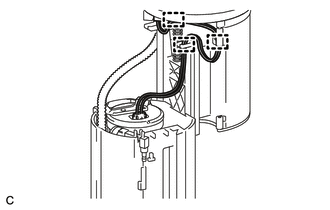
Separate the wire harness.
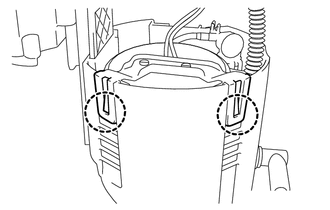
Detach the 2 claws and remove the sub-tank.
- NOTICE:
-
Do not do anything which may separate the fuel tube from either the fuel suction plate or fuel filter assembly, such as applying excessive force to the tube.
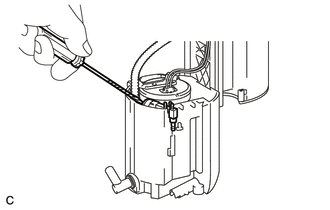
Using a screwdriver, remove the jet pump.
- HINT:
-
Tape the screwdriver tip before use.
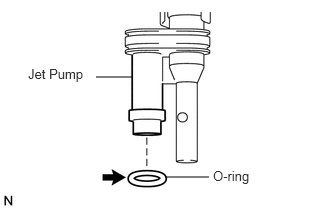
Remove the O-ring from the jet pump.
13.REMOVE BRACKET
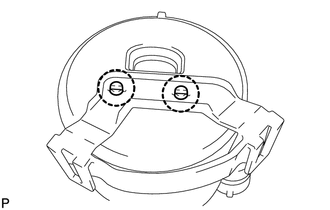
Using a screwdriver, detach the 2 claws and remove the bracket.
- HINT:
-
Tape the screwdriver tip before use.
23221
14.REMOVE FUEL PUMP ASSEMBLY
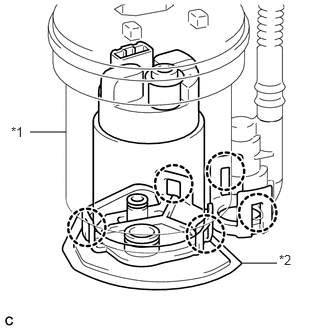
Detach the 5 claws on the filter and remove the fuel pump from the fuel filter.
| *1 | Fuel Filter |
| *2 | Suction Filter |
- NOTICE:
- ·
Do not damage the fuel suction filter and fuel filter.
·Do not remove the fuel suction filter from the fuel pump.
·Do not do anything which may separate the fuel tube from either the fuel suction plate or fuel filter assembly, such as applying excessive force to the tube.
- HINT:
-
If the fuel filter assembly is to be replaced, replace the fuel suction plate sub-assembly.
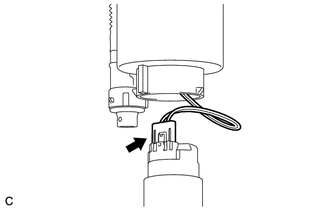
Disconnect the fuel pump connector.
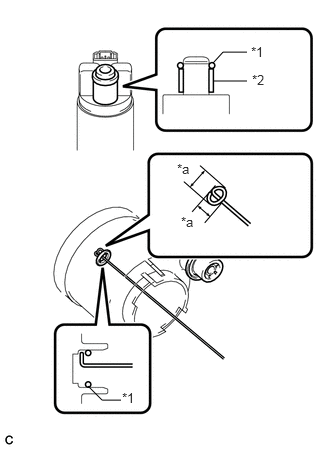
Remove the O-ring and spacer from the fuel pump.
| *1 | O-ring |
| *2 | Spacer |
| *a | 5.0 mm (0.197 in.) |
- NOTICE:
-
Be careful not to damage the sealing surface.
- HINT:
-
If the O-ring still remains in the fuel filter, remove it using a wire tip (φ1 mm) that is formed as shown in the illustration.