LIGHTING ROOM LIGHT ASSEMBLY(for Roof) REMOVAL
PROCEDURE

 1.DISCONNECT CABLE FROM NEGATIVE BATTERY TERMINAL
- CAUTION:
-
Wait at least 90 seconds after disconnecting the cable from the negative (-) battery terminal to prevent airbag and seat belt pretensioner activation.
63310
2.REMOVE ROOF HEADLINING ASSEMBLY
Remove the roof headlining (see page Vehicle Interior>INTERIOR>ROOF HEADLINING>REMOVAL).
81250
3.REMOVE ROOM NO. 2 LIGHT ASSEMBLY
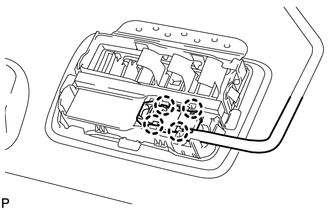
Detach the 4 claws and remove the roof wire from the room light.
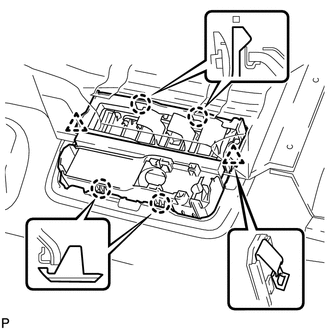
Detach the 2 clips.
- NOTICE:
- ·
As the No. 1 cooler air duct is part of the roof headlining assembly, do not remove the duct from the headlining during this operation to prevent it from being damaged.
·If the clips cannot be detached due to their modified shapes, break the clips to remove them.
·Do not damage the roof headlining assembly.
Detach the 4 claws and remove the room light.
- NOTICE:
-
If the No. 2 room light assembly is difficult to remove with the No. 1 cooler air duct installed, remove the No. 2 room light assembly using the following procedures.
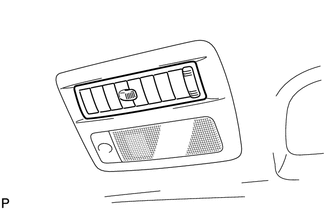
Remove the air outlet grille.
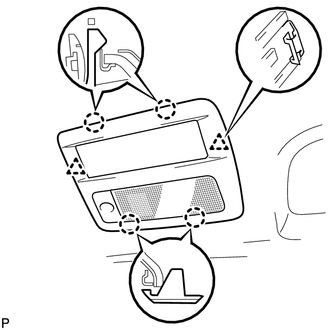
Insert a wire cutter into the No. 2 room light assembly where the grille was removed, and cut off the ends of the clips.
- NOTICE:
-
Do not damage the roof headlining assembly.
Detach the 4 claws and remove the room light.
- NOTICE:
-
Do not reuse the removed No. 2 room light assembly.
81290
4.REMOVE ROOM NO. 3 LIGHT ASSEMBLY
- HINT:
-
Use the same procedures as for the No. 2 room light assembly.