SEAT REAR NO. 2 SEAT ASSEMBLY(for Power Stowing Seat Type RH Side) REASSEMBLY
PROCEDURE

 72670B
1.INSTALL REAR SEAT CUSHION LOCK ASSEMBLY RH
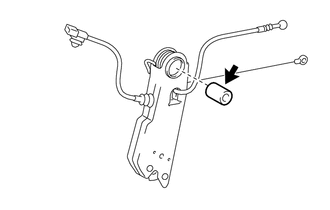
Install the bush to the rear seat cushion lock assembly RH.
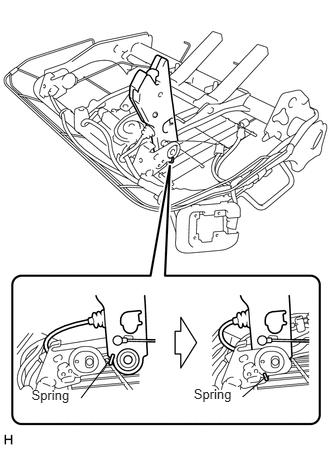
Set the rear seat cushion lock assembly RH to the No. 2 seat cushion spring assembly RH.
- NOTICE:
-
Make sure that the spring is positioned as shown in the illustration.
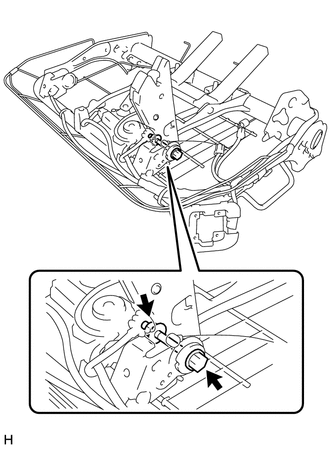
Temporarily install the rear seat cushion lock assembly RH with the bolt, washer and nut.
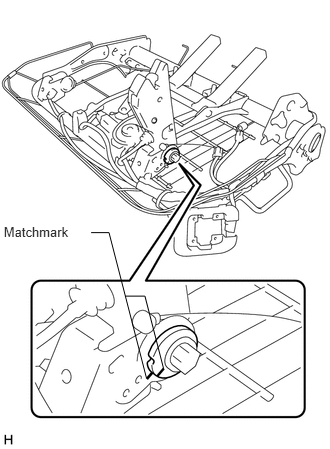
Align the matchmarks and tighten the bolt to install the rear seat cushion lock assembly RH.
- Torque:
- 15 N*m (149 kgf*cm, 11 ft.*lbf)
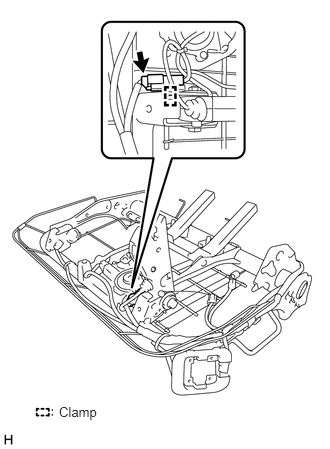
Connect the connector.
Attach the clamp.
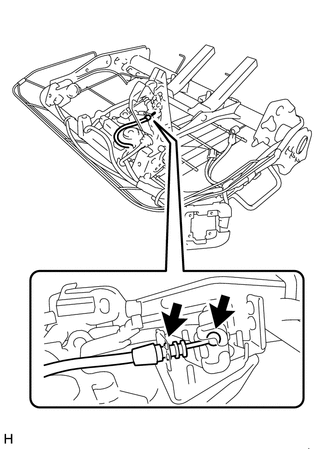
Install the cable to the No. 2 seat cushion spring assembly RH.
72680B
2.INSTALL REAR SEAT CUSHION LOCK ASSEMBLY LH
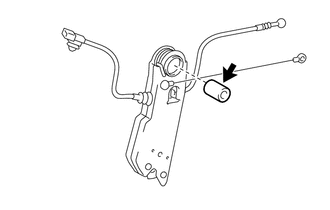
Install the bush to the rear seat cushion lock assembly LH.
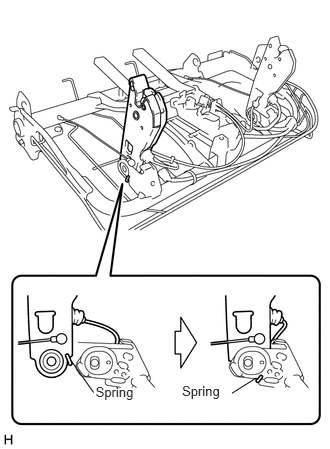
Set the rear seat cushion lock assembly LH to the No. 2 seat cushion spring assembly RH.
- NOTICE:
-
Make sure that the spring is positioned as shown in the illustration.
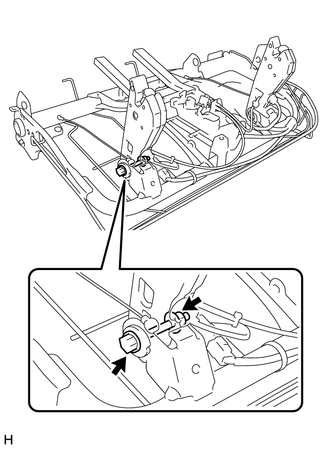
Temporarily install the rear seat cushion lock assembly LH with the bolt, washer and nut.
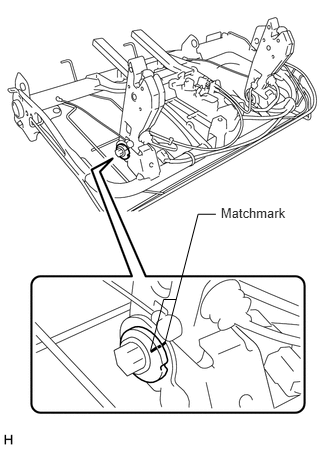
Align the matchmarks and tighten the bolt to install the rear seat cushion lock assembly LH.
- Torque:
- 15 N*m (149 kgf*cm, 11 ft.*lbf)
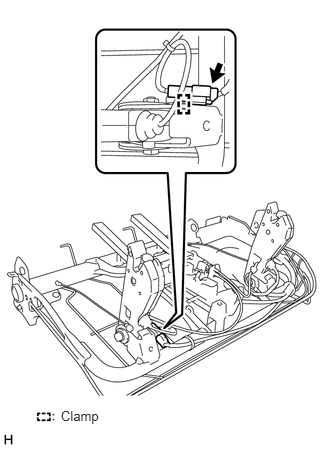
Connect the connector.
Attach the clamp.
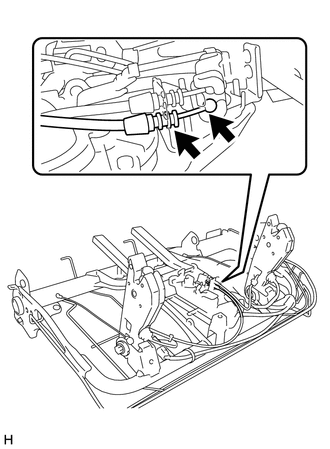
Install the cable to the No. 2 seat cushion spring assembly RH.
3.INSTALL REAR SEAT REAR LEG SUB-ASSEMBLY RH
- HINT:
-
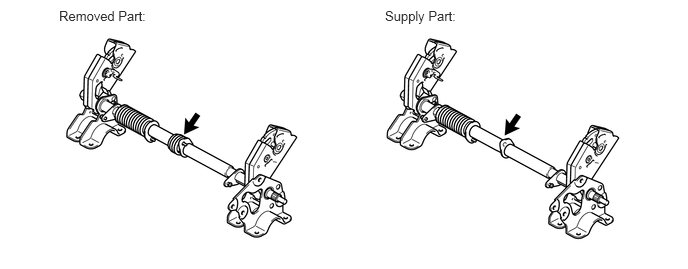
The spring shown in the illustration is not installed on a rear seat rear leg sub-assembly RH supply part.
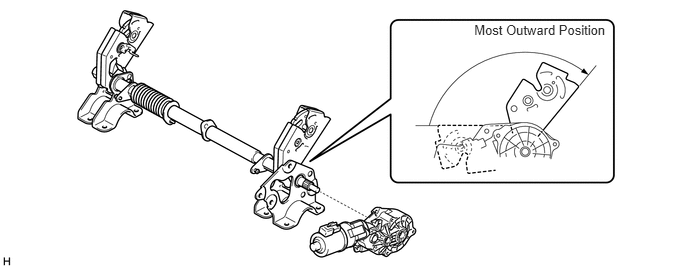
With the rear seat rear leg sub-assembly RH in the most outward position, temporarily install the power seat motor assembly.
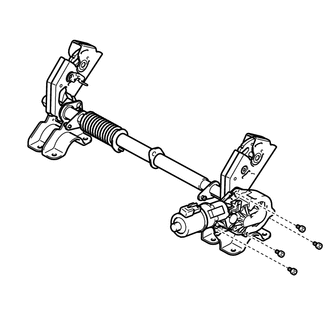
Using a 5 mm hexagon socket wrench, install the power seat motor assembly to the rear seat rear leg sub-assembly RH with the 4 bolts.
- Torque:
- 8.0 N*m (82 kgf*cm, 11 in.*lbf)
Attach the spring to the spring holder.
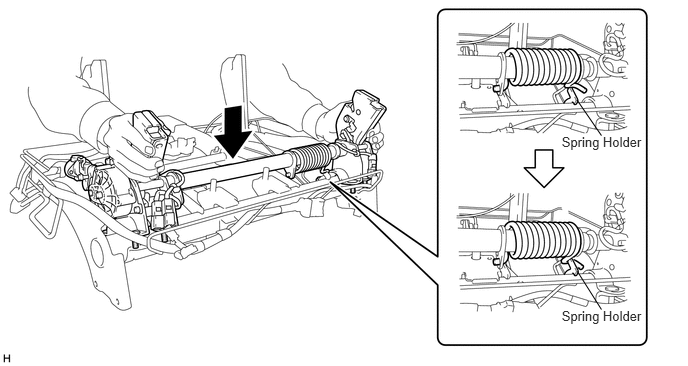
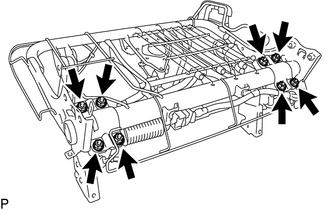
Install the rear seat rear leg sub-assembly RH to the No. 2 seat cushion spring assembly RH with the 8 nuts.
- Torque:
- 20 N*m (204 kgf*cm, 15 ft.*lbf)
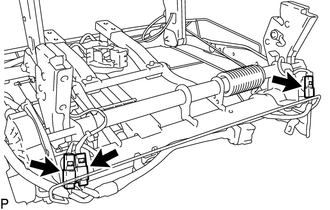
Install the 3 connectors.
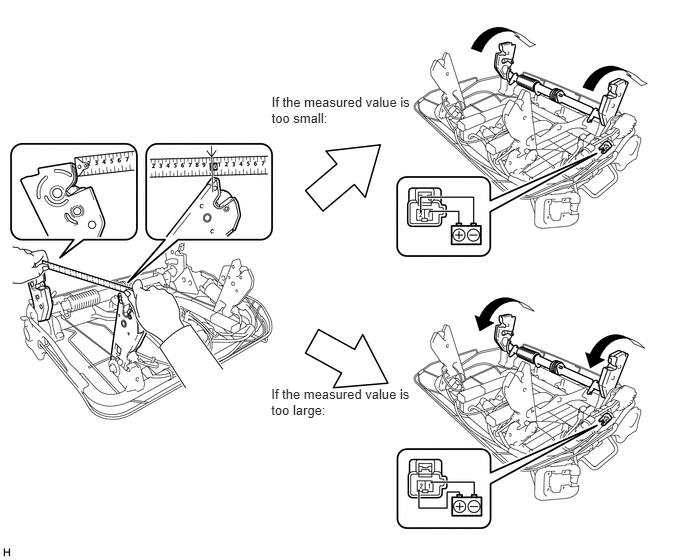
Adjust to the initial position.
Measure the distance between the points shown in the illustration and check if the measured value is equal to the value measured during disassembly.
- HINT:
-
If the measured values differ, perform the following adjustment procedure.
- ·
If the measured value is too large:
Apply battery voltage to the power seat motor assembly and move the rear seat rear leg sub-assembly RH inward.
·If the measured value is too small:
Apply battery voltage to the power seat motor assembly and move the rear seat rear leg sub-assembly RH outward.
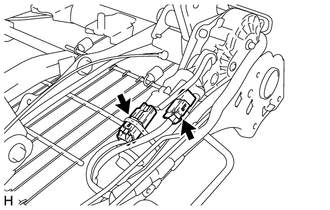
Connect the 2 connectors.
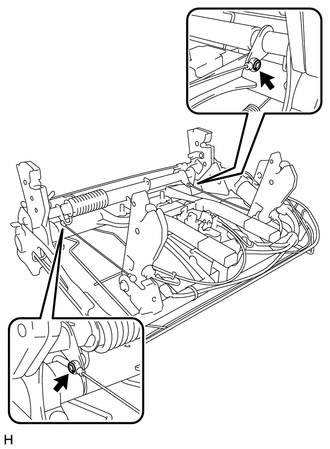
Connect the 2 cables to the No. 2 seat cushion spring assembly RH and install the 2 E rings.
79621
4.INSTALL NO. 2 SEAT CUSHION STOPPER
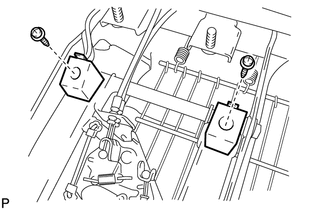
Install the 2 screws and 2 cushion stoppers.
84923
5.INSTALL POWER REAR SEAT SWITCH
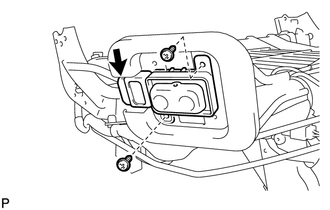
Connect the connector.
Install the 2 screws to install the seat switch.
71694D
6.INSTALL REAR SEAT CUSHION HINGE COVER OUTER LH
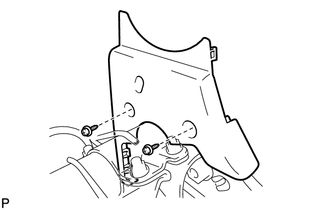
Install the 2 screws and hinge cover.
71693C
7.INSTALL REAR SEAT CUSHION HINGE COVER OUTER RH
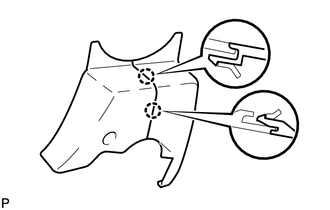
Attach the 2 claws to install the hinge cover.
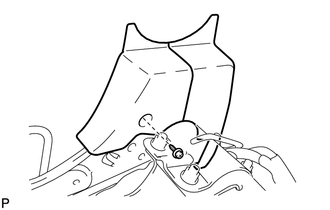
Install the screw and hinge cover.
79021
8.INSTALL NO. 2 SEAT CUSHION COVER SUB-ASSEMBLY RH
for Type A:
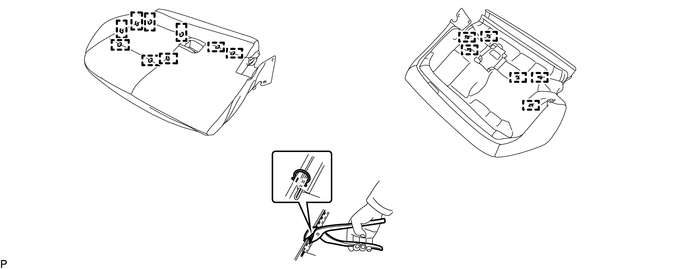
Using hog ring pliers, install the No. 2 seat cushion cover sub-assembly RH to the No. 2 seat cushion pad RH with 15 new hog rings.
- NOTICE:
- ·
Be careful not to damage the No. 2 seat cushion cover sub-assembly RH.
·Be sure to securely install the hog rings as shown in the illustration while preventing wrinkles from forming on the No. 2 seat cushion cover sub-assembly RH.
·Pass the wire through the No. 2 seat cushion cover sub-assembly RH hole and clamp the wire to the No. 2 seat cushion spring assembly RH.
for Type B:
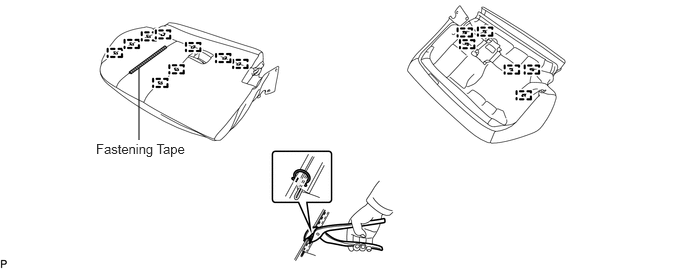
Engage the fastening tape.
Using hog ring pliers, install the No. 2 seat cushion cover sub-assembly RH to the No. 2 seat cushion pad RH with 15 new hog rings.
- NOTICE:
- ·
Be careful not to damage the No. 2 seat cushion cover sub-assembly RH.
·Be sure to securely install the hog rings as shown in the illustration while preventing wrinkles from forming on the No. 2 seat cushion cover sub-assembly RH.
·Pass the wire through the No. 2 seat cushion cover sub-assembly RH hole and clamp the wire to the No. 2 seat cushion spring assembly RH.
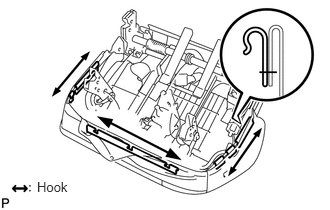
Attach the hooks and install the seat cushion cover (with pad) to the seat cushion spring.
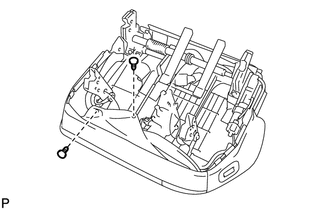
Attach the 2 clips.
72597
9.INSTALL RECLINING REMOTE CONTROL BEZEL
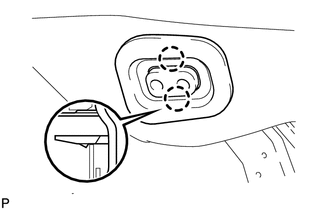
Attach the 4 claws to install the bezel.
73580
10.INSTALL REAR NO. 2 SEAT INNER BELT ASSEMBLY RH
73590
11.INSTALL REAR NO. 2 SEAT LAP TYPE BELT ASSEMBLY RH
71695E
12.INSTALL REAR NO. 2 SEAT PROTECTOR
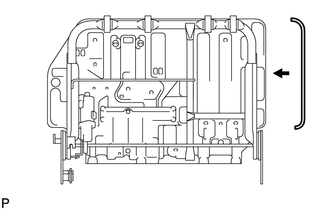
Install the seat protector.
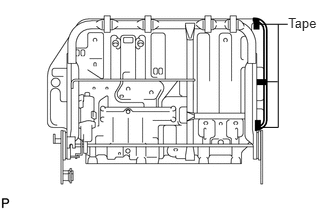
Apply new tape to the positions shown in the illustration.
71696
13.INSTALL FOLD SEAT PROTECTOR
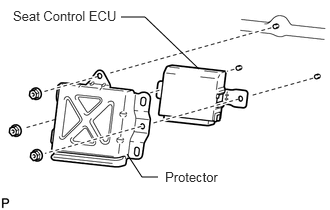
Install the seat control ECU to the seatback frame.
Install the 3 nuts to install the protector.
- Torque:
- 13 N*m (133 kgf*cm, 10 ft.*lbf)
82193
14.INSTALL REAR SEAT WIRE RH
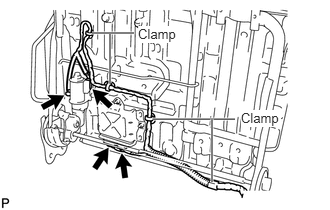
Attach the 4 seat wire clamps to the seatback frame.
Connect the 4 connectors.
72552E
15.INSTALL RECLINING HINGE COVER LH
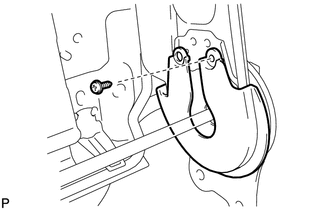
Install the hinge cover with the screw.
72551E
16.INSTALL RECLINING HINGE COVER RH
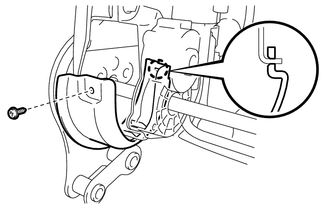
Attach the claw.
Install the hinge cover with the screw.
79023
17.INSTALL NO. 2 SEATBACK COVER SUB-ASSEMBLY RH
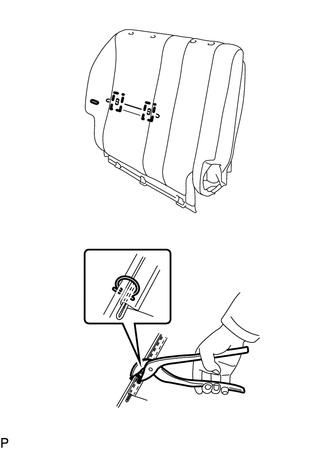
for Type A:
Using hog ring pliers, install the No. 2 seatback cover sub-assembly RH to the No. 2 seatback pad RH with 2 new hog rings.
- NOTICE:
- ·
Be careful not to damage the No. 2 seatback cover sub-assembly RH.
·Be sure to securely install the hog rings as shown in the illustration while preventing wrinkles from forming on the No. 2 seatback cover sub-assembly RH.
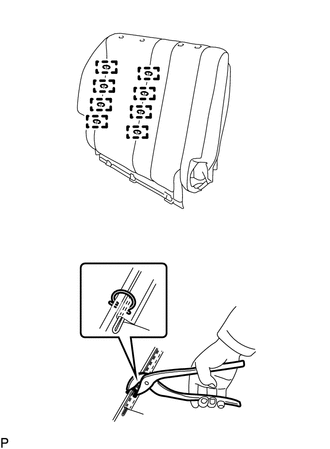
for Type B:
Using hog ring pliers, install the No. 2 seatback cover sub-assembly RH to the No. 2 seatback pad RH with 8 new hog rings.
- NOTICE:
- ·
Be careful not to damage the No. 2 seatback cover sub-assembly RH.
·Be sure to securely install the hog rings as shown in the illustration while preventing wrinkles from forming on the No. 2 seatback cover sub-assembly RH.
Install the seatback cover (with pad) to the seatback frame.
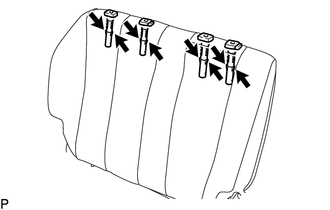
Attach the 8 claws to install the 4 headrest supports.
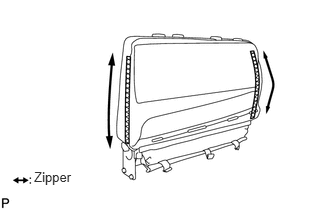
Close the zippers.
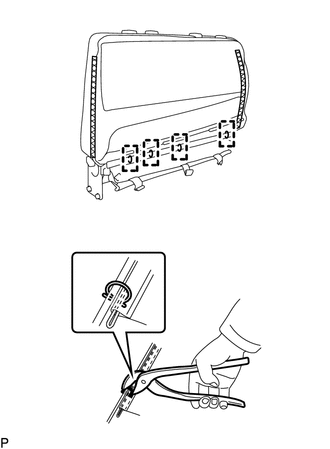
Using hog ring pliers, install 4 new hog rings.
- NOTICE:
- ·
Be careful not to damage the No. 2 seatback cover sub-assembly RH.
·Be sure to securely install the hog rings as shown in the illustration while preventing wrinkles from forming on the No. 2 seatback cover sub-assembly RH.
79203A
18.INSTALL NO. 2 SEATBACK FRAME SUB-ASSEMBLY RH
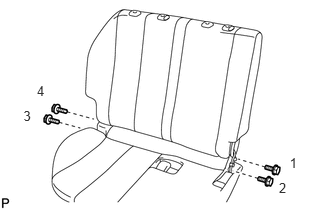
Temporarily install the seatback to the seat cushion with the 4 bolts.
Tighten the 4 bolts in the order shown in the illustration.
- Torque:
- 41 N*m (418 kgf*cm, 30 ft.*lbf)
71940E
19.INSTALL NO. 2 SEAT HEADREST ASSEMBLY
71970
20.INSTALL REAR SEAT HEADREST ASSEMBLY
73540C
21.INSTALL REAR NO. 2 SEAT LAP TYPE BELT ASSEMBLY
71844A
22.INSTALL REAR NO. 2 SEAT RECLINING COVER LH
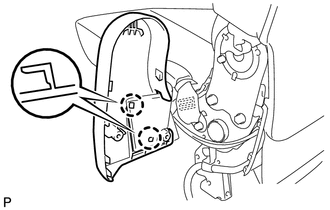
Attach the 2 claws and seat cushion cover.
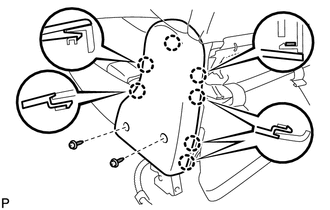
Attach the 6 claws to install the cover.
Install the 2 screws.
71843A
23.INSTALL REAR NO. 2 SEAT RECLINING COVER RH
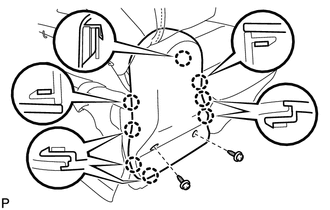
Attach the 8 claws to install the cover.
Install the 2 screws.
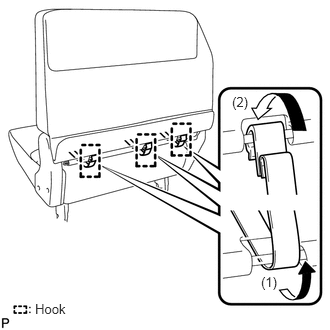
Attach each of the 3 hooks as shown in the illustration.