SLIDING ROOF SLIDING ROOF HOUSING INSTALLATION
PROCEDURE

 63203D
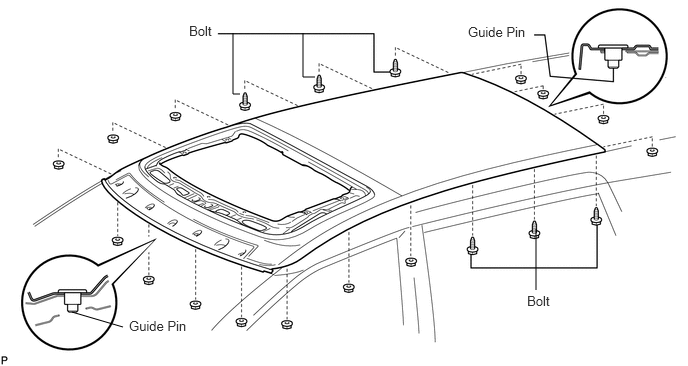
1.INSTALL NO. 2 ROOF WINDOW GLASS SUB-ASSEMBLY RH
Insert the 2 No. 2 roof window glass RH guide pins to the vehicle body and temporarily install the No. 2 roof window glass RH.
From the inside of the vehicle, check that the 2 guide pins are attached to the vehicle body. Then install the glass with the 6 bolts and 14 nuts.
- Torque:
- 5.0 N*m (51 kgf*cm, 44 in.*lbf)
for bolt
- Torque:
- 5.5 N*m (56 kgf*cm, 49 in.*lbf)
for nut
- NOTICE:
-
If shims are present, do not remove or adjust them.
63201C
2.INSTALL TILT ROOF GLASS SUB-ASSEMBLY
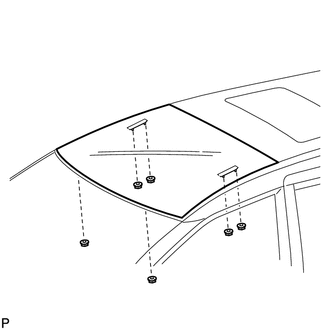
Install the glass with the 6 nuts.
- Torque:
- 7.4 N*m (75 kgf*cm, 65 in.*lbf)
- NOTICE:
-
When installing the tilt roof glass, make sure that the entire upper flap of the front moulding is above the tilt roof glass. Do not crumple the upper flap.
63203F
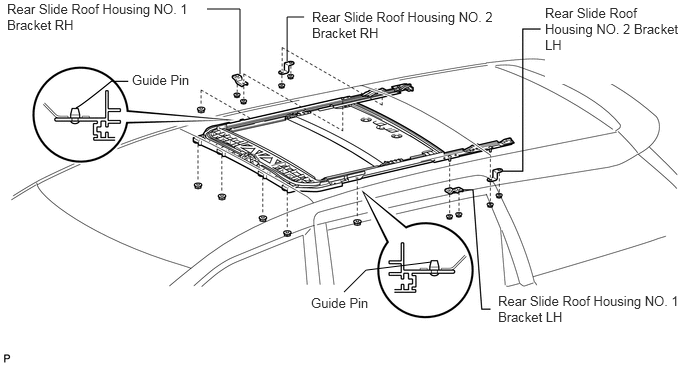
3.INSTALL SLIDING ROOF HOUSING SUB-ASSEMBLY
Insert the 2 sliding roof housing guide pins and install the sliding roof housing with the 14 nuts.
- Torque:
- 5.5 N*m (56 kgf*cm, 49 in.*lbf)
- NOTICE:
-
Be careful not to damage the curtain shield airbag when removing the housing.
63203C
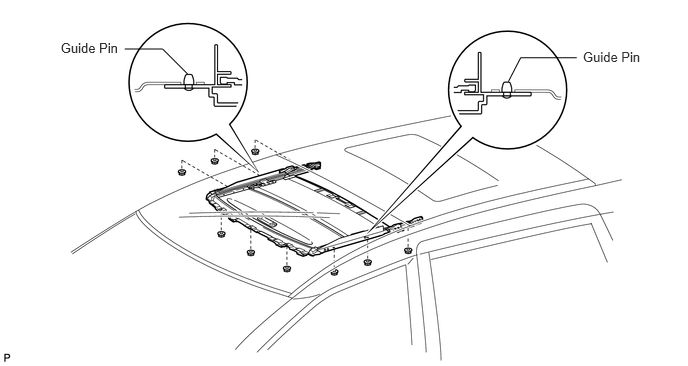
4.INSTALL TILT ROOF HOUSING SUB-ASSEMBLY
Insert the 2 tilt roof housing guide pins and install the tilt roof housing with the 9 nuts.
- Torque:
- 5.5 N*m (56 kgf*cm, 49 in.*lbf)
- NOTICE:
-
Be careful not to damage the curtain shield airbag when installing the housing.
5.INSPECT FOR WATER LEAKS
Adjust the sliding roof glass sub-assembly, and inspect for water leaks.
If there are any leaks, readjust the sliding roof glass sub-assembly.
63310
6.INSTALL ROOF HEADLINING ASSEMBLY
Install the roof headlining assembly (See page Vehicle Interior>INTERIOR>ROOF HEADLINING>INSTALLATION).
7.CONNECT CABLE TO NEGATIVE BATTERY TERMINAL
28800
8.PERFORM INITIALIZATION
Perform initialization (See page General>INTRODUCTION>REPAIR INSTRUCTION>INITIALIZATION).
- NOTICE:
-
Certain systems need to be initialized after disconnecting and reconnecting the cable from the negative (-) battery terminal.